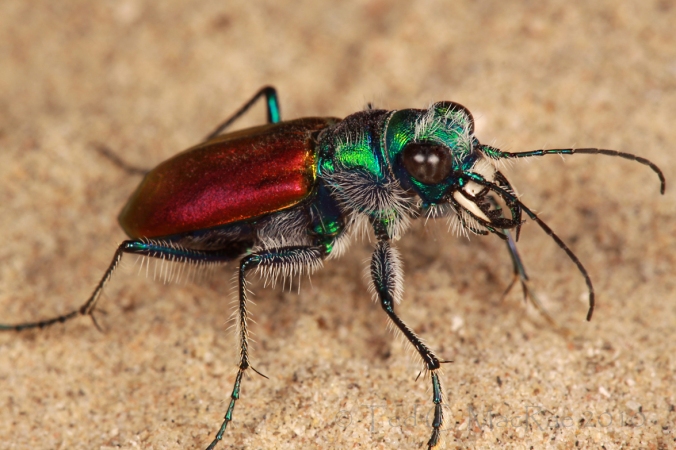
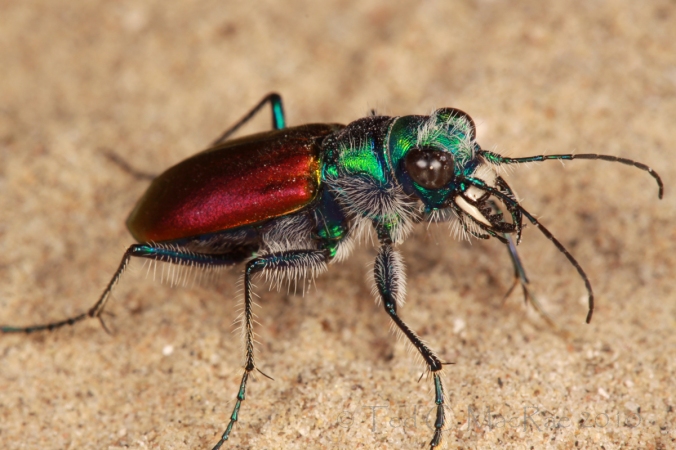
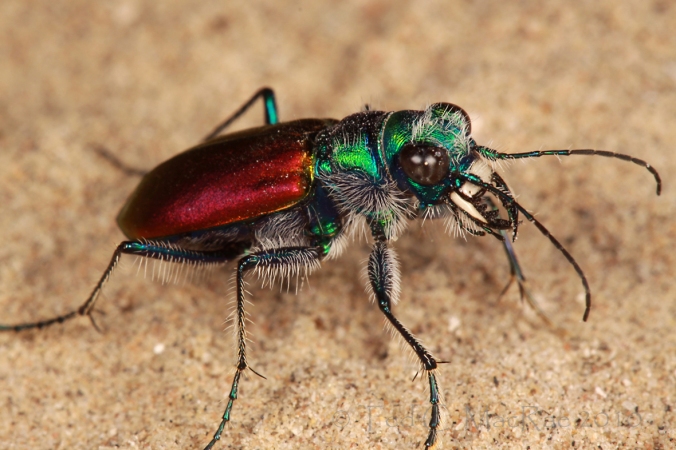
This is Cicindela scutellaris (festive tiger beetle), one of the six species of tiger beetles that we found last September at Monroe Canyon in the Pine Ridge area of northwestern Nebraska. The red elytra and green head and pronotum are characteristic of nominotypical populations of this species that are found in sandy habitats throughout the Great Plains. This is your classic tiger beetle in a classic tiger beetle pose; however, photographs such as this are not so easy to come by. The biggest challenge is the beetle itself – rarely are they so accommodating to allow this nice lateral profile perspective with the head slightly cocked towards the camera while standing up on their front legs. This posture is seen only when the beetles are warm and active, and warm beetles are skittish beetles that yield lots of not-as-interesting back shots (head directed away from the camera) as they persistently run away from the photographer. Cooler temperatures make them less skittish and easier to approach from the desired angle, but in this case they often lay flat on the ground trying to absorb heat – flay-laying beetles are not very photogenic either. With practice and patience, one learns how to “work” an active, skittish subject and get them accustomed to the photographer so that the above perspective can be achieved.
Getting the shot, however, is only half the battle. Tiger beetles are dirty bugs! They run around over bare ground and dig in it, often leaving them covered with debris. This is particularly true for species that frequent sandy habitats. For those of us who like to photograph wild individuals in their native habitats, debris-covered beetles is something we have to live with. Or do we…? The beetle in the above image looks squeaky-clean thanks to some simple digital image processing tools that I used to “clean up” the subject (I use Photoshop Elements 6.0). Now, I’ve never been one to want to spend a lot of time on post-processing of my photographs. I’d rather be looking for bugs, photographing them, studying them, and writing about them – time spent on post-processing is time not spent on any of these other activities. However, I have developed a little routine that I follow for most of my tiger beetle photographs now that cleans them up a bit – some more than others – and doesn’t take too much time. Maybe some of you will find this useful for your own photographs.¹
¹ Disclaimer: I am not a Photoshop expert. I’m not even a photographer. I’m an entomologist with a camera. As a result, this post is intended to be not so much an authoritative tutorial on the use of Photoshop as a summary of what I’ve learned in dealing with my own photographs. Constructive dialogue about these and other techniques is welcome.
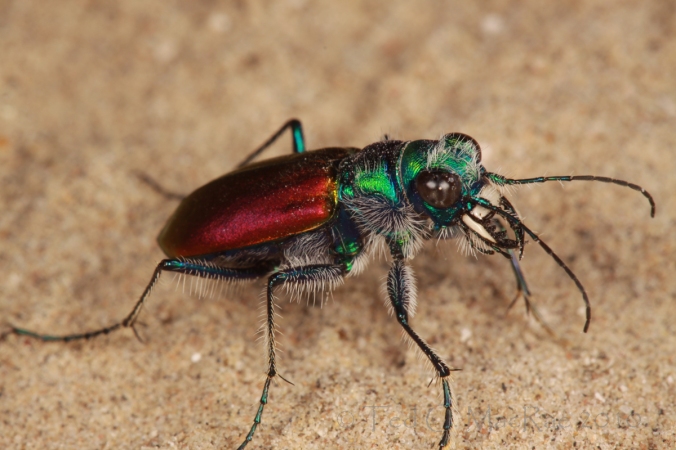
Like it or not, no digital image comes out of the camera ready to use (still perhaps the most perplexing aspect of this whole digital photography thing for me personally). Almost every image needs some levels adjustment and unsharp mask applied to it, and while others are against it I’m not above doing a little cropping to enhance the final composition of the photograph (hey, it’s difficult enough just getting these guys in the frame, much less positioned exactly where you want them). These are the basic steps that I follow for almost every photograph, as illustrated in the following sequence (reduced versions used for all photos):
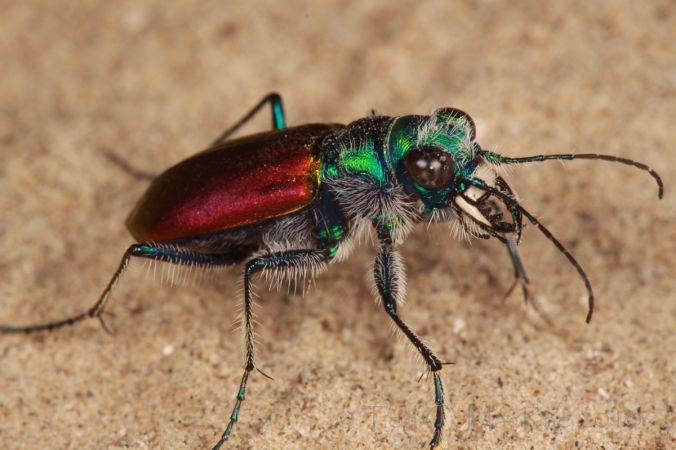
Normally I would be done at this point, but there are two things that bother me about this photo: 1) the dark shadow on the distal back portion of the elytra (common with this pose), and 2) the debris scattered about on the eye, mandibles, thorax, and elytra. To fix the shadow, I used the Magic Wand Tool (set on contiguous) to select the shadowed area of the elytra, then used the Dodge Tool set on Highlights (exposure = 25%) to lighten the shadowed area. For the debris, I enlarged the photo to 100% and used the Spot Healing Brush Tool to remove most of the sand particles, adjusting the size of the brush to just larger than the size of the individual sand particles. This works fine for particles surrounded by a uniform background, but it doesn’t work so well for particles along edges (particularly the mandibles). For this, I used the Clone Stamp Tool (again, with the photograph enlarged to 100%) and carefully “cloned” a clean spot along the edge of the mandible next to the sand particle and then replaced the piece of debris with the cloned piece of the image. As with the Spot Healing Brush Tool, the pixel size is set to the smallest size needed for the size of the debris particles. Compare the above image with the finished image below to see the difference.
The biggest improvements can be seen with the eyes, always the focal point of a photo such as this, and the mandibles – both now appearing nice and clean. Is this cheating? Have I compromised my ideal of getting an image of a wild individual of this species in its native habitat? I’d be interested to know your opinion about this.
Photo Details: Canon 50D w/ 100mm macro lens (ISO 100, 1/250 sec, f/16), Canon MT-24EX flash w/ Sto-Fen + GFPuffer diffusers.
Copyright © Ted C. MacRae 2010
I usually do more or less the same thing to my aquarium posts, or to insect photos. No matter how clean the bug is (and I try, if I can, to dust it off with a soft paintbrush), there will be some bits of fluff, some shed scales or feathers. And in the aquarium there are always spots on the inside of the glass, debris floating in the water, algae on the shells.
I don’t have Photoshop any more, so I use Picasa or Picnik, depending on what I need to do, usually adding more light, sharpening, cleaning, cropping. As you say, with a live critter, it’s often a challenge even to get the whole thing and not the tail end as it leaves the frame at top speed, so I usually give it a bit more space than it seems that I would need.
I used to feel that maybe I wasn’t being all that “honest” in my photos, but really, what I see is not what the camera sees. My eyes filter out those non-essentials in the background and the dust on the eyeballs. And which is “real”? What I see, or the messy, specks-and-all view? Both, and neither.
So why present something that will distract the viewer, instead of showing him the animal itself?
BTW, that’s a beautiful beetle!
I guess disclosing the process is also part of being “honest” – great insight, however, on what is “real” and what is not (“Both, and neither”).
This species is one of the most commonly encountered Great Plains species, so I tend to take it for granted and forget how stunning it really is.
It’s been great fun watching your photos progress with practice. These latest ones have really been great!
If I had one criticism of this image, it’s that the tarsi in the foreground didn’t make the frame in the original exposure, so that the beetle looks a little bit kneecapped.
Yep, that foot bothers me too. I had another shot that was a little better framed but less well exposed that I could’ve worked with – it’s always a trade off.
I appreciate your feedback!
Hi Ted
Thanks for the most useful lesson. I’ll start to put some of those techniques to work.
By the way, we had one of those spectacular “nights at the sheet” last night just north of Mareeba, Queensland in the mixed eucalypt forest. It was storming all around us but dry where we were. For your interest several Cicindela-appearing Tiger Beetles showed up at the sheet. I took photos and see what I can do with them later today.
All the best.
DR
Hi Dave — those warm, humid, “unsettled” nights with storms threatening but dry in the immediate vicinity are some of the most awesome nights for blacklighting. I’ll be anxious to see what tiger beetles showed up for you.
… sounds like just about every night during monsoon season here in the se corner of AZ – Willcox Playa and the upper Mesquite/grasslands by day; any of about a dozen “sky islands” by night!
Kampai!
You know, for all the times I’ve been to Arizona I’ve never actually been to Willcox Playa – my last visit (1998) pre-dated my serious interest in tiger beetles. I’ve ignored it’s siren song for too long!
Salud!
Incredible, Ted! One of my all-time favorite species. No reason to apologize for your photographic efforts – you’ve captured him perfectly.
Za vashe zdorovye!
Delbert
Thanks Delbert – much appreciated!
Chtob vse byli zdorovy!
Thanks for sharing the process. You definitely got some beautiful results.
I was wondering, however, if by excessive modification we aren’t destroying “information” that might be useful to future researchers… I’m often surprised by what shows up in the photograph. 🙂
Thanks, Roberta. I guess it depends on what you define as “excessive modification.” For me, distorting the colors or changing the shape of structures would certainly qualify. Removing sand particles from the body surface seems less of a risk. There is always a need to balance current needs with possible future uses.
I don’t know that you destroy any information by modification. Information is only destroyed when you do a SaveAs and toss the original.
As for “cheating” in improving the image, I disagree. The image is always limited, not only by the camera but also the environment and most particularly “Lighting”. What could possibly be more artificial than flashing or shining a light on an insect, yet it is common practice for obvious reason.
The ideal for most “documentation” photography is to reproduce an image that is as representative of the real McCoy as possible. I really appreciate Ted’s images and also appreciates that he cares enough to improve the quality before publishing. It is much preferable to blind acceptance of whatever the camera happens to spit out on the other end.
Hi Jonathan – thanks for your perspective, which helps me solidify my feelings as well. To be honest, I’m a little bit surprised at how much resistance there is to image-shopping of this sort – I really can’t see equating a practice of this sort (removing debris particles) with filming rented animals or creating realistic virtual images. Ultimately, however, it is the viewer’s choice as to what they will and will not appreciate. As long as I’m honest about what I do, I can sleep well.
I’ve always been a purist when it comes to my photos. Not that I’m religious about it, but I totally suck at image processing. Normally once I start tinkering with a photo, it takes several minutes before I realize I’ve created a mess, so I cancel the changes and start over. This process repeats until I realize I just can’t pull it off. Sure, I do the sharpen and histogram changes and noise reduction like everyone, but beyond that what you see is what I photographed. Believe me when I say it’s better that way.
I think the deal with no-change images versus Photoshopped images is one of intent and disclosure, just as it is with wild animals versus for-rent or zoo animals. It doesn’t matter that people do it and it makes for some awesome photographs. Disclosing the truth is what makes the difference in my mind.
And awesome shot! Maybe it’s a pedestrian species but by golly it sure is purty.
Easy for you – your photos don’t need fixing. Seriously!
I don’t think I’ve really gotten a feel for the full range of tools and how to use them – not that I’m against using them or am not interested, but I just don’t want to imvest the time to learn. Like I said, I’d rather do other things than post-process photos. It still annoys me that I have to apply unsharp mask – what the heck is that? Why can’t photos just be sharp to begin with? If you want blurry photos, then you should be required to apply “sharp mask” (and although I’ve read the explanations on why it’s called unsharp mask, that’s still the stupidest name imaginable for a tool that sharpens your photos). At any rate, I had this specific need to eliminate sand particles from my subjects and figured out a way to do that. I guess I do feel a little guilty that I’ve manipulated the photo by doing that, but those sand grains just annoy me whenever I look at the photo – I have to choose between guilt and annoyance![/rant]
Consider this my disclosure 🙂
The photographs you post are always incredible, Ted. I’m in awe. While I don’t mind your fixing the dark parts and cropping, I’m not fond of your sand spec removal. If you hadn’t said it, many people would not know that tiger beetles are dirty. The mind sees things that doesn’t always register consciously. By removing the debris digitally, it’s not an honest native habitat shot. You might as well have a softened and posed dead beetle in the sterility of a photographer’s studio, which many people also do. What’s your goal? Show people how beetles truly are out in nature, or show people a pristine picture, or a fusion of the two that doesn’t quite tell the truth?
Hi Katie – thanks for the comment, and I appreciate your perspective. You make a good point about portraying all elements of natural history accurately. After mulling it over, I still think sand particle removal is okay in this case because not all individuals encountered are dirty – it just happened that the one I was able to photograph was dirty. By and large, the majority of the photos I’ve presented on this site have not been altered in such manner – indeed, whatever minimal post-processing I have done to the photos is routinely disclosed in footnote fashion. This includes beetles that may have a little bit of debris on them, but not enough to bother me. In the case of this beetle, it was excessively dirty to the point that it distracted from the intent of the photo, which was not only to show the beetle in its native habitat, but to highlight its spectacularly contrasting coloration. I really can’t consider the kind of editing that was done to this photo as the “moral equivalent” of photographing a posed, dead beetle (which I also see nothing wrong with – as long as that fact is disclosed).
If “dirt” was an essential element of the appearance of this species, then I agree that digital cleaning is not appropriate. As an example, there are certain insect larvae that intentionally cover themselves with debris as a behavioral adaption for anti-predation. The debris prevents a clear view of the insect itself, but to remove it shows the insect in an unnatural state. Even then, however, removal of the debris would be a problem only if the intent of the photo is to show the insect in a natural setting – there would be nothing wrong with removing the debris in a photograph whose express purpose is to show a clear view of the insect and does not “pretend” that it represents a natural appearance.
Thanks for sharing your process Ted. Beautiful photos…as always!
Thanks BBG – I appreciate the comment!
Great shot – and description! it’s always fun to see ‘behind the scenes.’
Not for nothing, if I were you, I would WATERMARK all your shots! It never mattered to me before and I thought it ‘ruined’ the shot I have worked so hard to compose – and now some of my ‘better’ photos show up ALL OVER THE PLACE on the Internets – and I keep thinking I want people to know where they came from (in some cases others even take credit – on one site, they had phony camera and lighting info!!)
If you know how to do layers in PS, you can add a white background and then reduce the layer opacity to like 50% or 70% and still see behind it. I am at this moment in the process of going back through ALL of my posted photos (a BUNCH!) and adding a watermark.
And…. I LOVE Tiger Beetles – we have Green Six-Spotted here – I have never seen one like this – nice!
I used to add watermarks and sort of fell out of the habit. I’ve never seen one of my photos used inappropriately (and I do look occasionally) and don’t make any money on them myself – the effort just seemed too great for what was at stake. Maybe that will change in the future and I’ll find myself regretting it…