One of the comments on my post Diffuser comparisons for 100mm macro lens was by Stephen Barlow, one of the original “concave diffuser” advocates, who claimed that the “dead” appearance of Photo #4 was an artifact of post-processing and not really a problem with the diffusion method itself. Heeding this comment, I reprocessed Photo #4 to see if this was really all that was needed to give it a “livelier” look by rather aggressively bumping up the brightness and contrast by 30% each (to correct for underexposure), then reducing the saturation by 10% (to correct for the effect on color caused by increased brightness and contrast), adjusted levels to a set point of 240 to add some more “high end,” and reduced highlights and shadows just a bit (10% each). Following is the original and then the reprocessed version of Photo #4:

Original post-processing

Additional post-processing.
There is no question that this additional reprocessing has greatly improved the photo. However, after I did this I got to thinking—why not try combining the two diffusers that gave the best results? Recall that the diffusion method in Photo #5 (SoftBoxes on flexible arm extenders) easily “won the vote” over Photo #4 (open concave diffuser) by a 2:1 margin (35 to 17). This may have been at least partly a result of the less than flattering post-processing of the original version of #4, but still the overall lighting effect on Photo #5 caused by the diffusion method used was quite dramatic. The only downside of the #5 method was the persistence of hot spots (albeit muted) from the flash heads and a dark background with lots of shadowing caused by light drop off (since the flash heads were mounted on the lens rather than extenders). Double diffusers are nothing new, the idea being that the first diffuser spreads the light out more before it hits the second diffuser than does a bare flash head, allowing even further diffusion of the light the reaches the subject (and background) for truly even lighting. I reasoned that using SoftBoxes on flexible arm extenders plus the concave diffuser would not only accomplish double diffusion but also allow controlled placement of the flash heads close to the specimen to maximize apparent light size and minimize light drop off. To test this I re-shot the same beetle with the same camera settings, and here is the result:

Flash heads mounted on flexible arms, diffused by SoftBoxes + open concave diffuser
My personal opinion is that this photo combines the best of both methods. While loss of light can be a problem with double diffusion, my use of extenders to place the flash heads close to the subject minimizes, or perhaps even completely negates this problem. Additionally, while subtle hot spots are still apparent, they are not nearly as apparent as in Photo #5 (SoftBox diffusers on extenders w/o concave diffuser—refresh your memory here) due to the additional diffusion, which also dramatically reduces shadowing as a result of better light throw. The hot spots are also more subtle than in #4 because of the larger apparent light size (a combination of closer flash head placement and the SoftBoxes), and is it just me or are the colors more vibrant and life-like in this photo compared to #4 (even reprocessed)? The flat colors were my biggest criticism of Photo #4, and even heavy-handed reprocessing, while helpful, didn’t completely bring it “back to life.” In contrast, the double-diffused photo required only typical post-processing to achieve a more than acceptable result—I have to believe that, all other things being equal, a photo that requires less post-processing is better than one that requires more.
Of course, using a setup like this in the studio is one thing—using it in the field is another. Both the extenders and the oversized concave diffuser are likely to make things a little clumsier in the field, and the two combined may be more clumsiness than I care to deal with. Nevertheless, the results from my test shots are certainly promising enough to give it an honest effort. Have I finally found a viable solution to diffusion in long-lens, full-flash macrophotography? We’ll find out this summer!
Copyright © Ted C. MacRae 2013

Ted – thanks for this series – it’s given me a lot to think about. After some experimenting last summer with various diffusers (including a homemade one) I decided that although I could get a better pictures with some setups, they were just too much of a hassle in the field. What I ended up for normal work was a softbox placed over my Canon 580 EXII, with the flash on the hot shoe and depressed. I also set the zoom on the flash manually to its widest setting and drop down the wide angle diffuser on the flash head as well. The combination, while not perfect, handles fairly well and with the working distance of the 100mm gives pretty good results.
I’ve never used anything but the MT-24EX, so much of what you said about how you use the 580EX is beyond me. But your point about field utility is certainly well taken. I’ll just have to try it and see.
FWIW, this is the setup I am using with my 100 mm: http://www.flickr.com/photos/deadmike/7218945398/
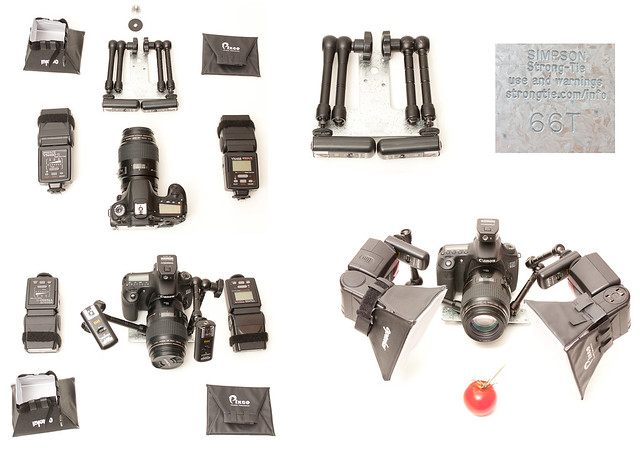
I have changed it somewhat in that instead of a firm metal bracket, the two arms are on a 20 cm Arca Swiss rail so I can quickly change the flash-subject distance (or maintain it at the same distance while changing magnification). With this setup,to avoid falloff, I am often leaving one speedlight bare and aiming it to the background while leaving the other diffused and illuminating the subject. As for diffusing, I have adapted something simpler than the softboxes which is cheaper and faster to setup: http://ibycter.com/2013/01/22/cheapskate-tuesday-1-cheap-flash-diffuser/
Most of the shots in the blog post were with 2 Yongnuo speedlights, with manually set power and triggered with those radio triggers. The backgrounds are illuminated with the bare light and the foregrounds with the Cheapskate Diffuser.
Your setup is basically the same principle as my flexible arm extenders, only yours is much more durable and with more powerful flash heads. I only bought the flexible arm extenders for proof-of-concept testing – at $25 I could afford to give them a try. Now that I like the concept I’ll be searching for a sturdier bracket with dual arm extenders – I’ve heard good things about the brackets made by Really Right Stuff (though quite expensive, but probably in the case of camera brackets you get what you pay for).
Of course, with the setup I described, you can also have a key and fill for small subjects, and with the 2 diffusers, you can kind of mash them together so that they appear as a single light source, but with directionality. I will try to work up a blog post on the topic.
Yes, I had the two soft boxes closed up against each other above the concave diffuser.
I think the changes that stand out to me the most are the a) centered lighting in the eyes. It adds life to the eyes…which we humans look for in each other…, and b) a front and end point (the full body).
P.S. Thank you for sharing the details of your process. Quite fascinating and insightful.
Thanks FIR – I’m having a hard time understanding why there should be such noticeable changes in color depending on flash head placement, but apparently I’m not the only one seeing them.
Has anyone tried ,Graslon Prodigy Flash Diffuser,I’m presently using a modified onion storage container modified to fit my nikon sb800,with wa lens dropped down, works very well in the field.
I have not tried it. However, if I’m looking at the right product it is a convex diffuser which, in closeup photography, will still result in hot spots. This is because the diffuser is closest to the subject at its center and futher away around the perimeter, exaggerating the effect of light drop off towards the edge of the diffuser. A flat diffuser is better, but even then the center is still closer to the subject than the edge. That is why I am trying to incorporate a concave diffuser. I’ve seen a lot of long-lens macro photos taken with a single flash unit and never really liked them, no matter how well the light is diffused, because of the amount of shadowing.