I recently happened upon one of my first attempts at post processing a photograph of a pinned insect specimen. The subject was Anomalipus elephas (large armoured darkling beetle), a tank of an insect (this example measuring 32 mm in length) belonging to the family Tenebrionidae. At the time, I was quite pleased with the results of my crude post processing efforts and proudly posted the “enhanced” photo in full-sized glory for all to behold. Since then, I’ve gained some experience with post processing of photos, and when I saw the processed photo this time I knew that there was considerable room for improvement. I thought it might be interesting to give the photo another PP whack and compare the two efforts from then and now.

Here is the original photo—keep in mind that the photo was taken with a small (though fairly decent) point-and-shoot camera (Panasonic DMC-FX3) a few months before I made the move to my current dSLR setup. I pinned the specimen to a styrofoam board, illuminated it with two 23w compact fluorescent light bulbs, and took the photo with the camera set on its “macro” setting. For the original post processed version (using Adobe Photoshop Elements version 6.0), I rotated and cropped the photo, then increased brightness and contrast (I don’t remember the values for each), used the clone tool to remove the pinhead (I’d just figured out how to do this), and increased sharpness using unsharp mask. This is all well and good (although I think the added contrast was a little excessive); however, I did make two big mistakes. The first was using the eraser tool to create a white background—a tedious process, especially around the perimeter of the subject to avoid “clipping” any of the subject’s body. The second was leaving the numerous small pieces of debris clinging to the subject. Debris on pinned (and even live) specimens is now a pet peeve of mine—I find it detracts greatly from the appearance of the photo, yet it is remarkably easy to remove in all but the most extreme of cases. At any rate, here is the result of that original attempt:

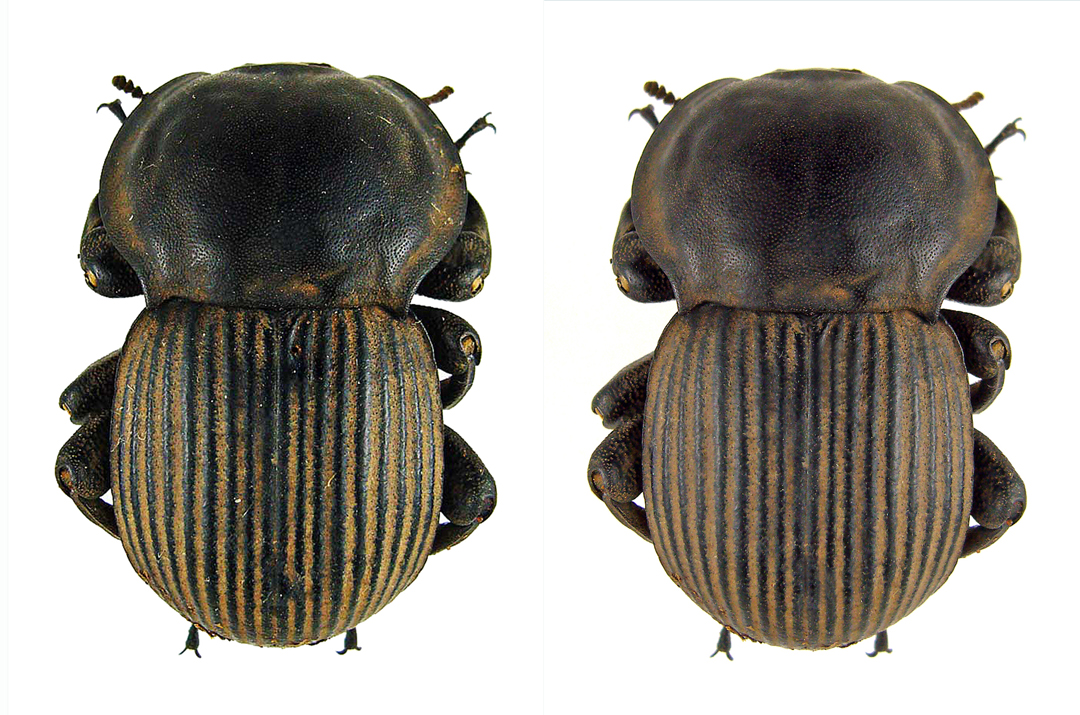
For the latest attempt, I rotated and cropped the original photo as before. Next, I created a white background, not with the “Eraser Tool” but rather by opening “Levels”, clicking on “Set White Point”, and touching the darkest part of the background. Voilá—a beautiful white background with no clipped subject edges! The subject still needed to be brightened up (two 23w fluorescent bulbs don’t put out that much light); however, instead of directly adjusting brightness I set “Lighten Shadows” to a value of +30% (a rather heavy handed setting) to also reduce shadows around the subject’s legs. Then I used the “Clone Stamp Tool” to clone out the pinhead, but this time I didn’t stop there—I continued using the tool to clone out all of the tiny little pieces of debris on the subject surface. Using the clone stamp tool effectively requires some practice, but eventually one learns to adjust the size and define the source set point to achieve almost perfect results. Lastly, I increased sharpness with “Unsharp Mask” (118%, 1.0 pixels, 8 levels). That’s it—took me all of about 3 or 4 minutes to post process the original photo to achieve the following result:

To compare the two post-processed images directly click here. Of course, my current camera setup is capable of much higher quality photographs than the point-and-shoot used for the subject of this post; however, the sequence of post processing steps that I use is essentially the same (if less heavy handed). One final note—I am not a Photoshop expert, and perhaps some of the processes I have described can be done even more effectively or easily than in the manner I have described. I would welcome any comments or tips that you think might offer a better way to post process photos of pinned specimens.
Copyright © Ted C. MacRae 2012


