Alternative title: Rich and Ted’s “Excellenter” Adventure.
This is the ninth “Collecting Trip iReport”; this one covering a 10-day trip to western Texas from April 27 to May 6, 2021 with friend and local collecting buddy Rich Thoma. Rich and I have done many shorter collecting trips (up to five days) throughout Missouri and in the neighboring states of Kansas, Nebraska, and Oklahoma (in fact, our first joint trip was to Barber County, Kansas way back in May 1986!). This trip, however, was our first truly long one together—10 days of collecting plus a travel day on each end. To take full advantage of the amount of time we had, we chose western Texas; an area that I have visited several times from the mid-90s through 2004 but not since. We wanted to make the trip during early to mid-May, but scheduling conflicts forced us to go earlier. I reasoned that even if it was a bit too early in the season, I could still collect infested wood for rearing—as I did with great success during my April 2004 trip. For Rich, who is more of a general insect collector, the trip provided him an opportunity for extended collecting in an area that he’d not previously spent a lot of time.
As with all previous “iReports” in this series, this report is illustrated exclusively with iPhone photographs (thus the term “iReport”), with previous versions including the following:
– 2013 Oklahoma
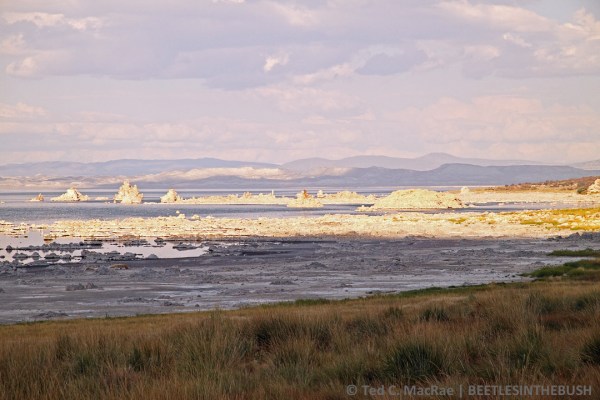
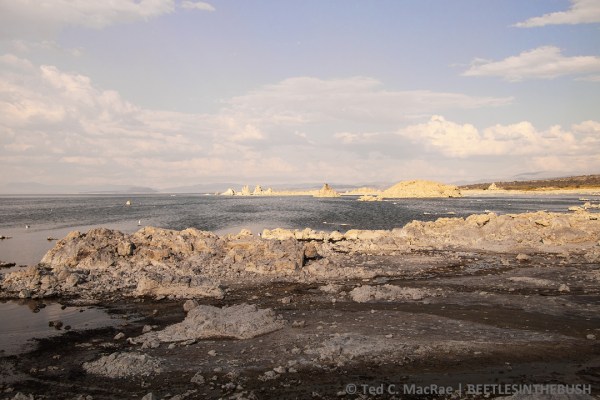
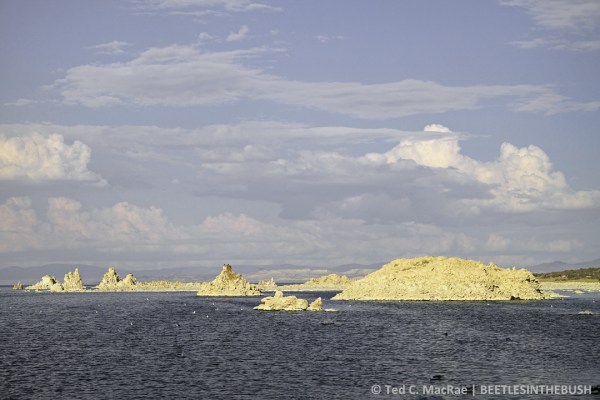
– 2013 Great Basin
– 2014 Great Plains
– 2015 Texas
– 2018 New Mexico/Texas
– 2018 Arizona
– 2019 Arkansas/Oklahoma
– 2019 Arizona/California
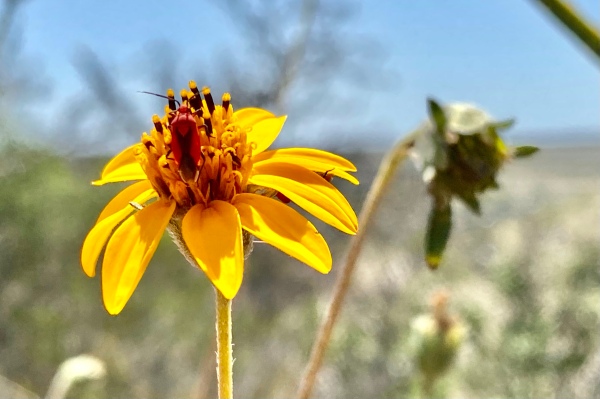
Day 1 – Monahans State Park, Shin Oak Picnic Area
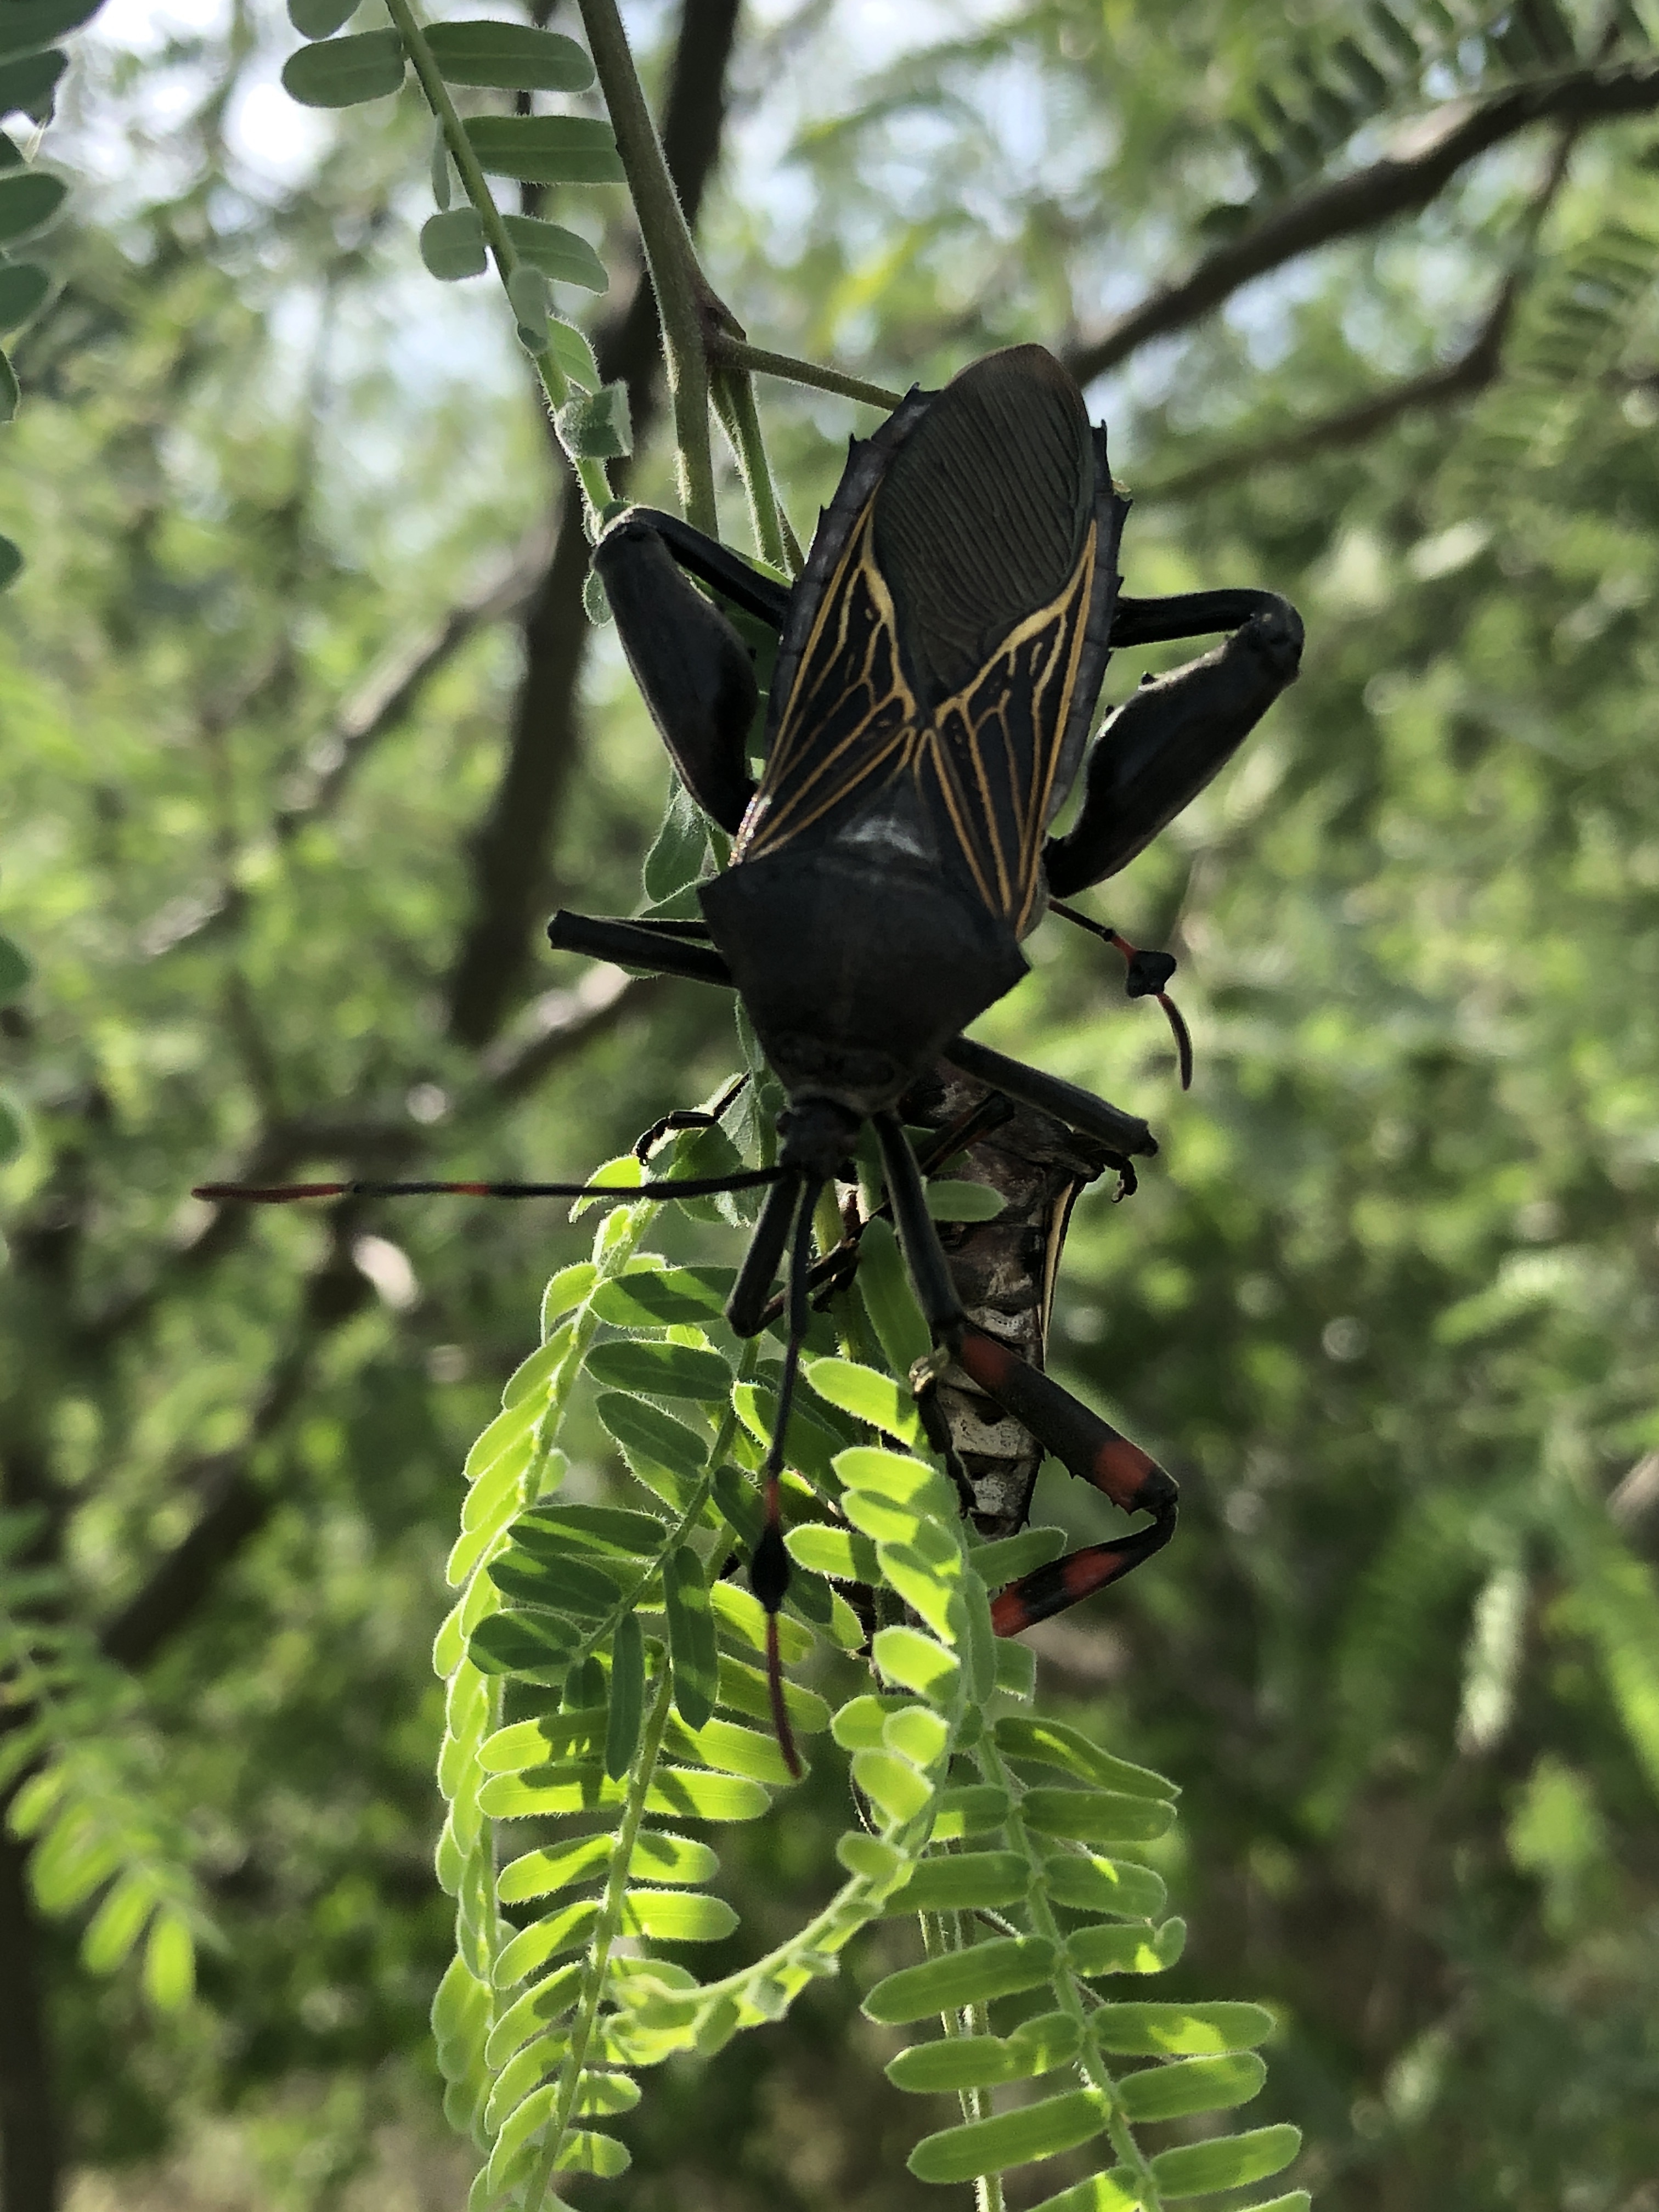
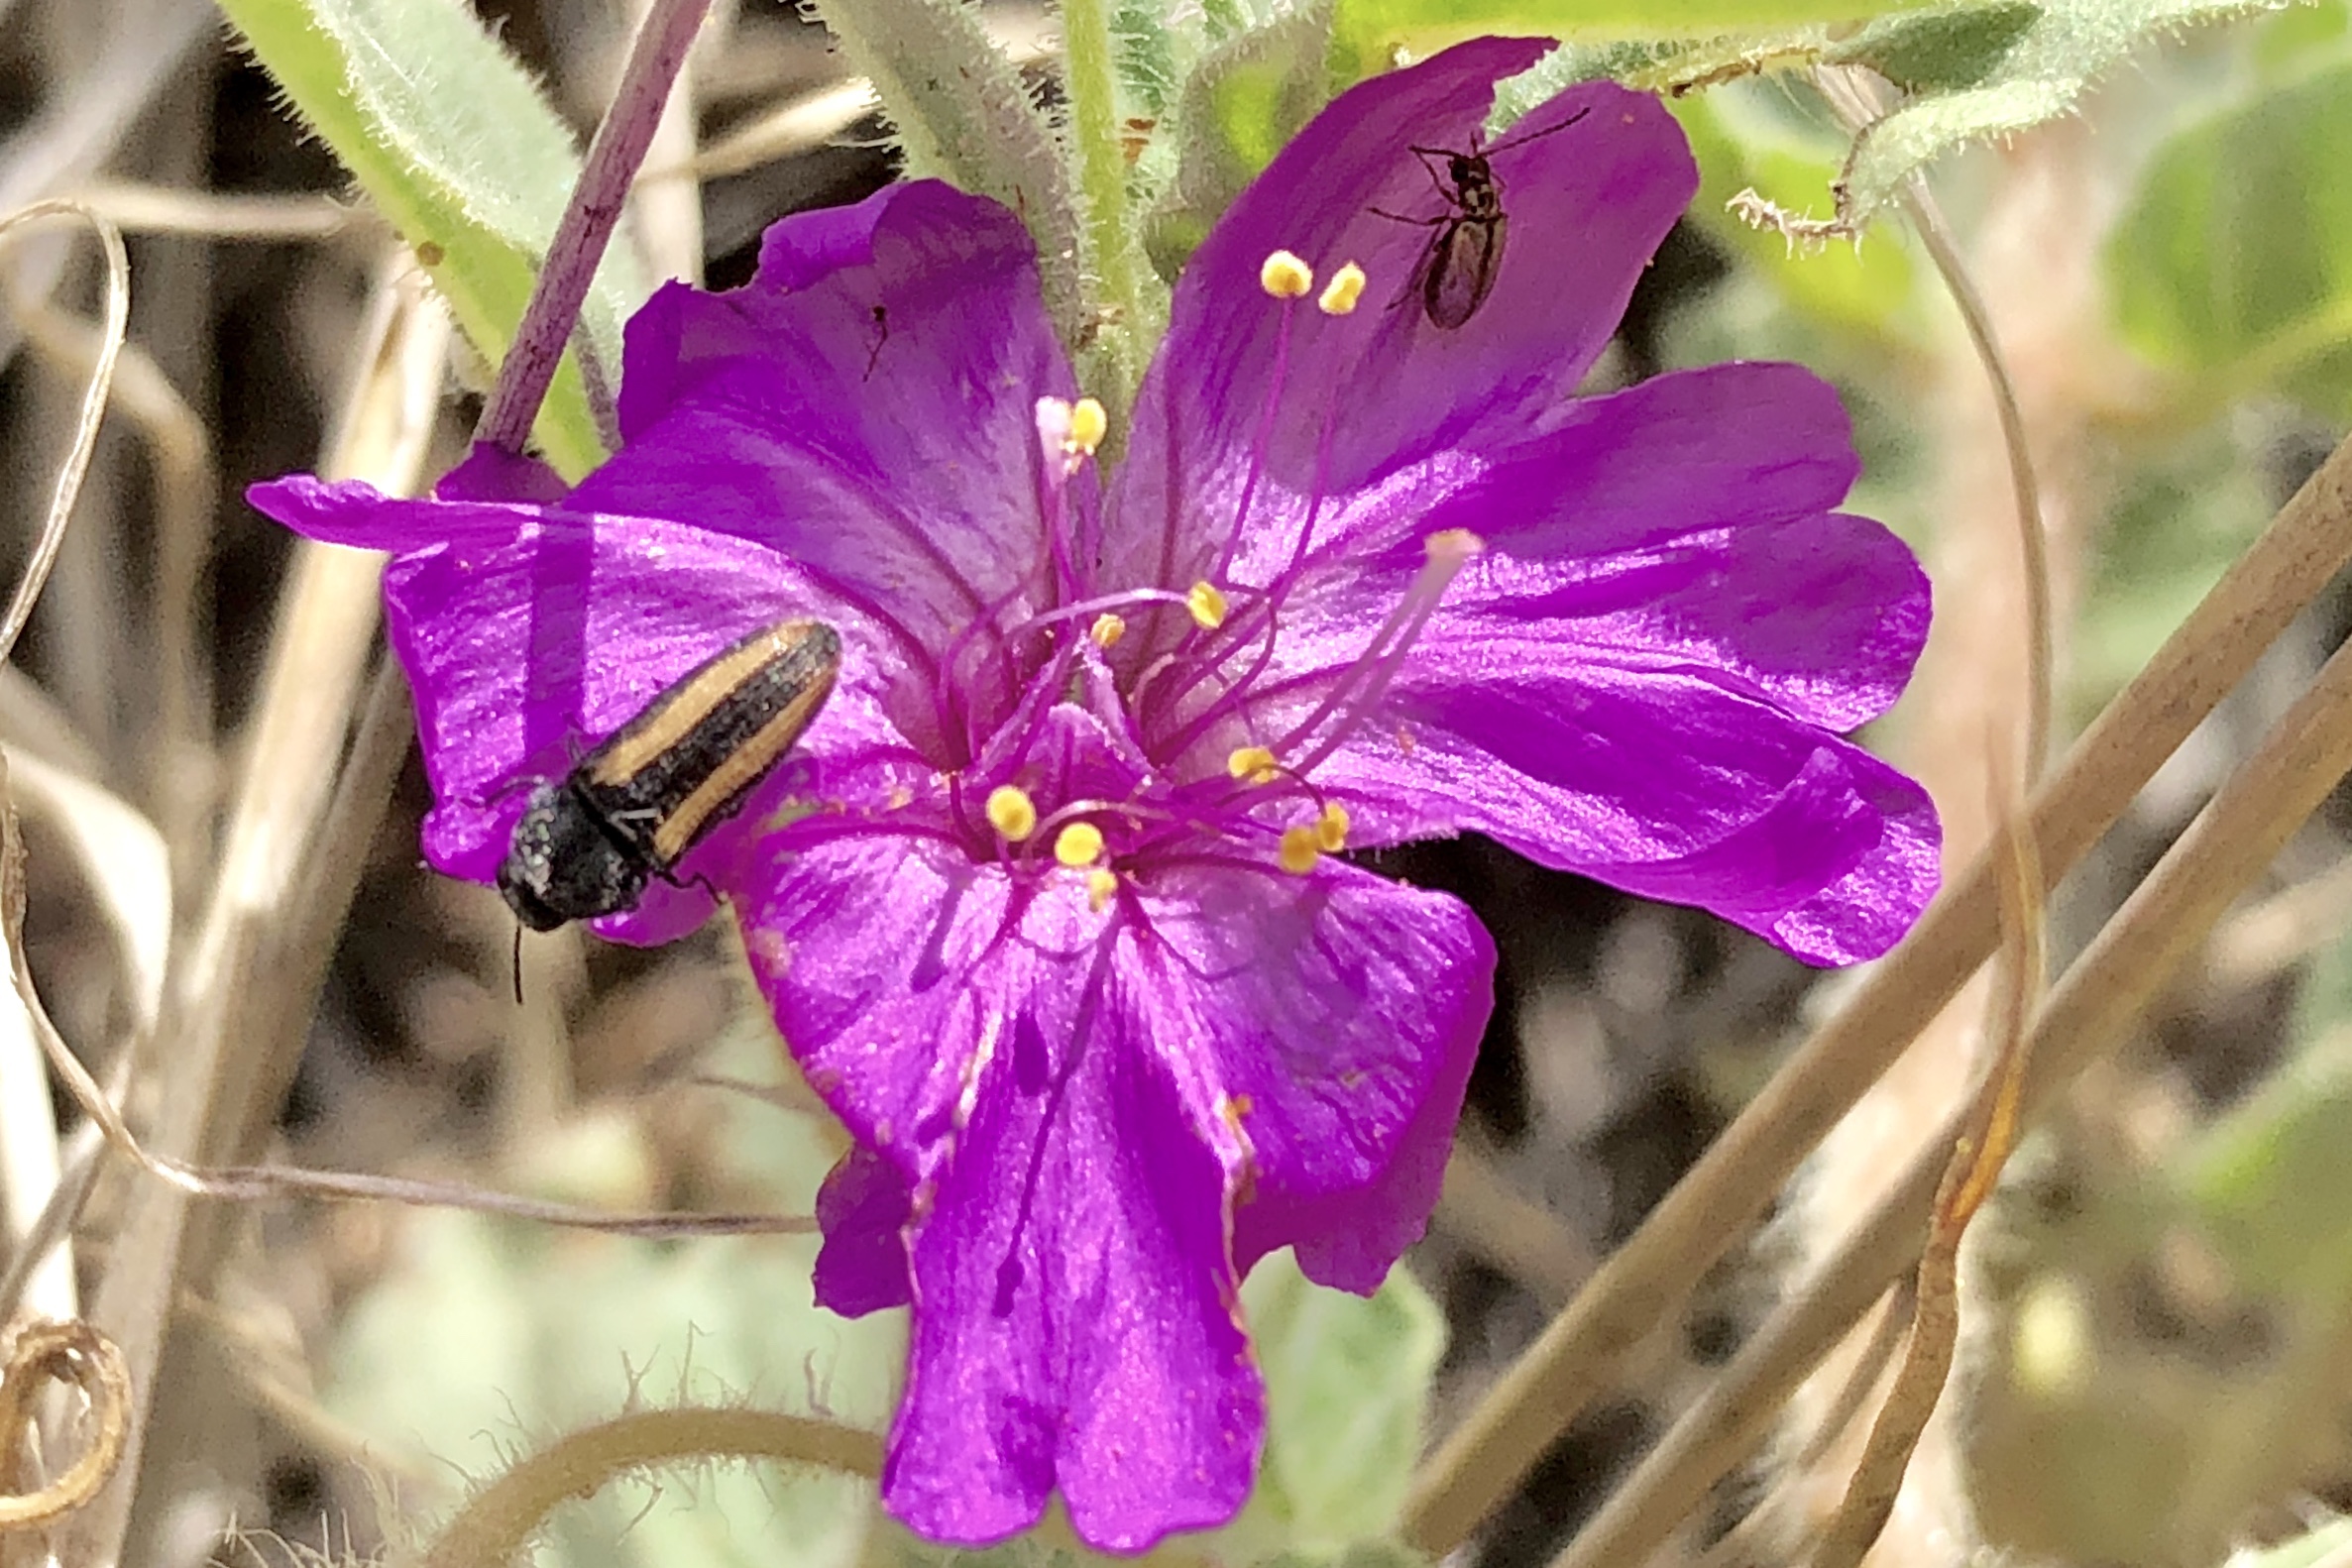
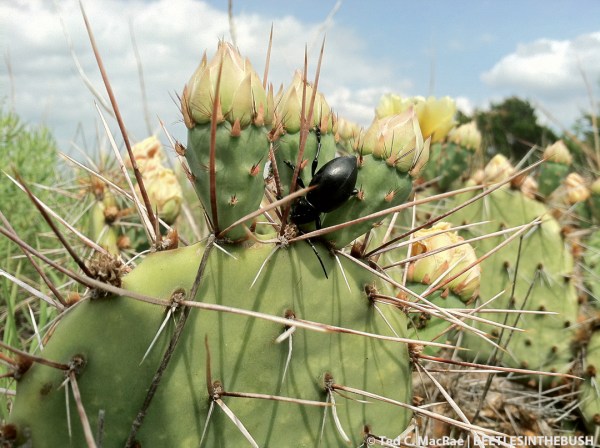
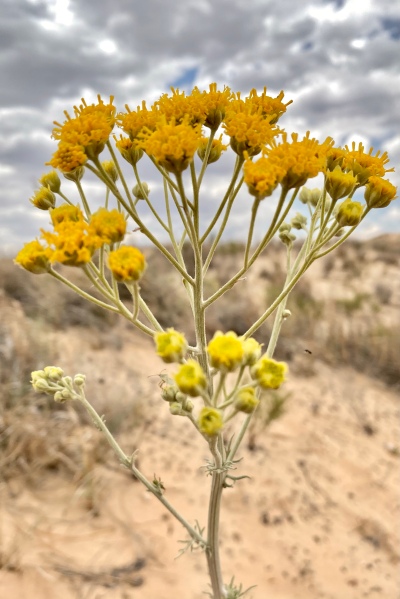
First stop of the trip. I was hoping to see beetles on flowers and maybe some tiger beetles, but unfortunately the area hasn’t had any rain yet this spring (according to the ranger). The mesquite was in bloom, but the only beetles I beat from it were a few tiny weevils. A few other plants were in bloom, but only one—Hymenopappus flavescens—had beetles on it (mordellids, which I picked up for Enrico Ruzzier). After a lot of walking I noticed Quercus havardii (shin oak) with flagged branches of dead leaves—a bit of investigation revealed it had been attacked by what must be Chrysobothris mescalero, so I collected as many flagged branches as I could find (7 total) and will bring them back for rearing.


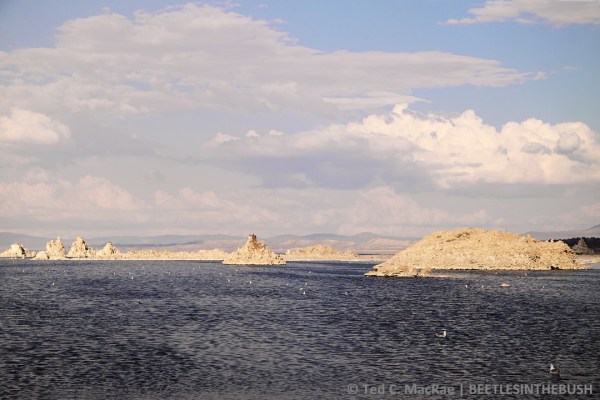
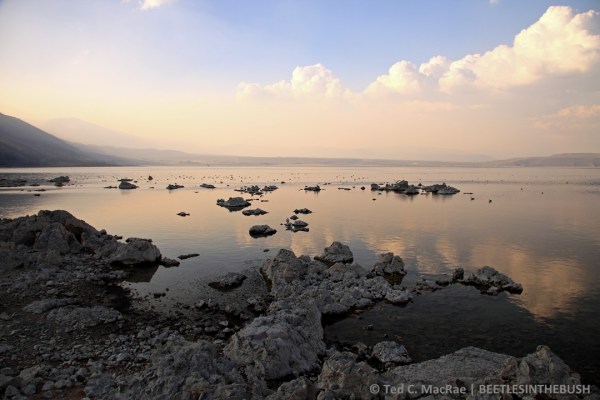
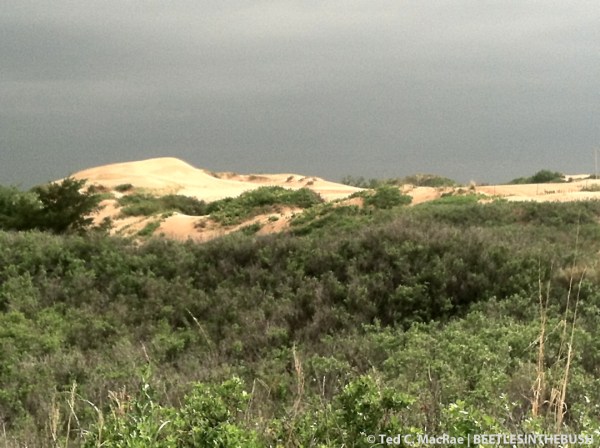
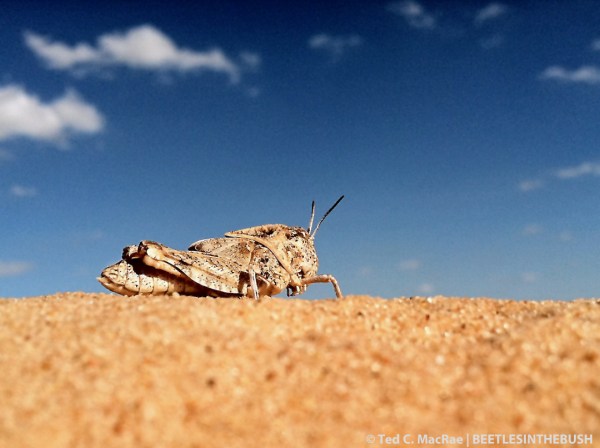
Monahans State Park, Sandhills Picnic Area
The big dunes are in this area. We didn’t expect to see any insects but brought our nets anyway. As we were walking the ridge we saw two grouse-like birds in the distance. We tracked them for a bit before I decided to go back and get my binoculars. They kept us at bay, but eventually I was able to get close enough to get a good look at them—they turned out to be scaled quail, a new bird for me. We continued tracking them and eventually they were joined by two more individuals. Handsome birds!


Monahans State Park, Shin Oak Picnic Area
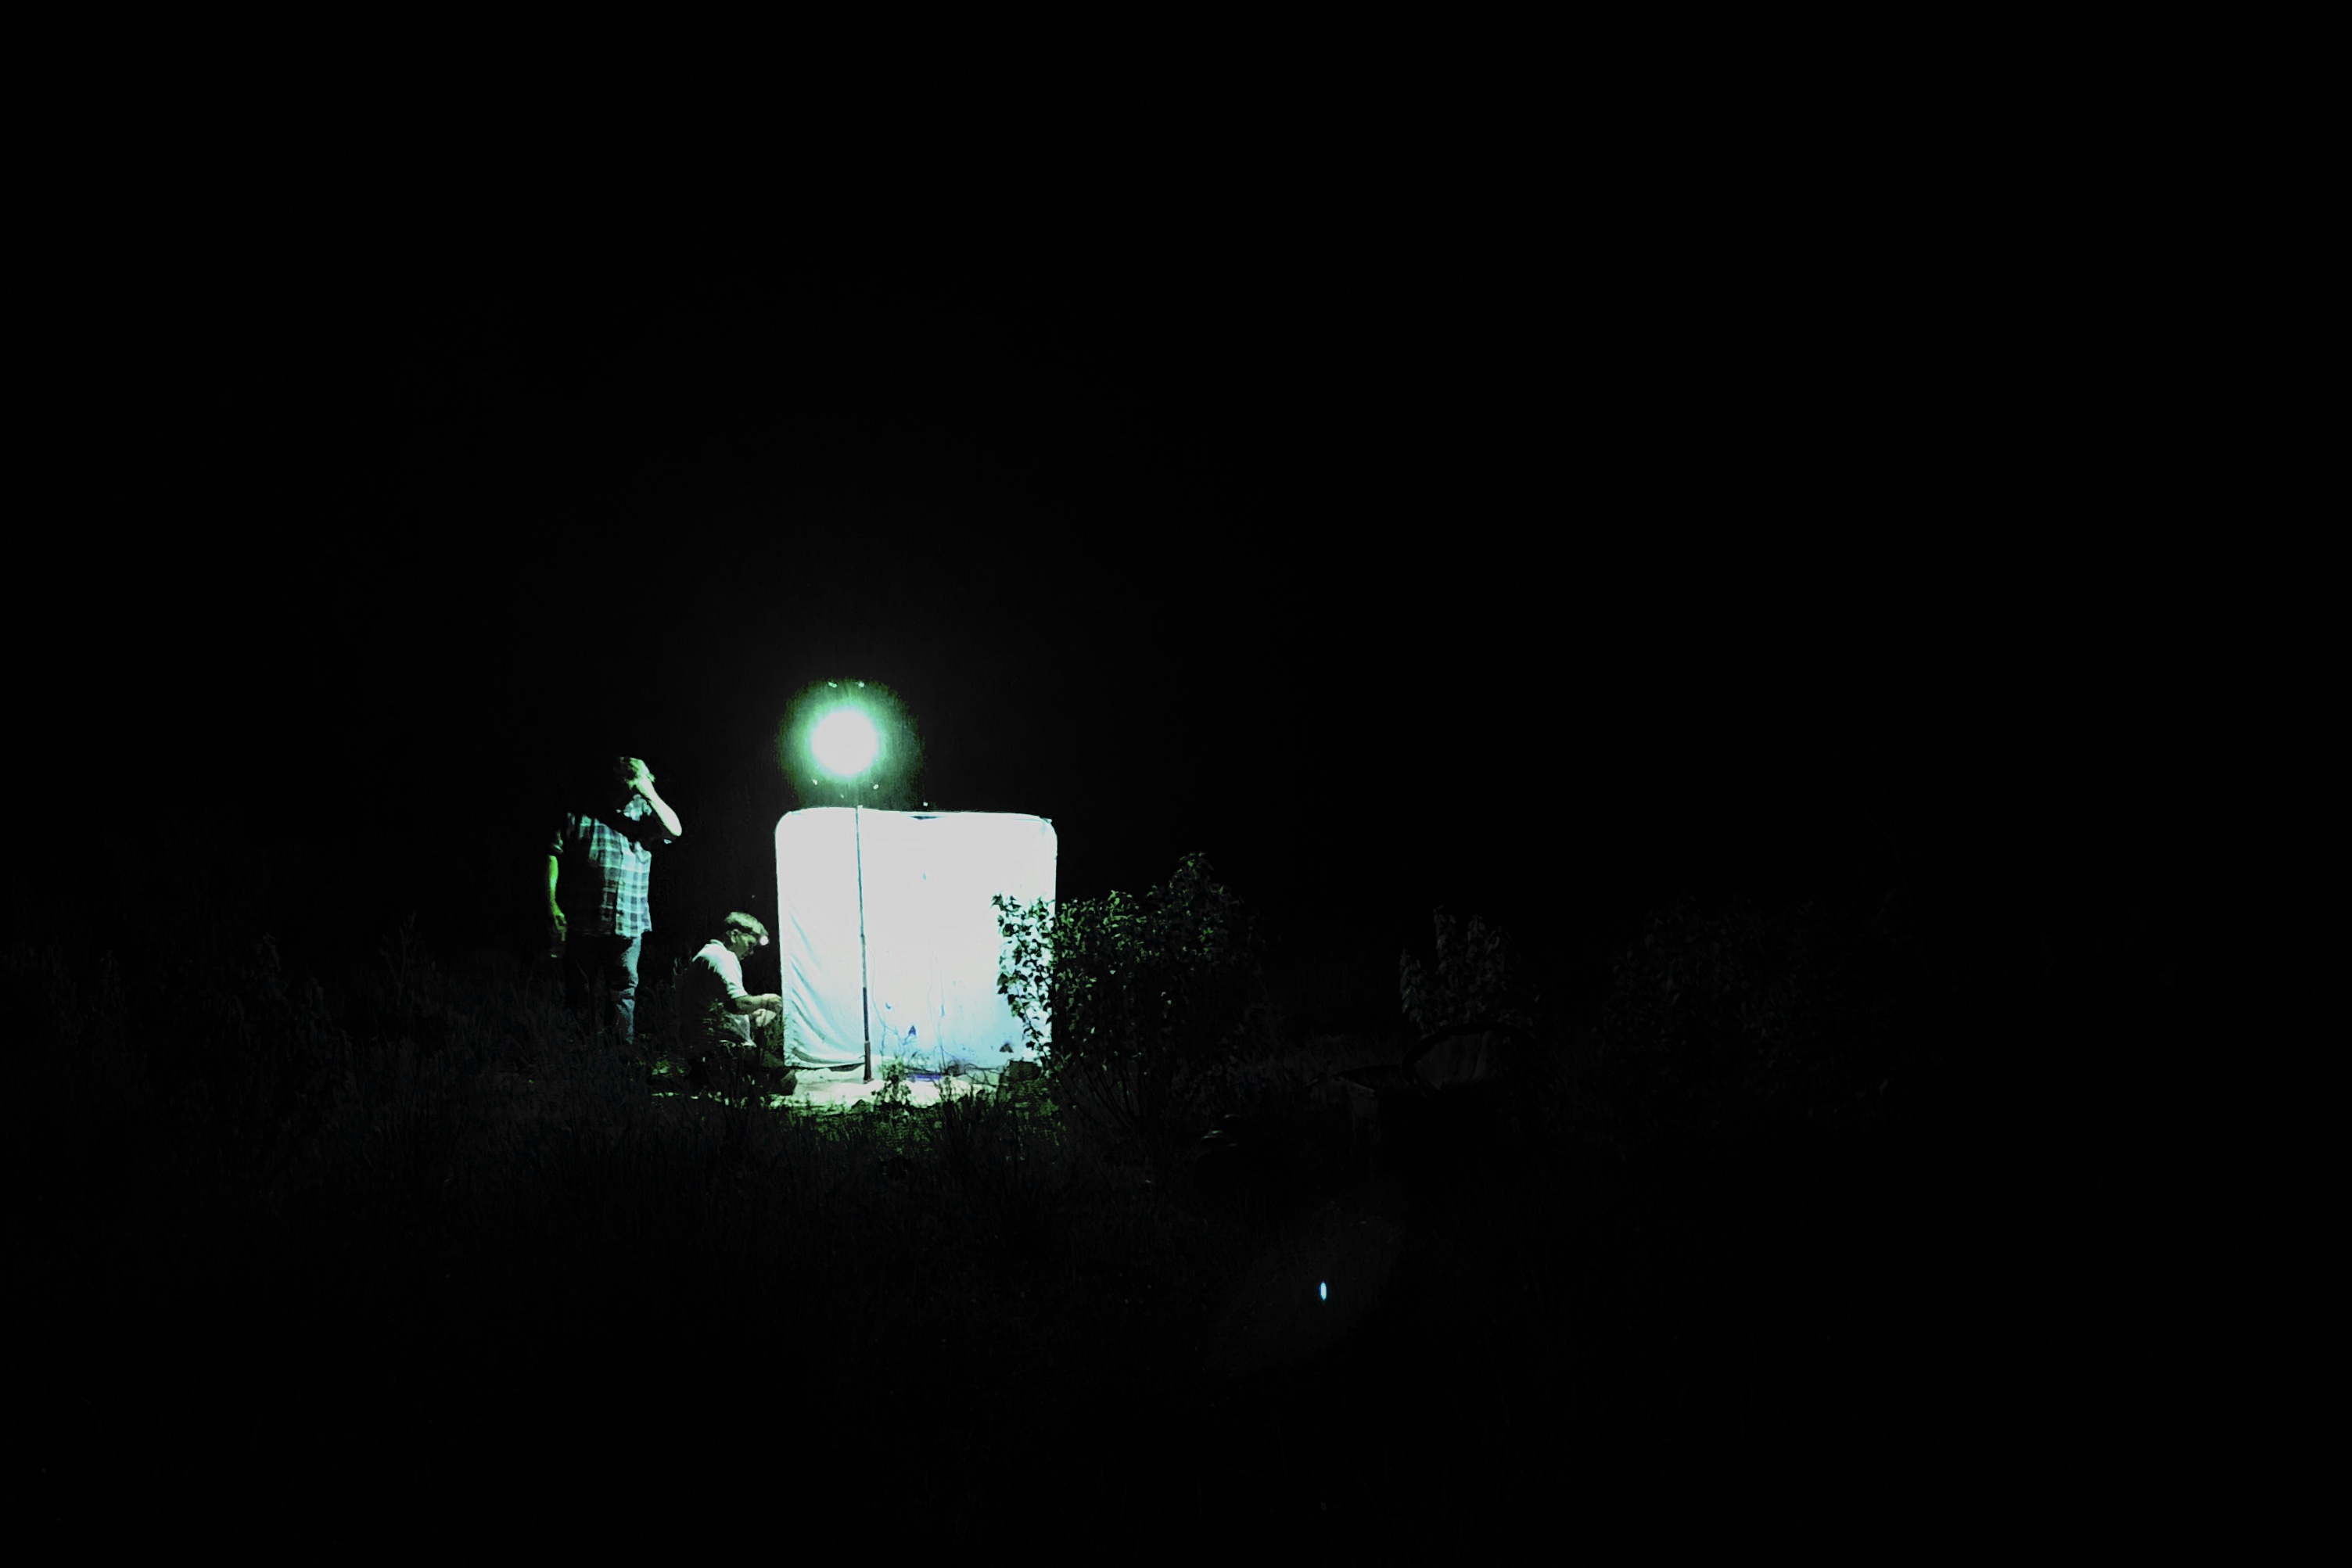
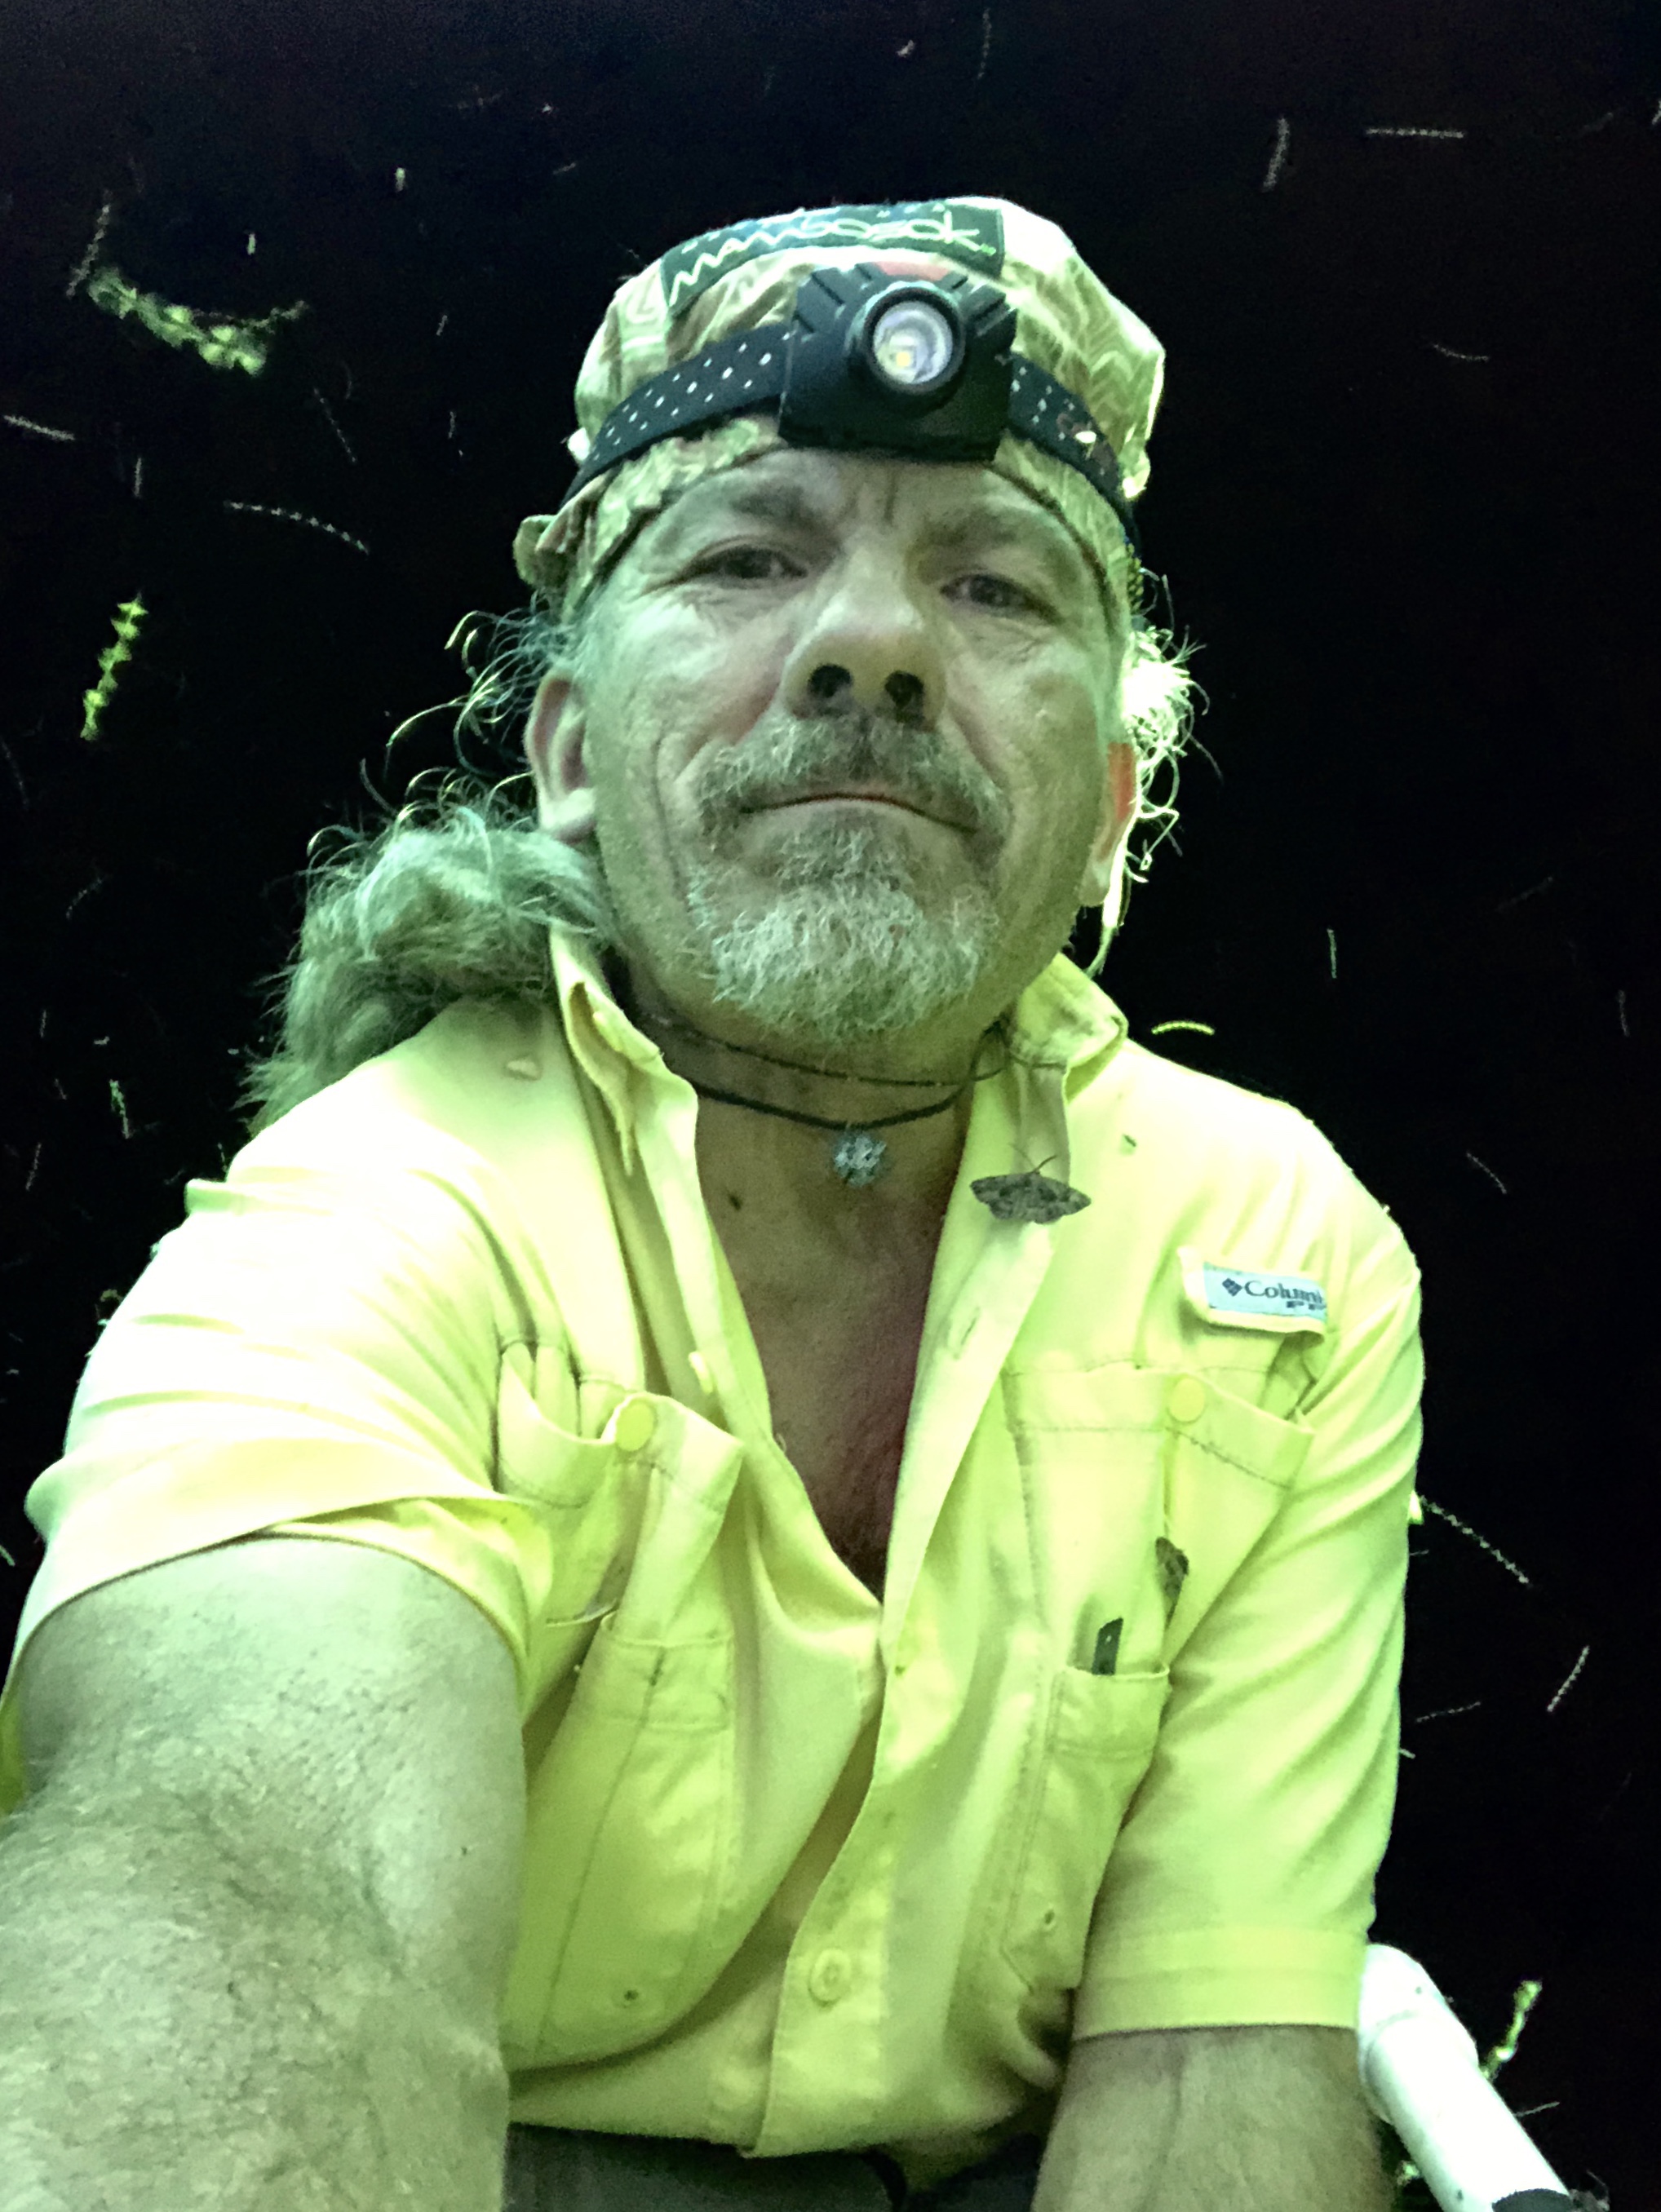
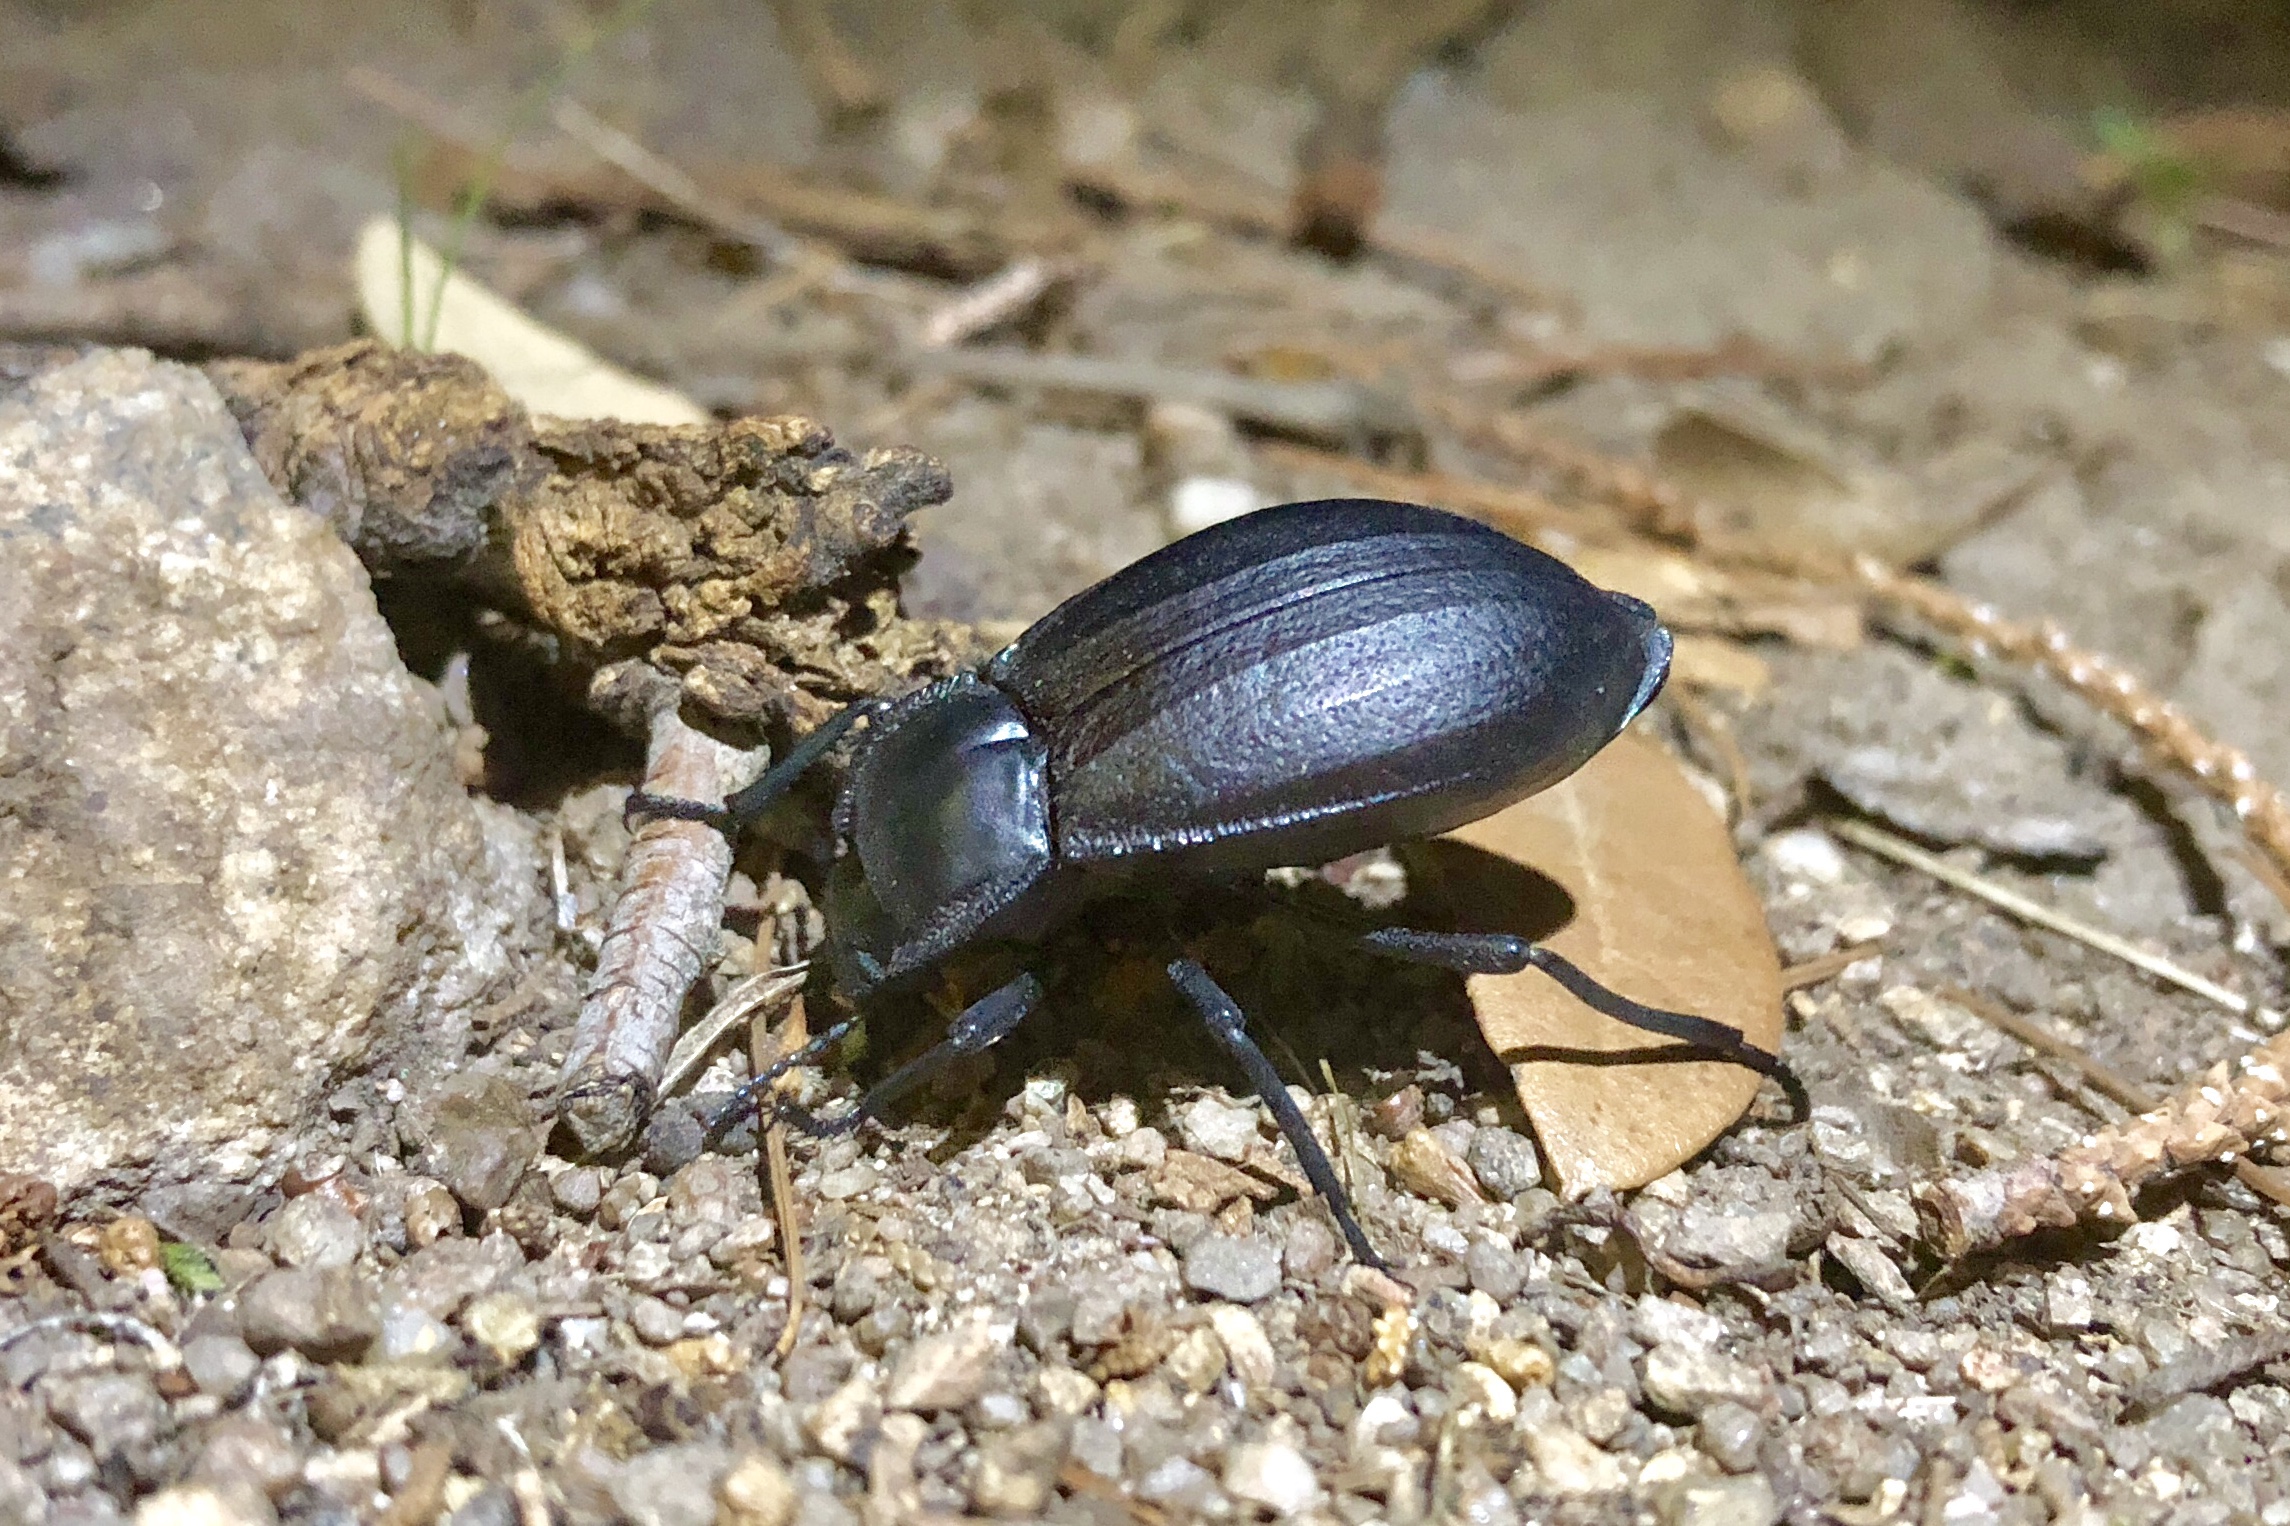
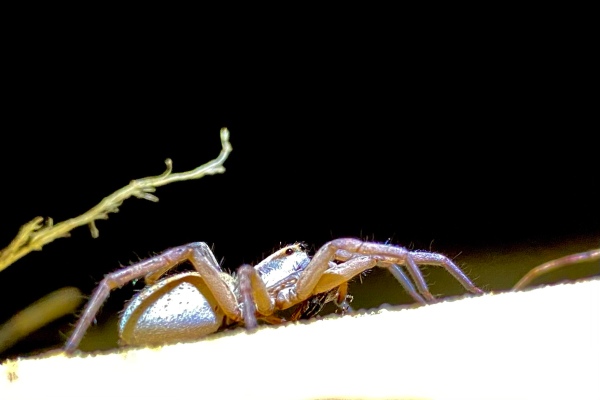
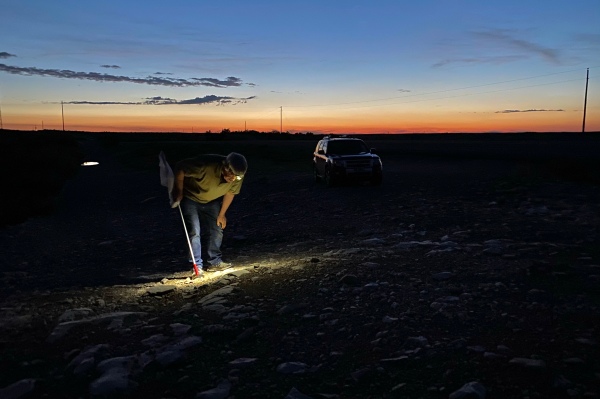
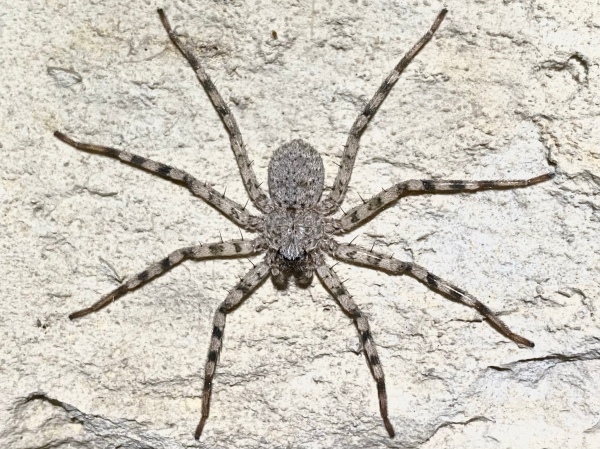
After going into town and picking up some dinner, we came back out to the park and setup the ultraviolet lights. I didn’t have much optimism based on the lack of insect activity we saw during the day, but the temperatures were still plenty warm (well into the 80s) and we had nothing better to do. We returned to the Shin Oak Picnic Area since it had a mix of open and more vegetated dunes. Glad we did because two male Prionus arenarius, one Megacyllene antennata, and a tiny, unidentified elaphidiine came to the lights. I also found two small darkling beetles crawling on the sand nearby. I searched the surrounding sand hoping to find more males looking for females, or perhaps even a female herself, but found none. Wolf spiders, however, were common on the sand, their glowing eyes drawing attention beyond their abundance. I guess they are a species of Hogna, but I’m not certain—I photographed two individuals. Also got a large bostrichid (Apatides fortis?) at the light. Before we took down the lights, Rich called me over to see a tiny, slender, worm-like snake that we eventually determined was one of the blind snakes (Leptotyphlum sp.)—definitely a first for me.


Day 2 – Toyahyale
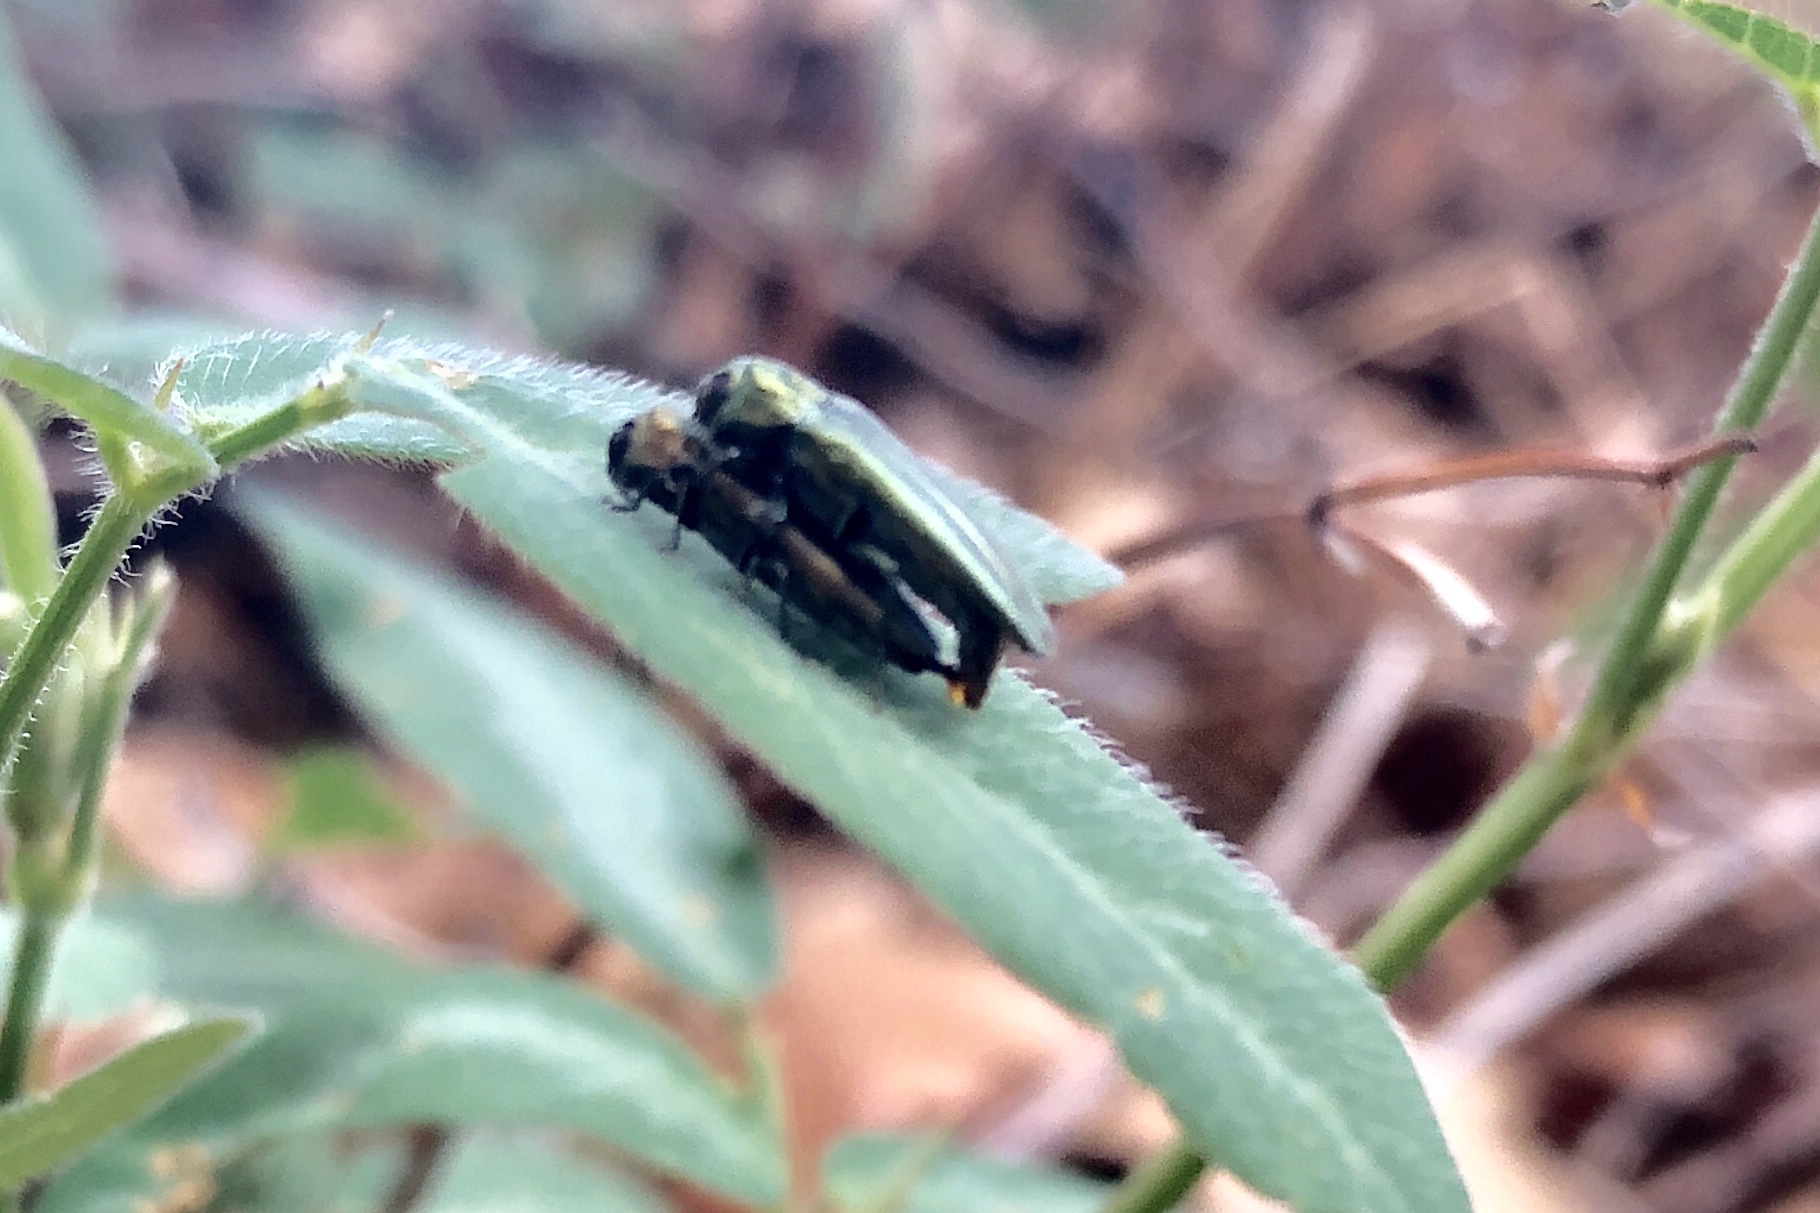
We stopped here on a tip from Jason Hansen and Tyler Hedlund, who swept good numbers of Agrilus cochisei off of Ambrosia psilostachya (western ragweed)—albeit, a few weeks later during May. I found the plants, but they were very small and low to the ground. Nevertheless, adults could be swept abundantly from the plants, and I was able to take good photos of singles and a mating pair with the big camera (iPhone photo here just to show what they loook like). Also got a single specimen of an apparently undescribed Acmaeodera sp. while sweeping for A. cochisei and one of two A. cochisei adults that I saw on flowers of Sphaeralcea sp.


Davis Mountains, 15.8 mi NE Ft. Davis
We stopped here to look for the undescribed species of Acmaeodera, which Jason had found in good numbers during May on blooms of Lygodesmia and Convolvulus. Both plants were present, but neither was in bloom. Still, I found one adult on flowers of Verbina sp. and swept another from roadside vegetation. Ambrosia polystachia (western ragweed) was also present—I looked visually for Agrilus cochisei and did not see any, but I did get one adult and a couple of cryptocephalines in the sweeping that produced the second Acmaeodera.


Day 3 – Point of Rocks Roadside Park
The weather turned decidedly cool in the Davis Mountains—first time I’ve ever frozen camping out on a collecting trip. The high temps are expected to stay in the 50s to 60s with a chance of rain for the next few days, so we decided to head down to the Big Bend area where there is still a chance of rain but warmer temps (up to the high 70s). Maybe we’ll come back to this area next week. Before leaving, however, I wanted to check the Quercus vasseyana (vassey oak) at Point of Rocks, where in the past I collected a good series of Mastogenius texanus even earlier in April (it was actually undescribed at the time). I’ve also collected Elytroleptus lycid-mimicking cerambycids on soapberry flowers here in June, although I knew the soapberry would not be in bloom. There was nothing on the oaks, but I did collect a few miscellaneous beetles beating Prosopis glandulosa (mesquite) and found one vassey oak branch with evidence of wood-boring beetle larval feeding and which I collected for rearing.
17 mi S Alpine
This is the first of two picnic areas along Hwy 118 going south from Alpine towards Big Bend National Park. There are lots of big Quercus vasseyana and Q. grisea here, so I stopped to see if I could find any infested wood. Bingo—one of the Q. grisea had a dead branch hanging from it that looked recently dead, and breaking apart a few of its smaller branches revealed fresh larval workings of some kind of buprestid (perhaps Polycesta arizonica). I cut of the branch and will bring back the bundle for rearing.
26 mi S Alpine
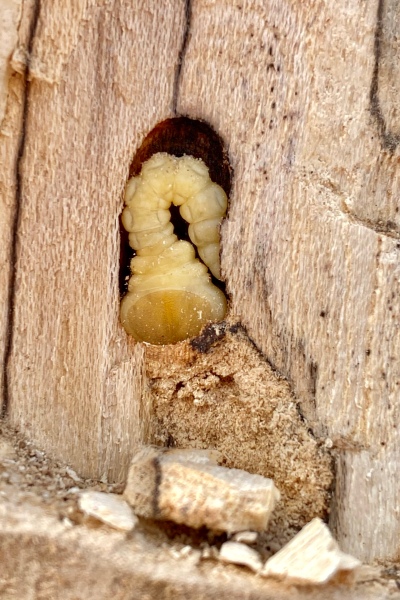
This is the second of two picnic areas south of Alpine on Hwy 118 towards Big Bend National Park. Rich and I have both stopped here before, and Rich brought back infested wood (apparently Juglans sp.) from which I reared Chrysobothris comanche, so that was the plan again unless we saw active insects. We did not, so I scanned the trees and found a small Celtis laevigata (sugarberry) that had recently died—the bark was peeling, but there were no emergence holes that I could see. I started chopping into the trunk wood and quickly encountered a large buprestid larvae in its “pre-pupal fold”. This could be Texania fulleri based on host and location, so I cut a couple of bolts from the trunk to bring back for rearing. The branches also showed fresh larval workings, so I cut up one along with its smaller branchlets to also bring back for rearing.
3.3 mi W of Hwy 118 on Agua Fria Rd.
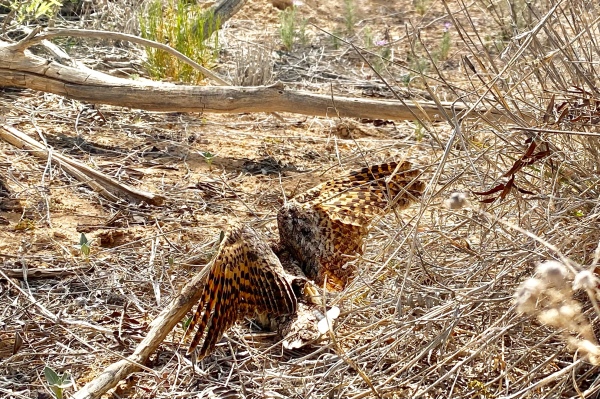
Last stop of the day, which I was told could have water with tiger beetles. The creekbed was bone dry, and I collected but a single Chrysobothris sp. beating Prosopis glandulosa in flower—amazing given the proliferation of wildflowers that were in bloom. We did find a nautiloid/ammonite-type fossil in the bone-dry creekbed, which Rich says is of Cretaceous origin based on clam fossils in the underlying layer, and I tracked a common poorwill (Phalaenoptilus nuttallii) for a little bit, eventually getting close enough for the rare iPhone bird photo. Interesting position it assumed upon landing with its wings outstretched above its back.


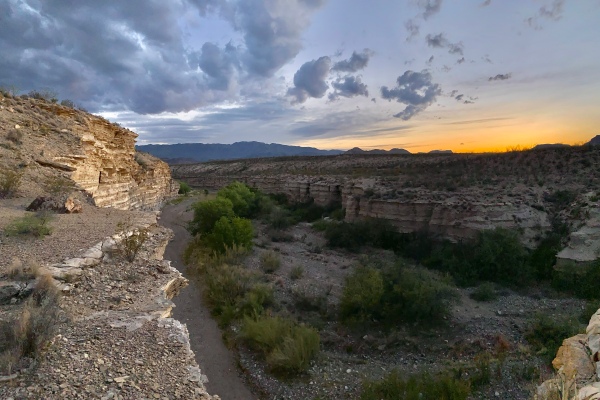
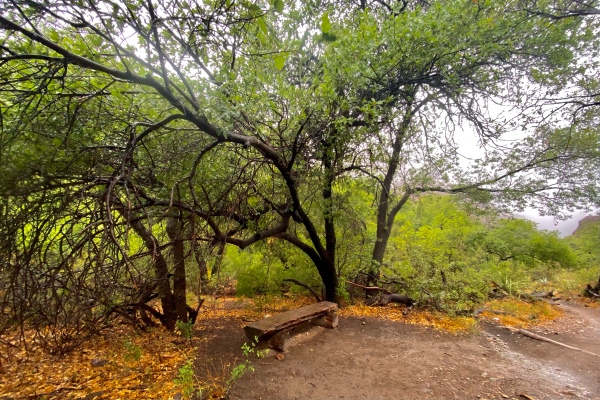
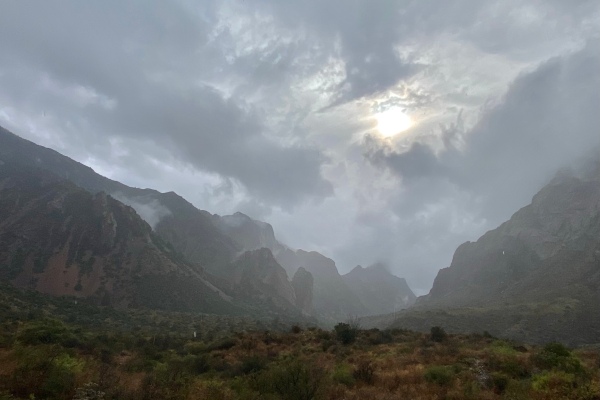
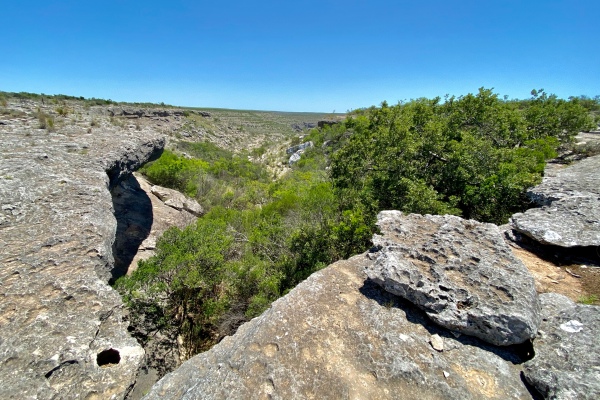
Big Bend Ranch State Park, West Contrabondo Campground
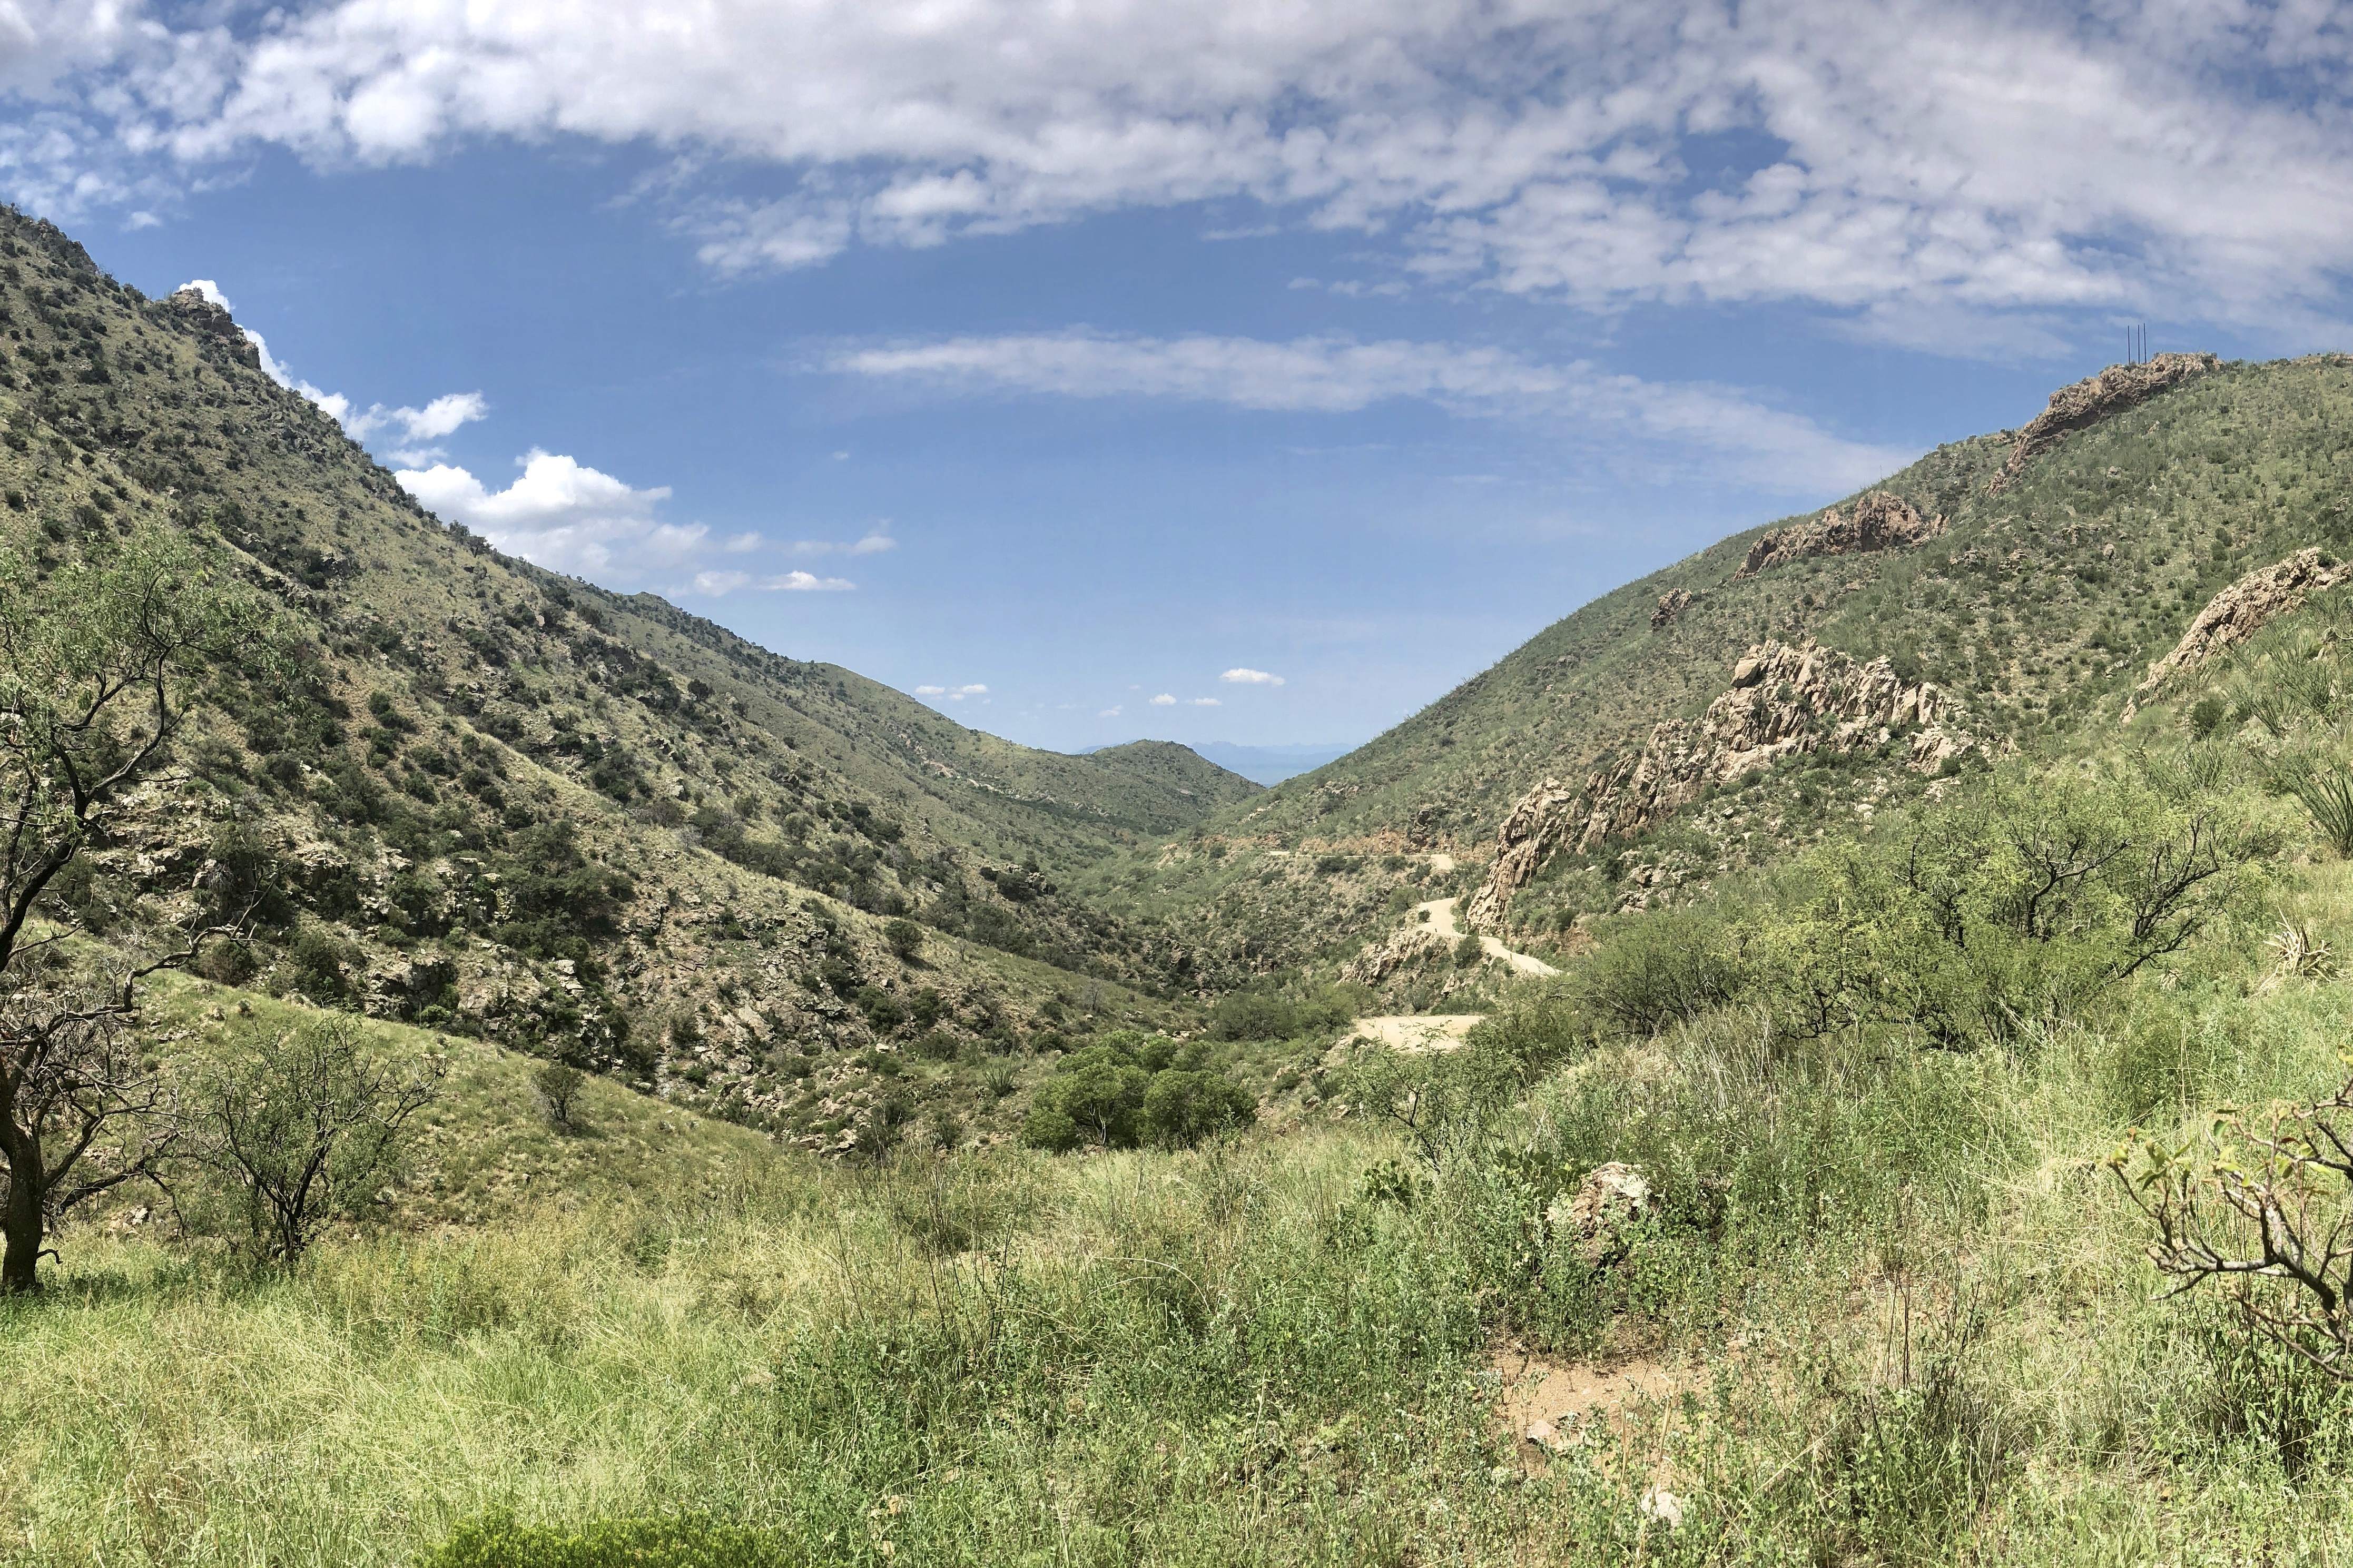
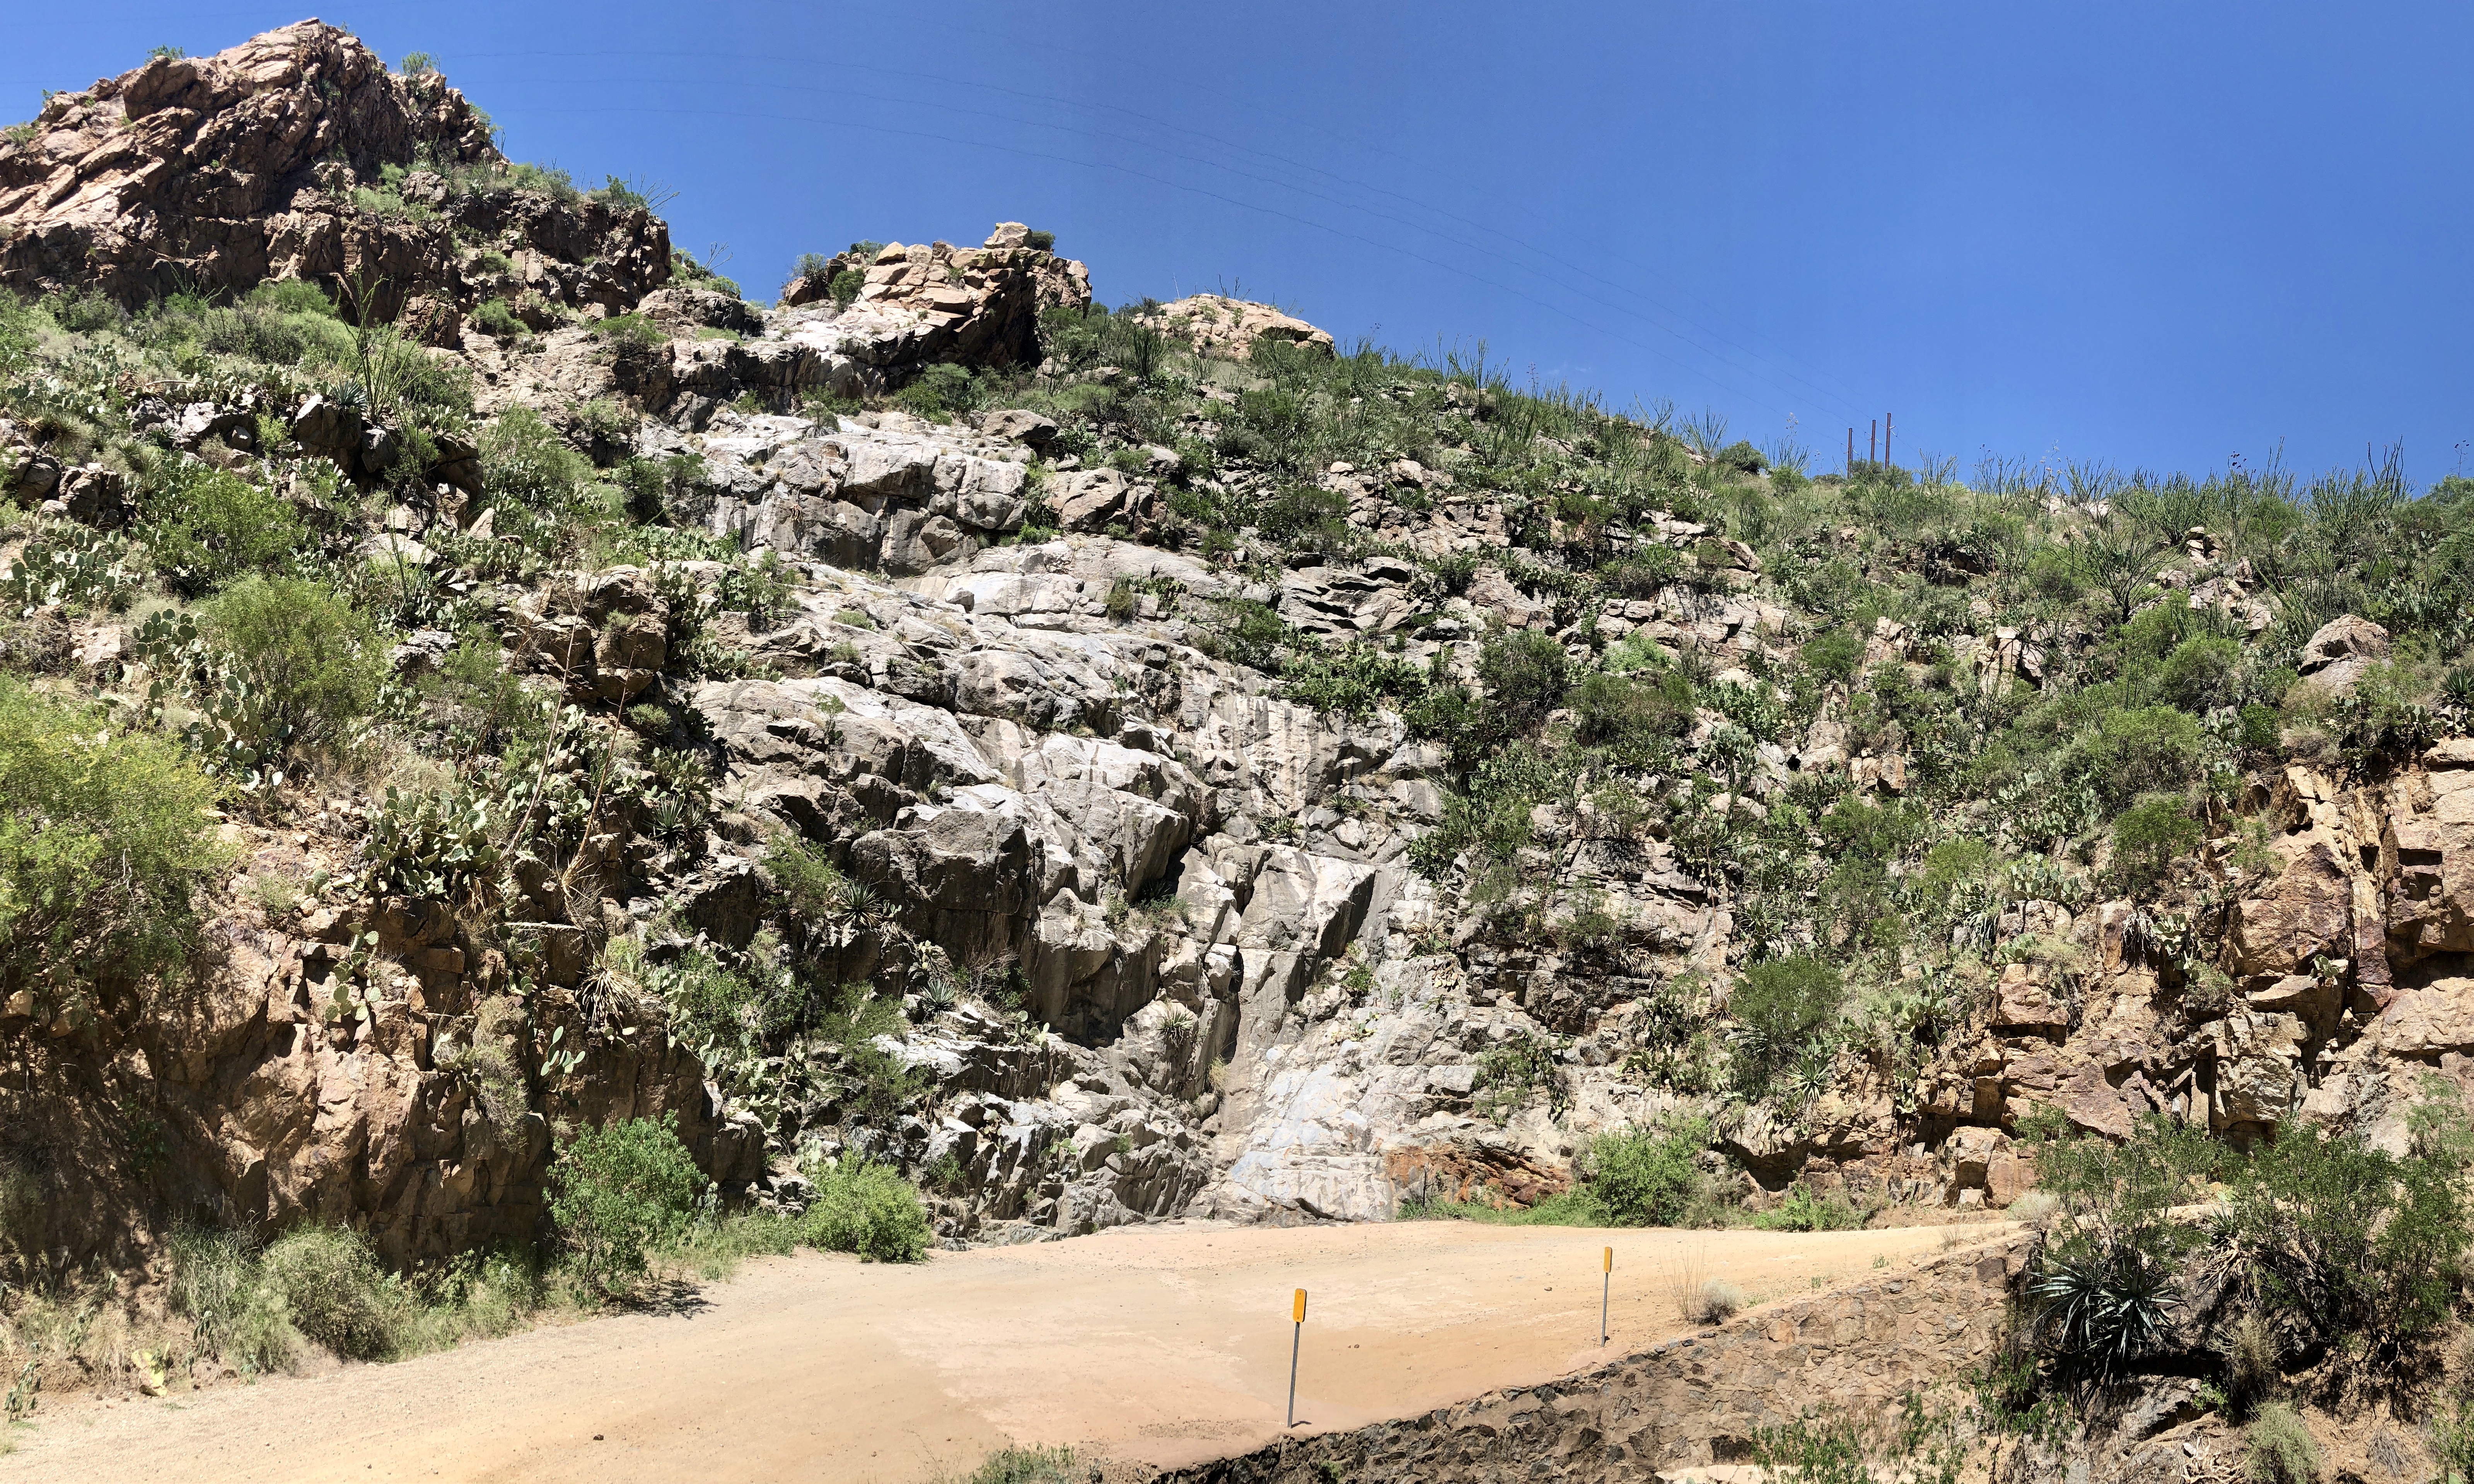
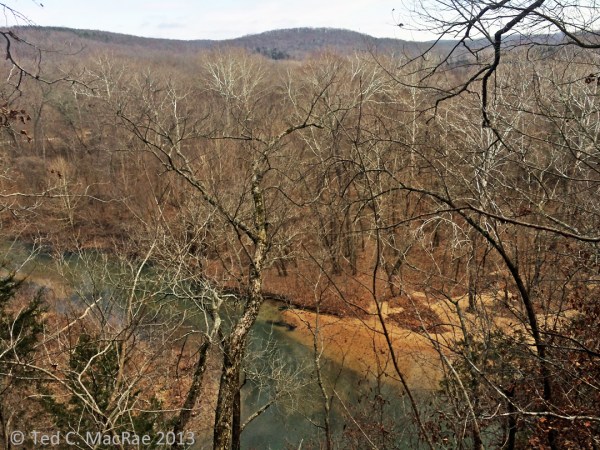
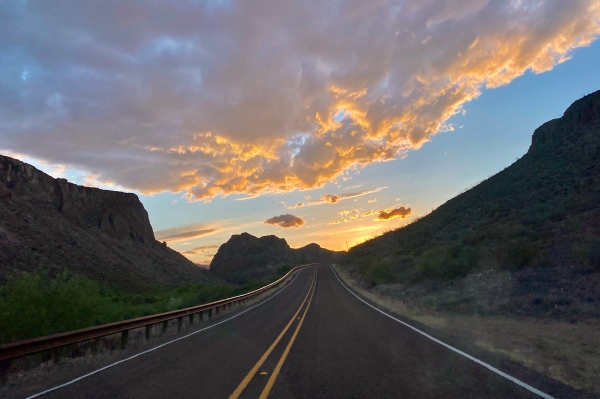
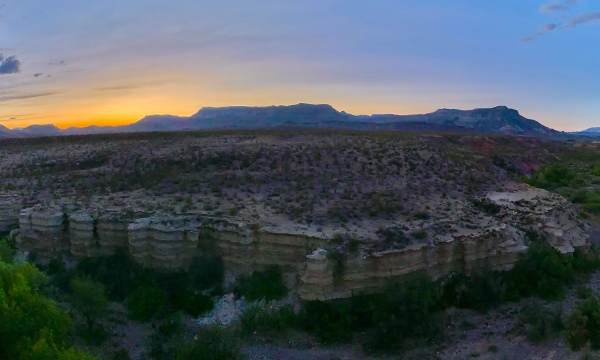
We arrived in Study Butte with just enough time to check into a motel and get dinner before heading out to Big Bend Ranch State Park. The drive through the park was incredible as we searched for a spot to setup the lights. After finding such spot, however, we were greeted as we got out of the car by a stiff, chilly wind. I knew there was no point in going through the trouble to setup, so instead we drove further down the 2-track to an amazing scenic overlook into an impressive box canyon. Words cannot describe the contortions this acrophobiac took to find good position for these photos, but it was well worth the views.
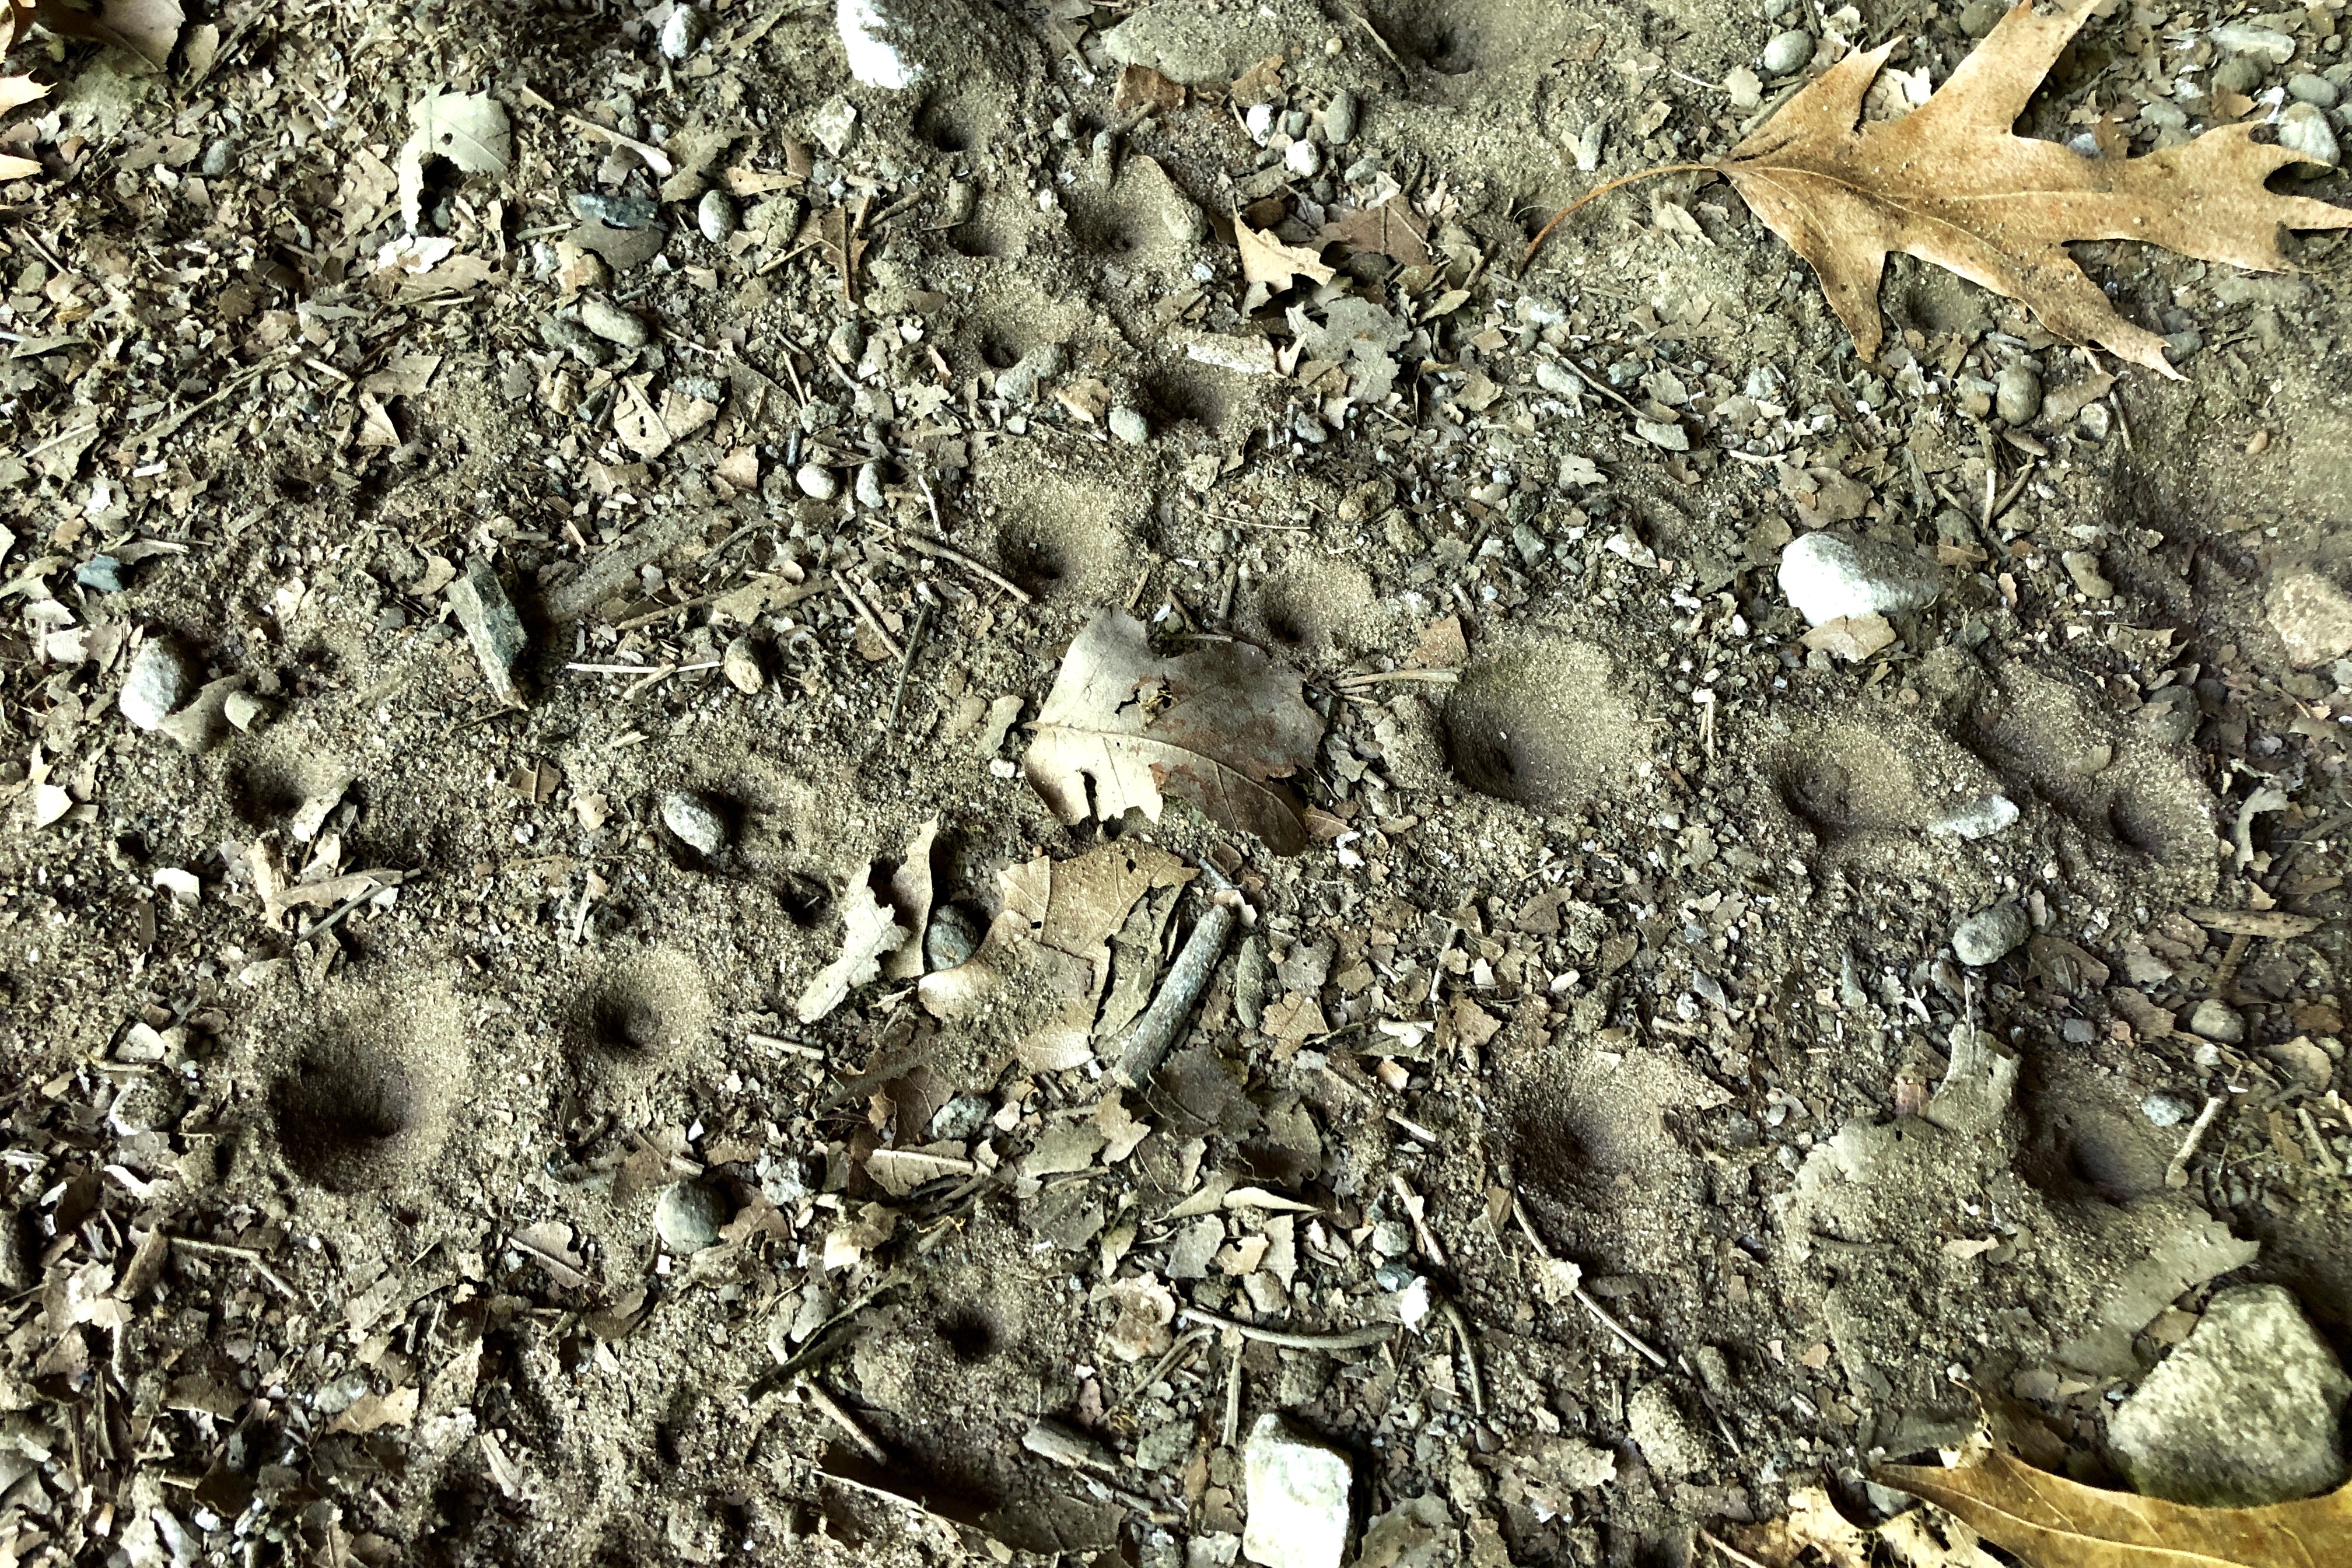
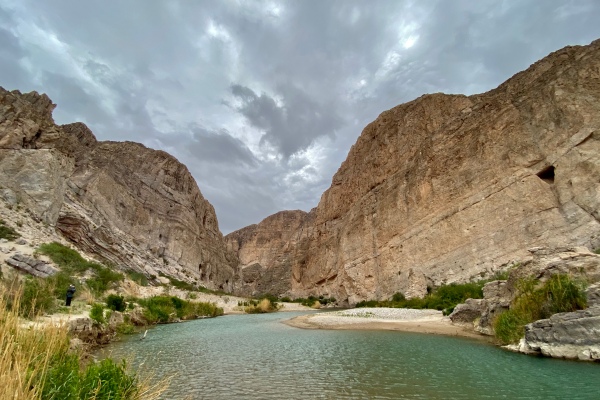
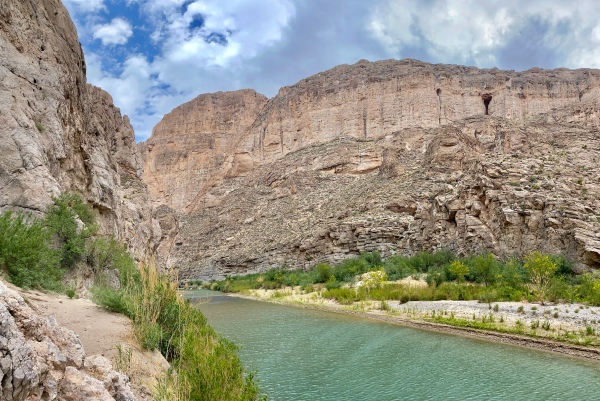
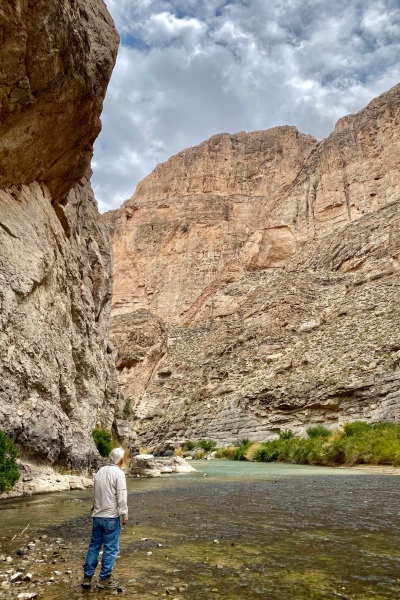
Day 4 – Big Bend National Park, Boquillas Canyon Trail
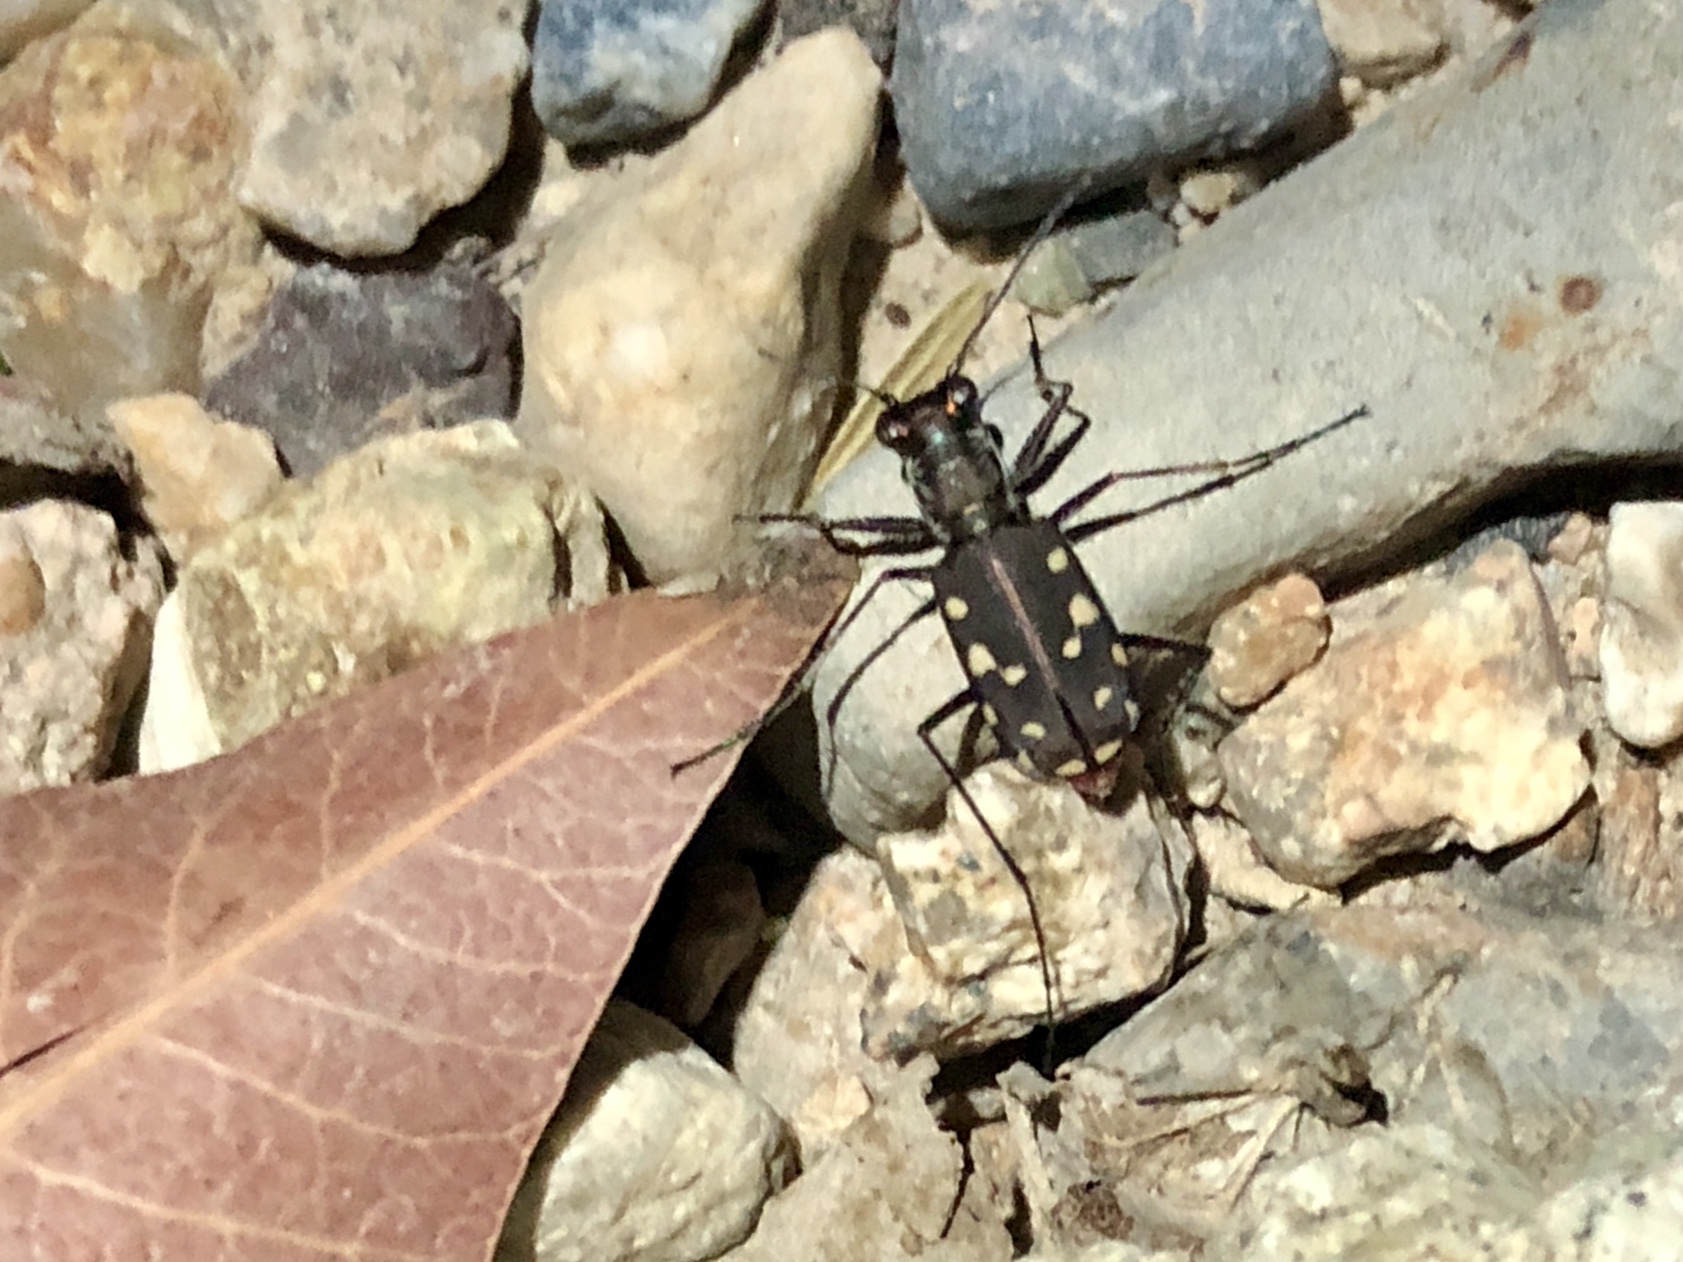
Well, the rain and cold continue to follow us. Rather than trying once again to drive somewhere else to escape, we decided to just sit this day out and visit the national park (not a bad Plan B!). Boquillas Canyon is an amazing slice through the rocks along the course of the Rio Grande River, and we hiked as far into the canyon as we could before sheet rock on the left and deep water on the right prevented any further progress. We saw only two insects—a tiger beetle larva that I “fished” out of one of the many larval burrows we saw (definitely Tetracha, and likely T. carolina) and a velvet ant (black head and pronotum, red abdomen).


Big Bend National Park, near Panther Junction
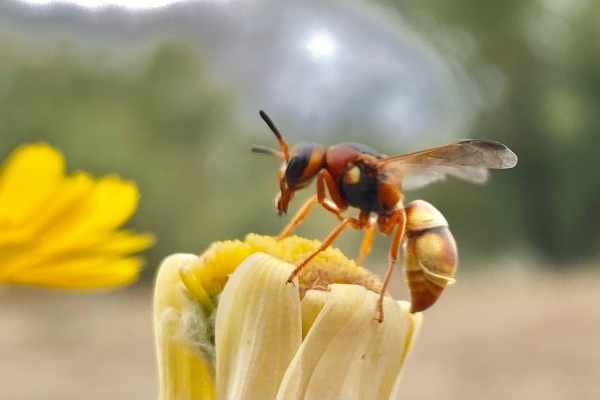
Driving towards the Chisos Mountains after hiking the Boquillas Canyon Trail, we encountered this fine adult male Aphonopelmis hentzii (Texas tarantula) crossing the road.

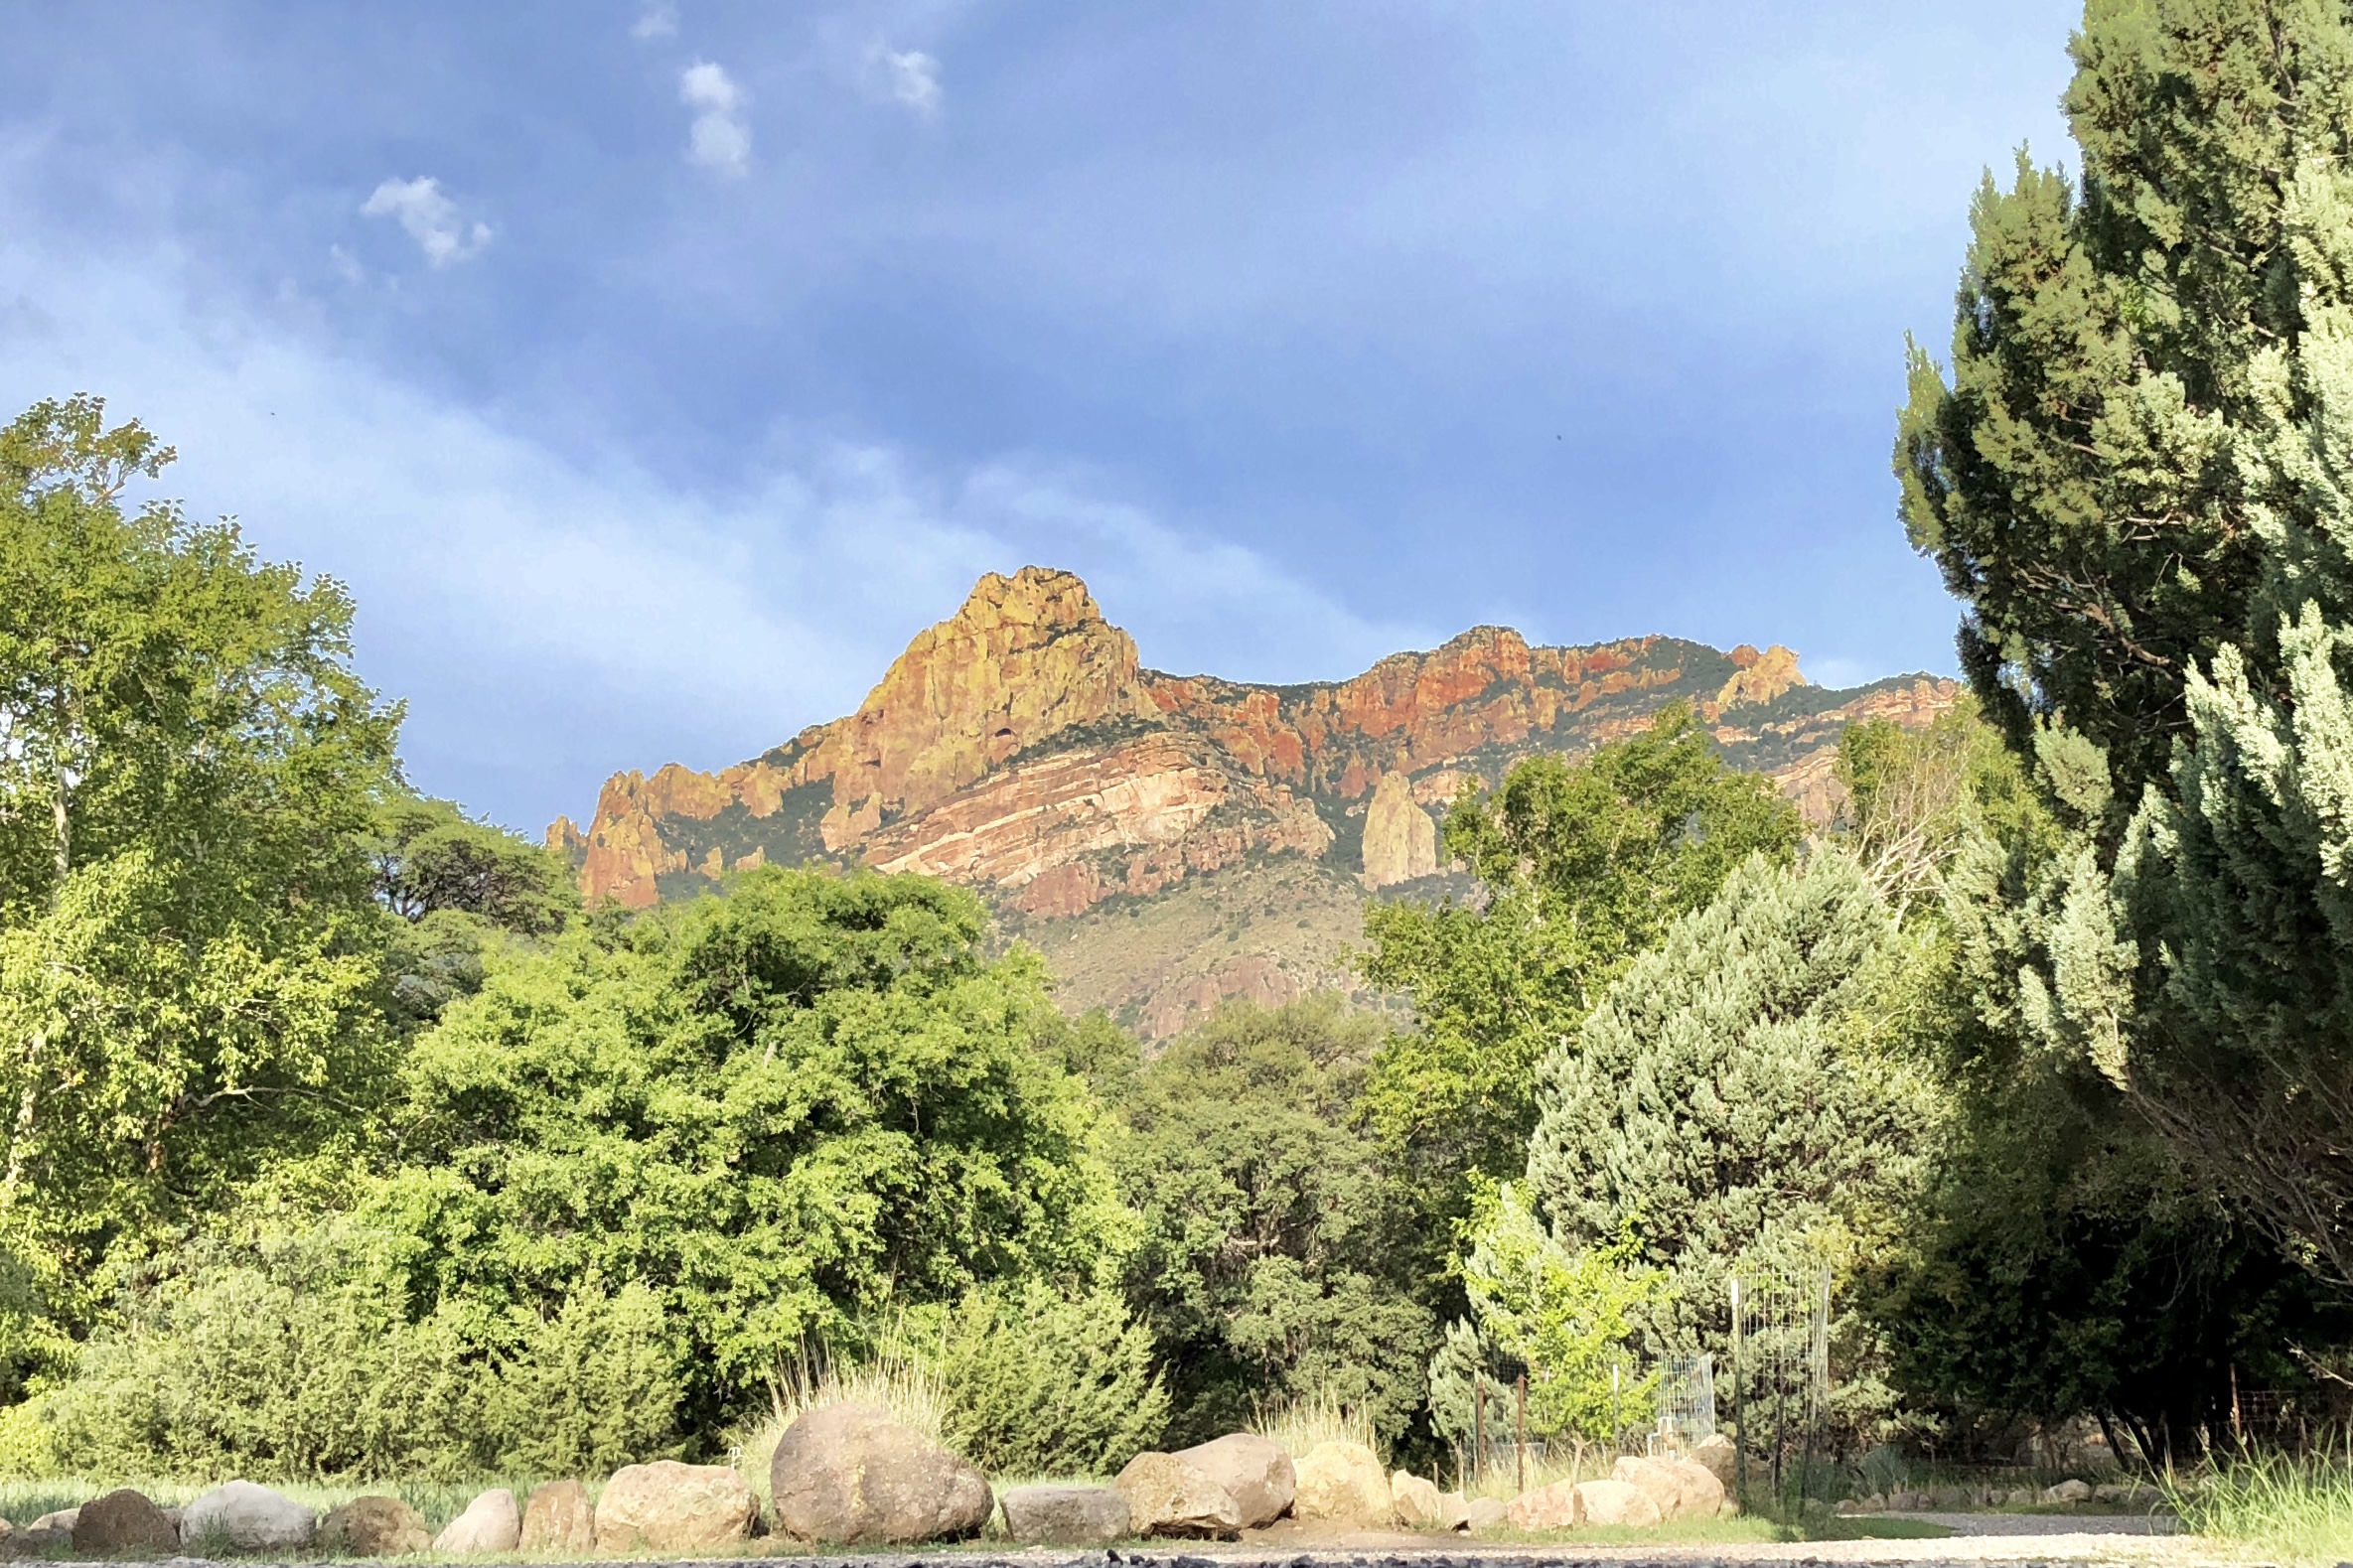
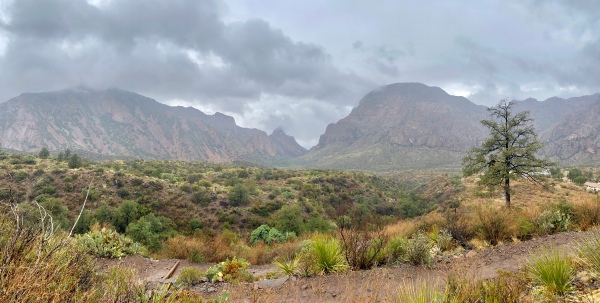
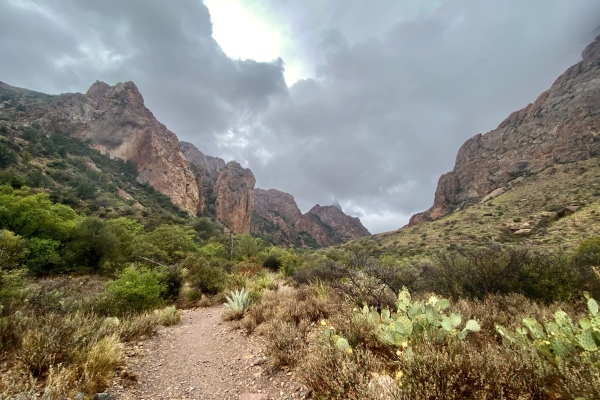
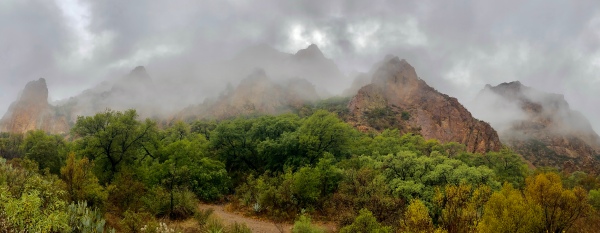
Big Bend National Park, Chisos Basin, Window Trail
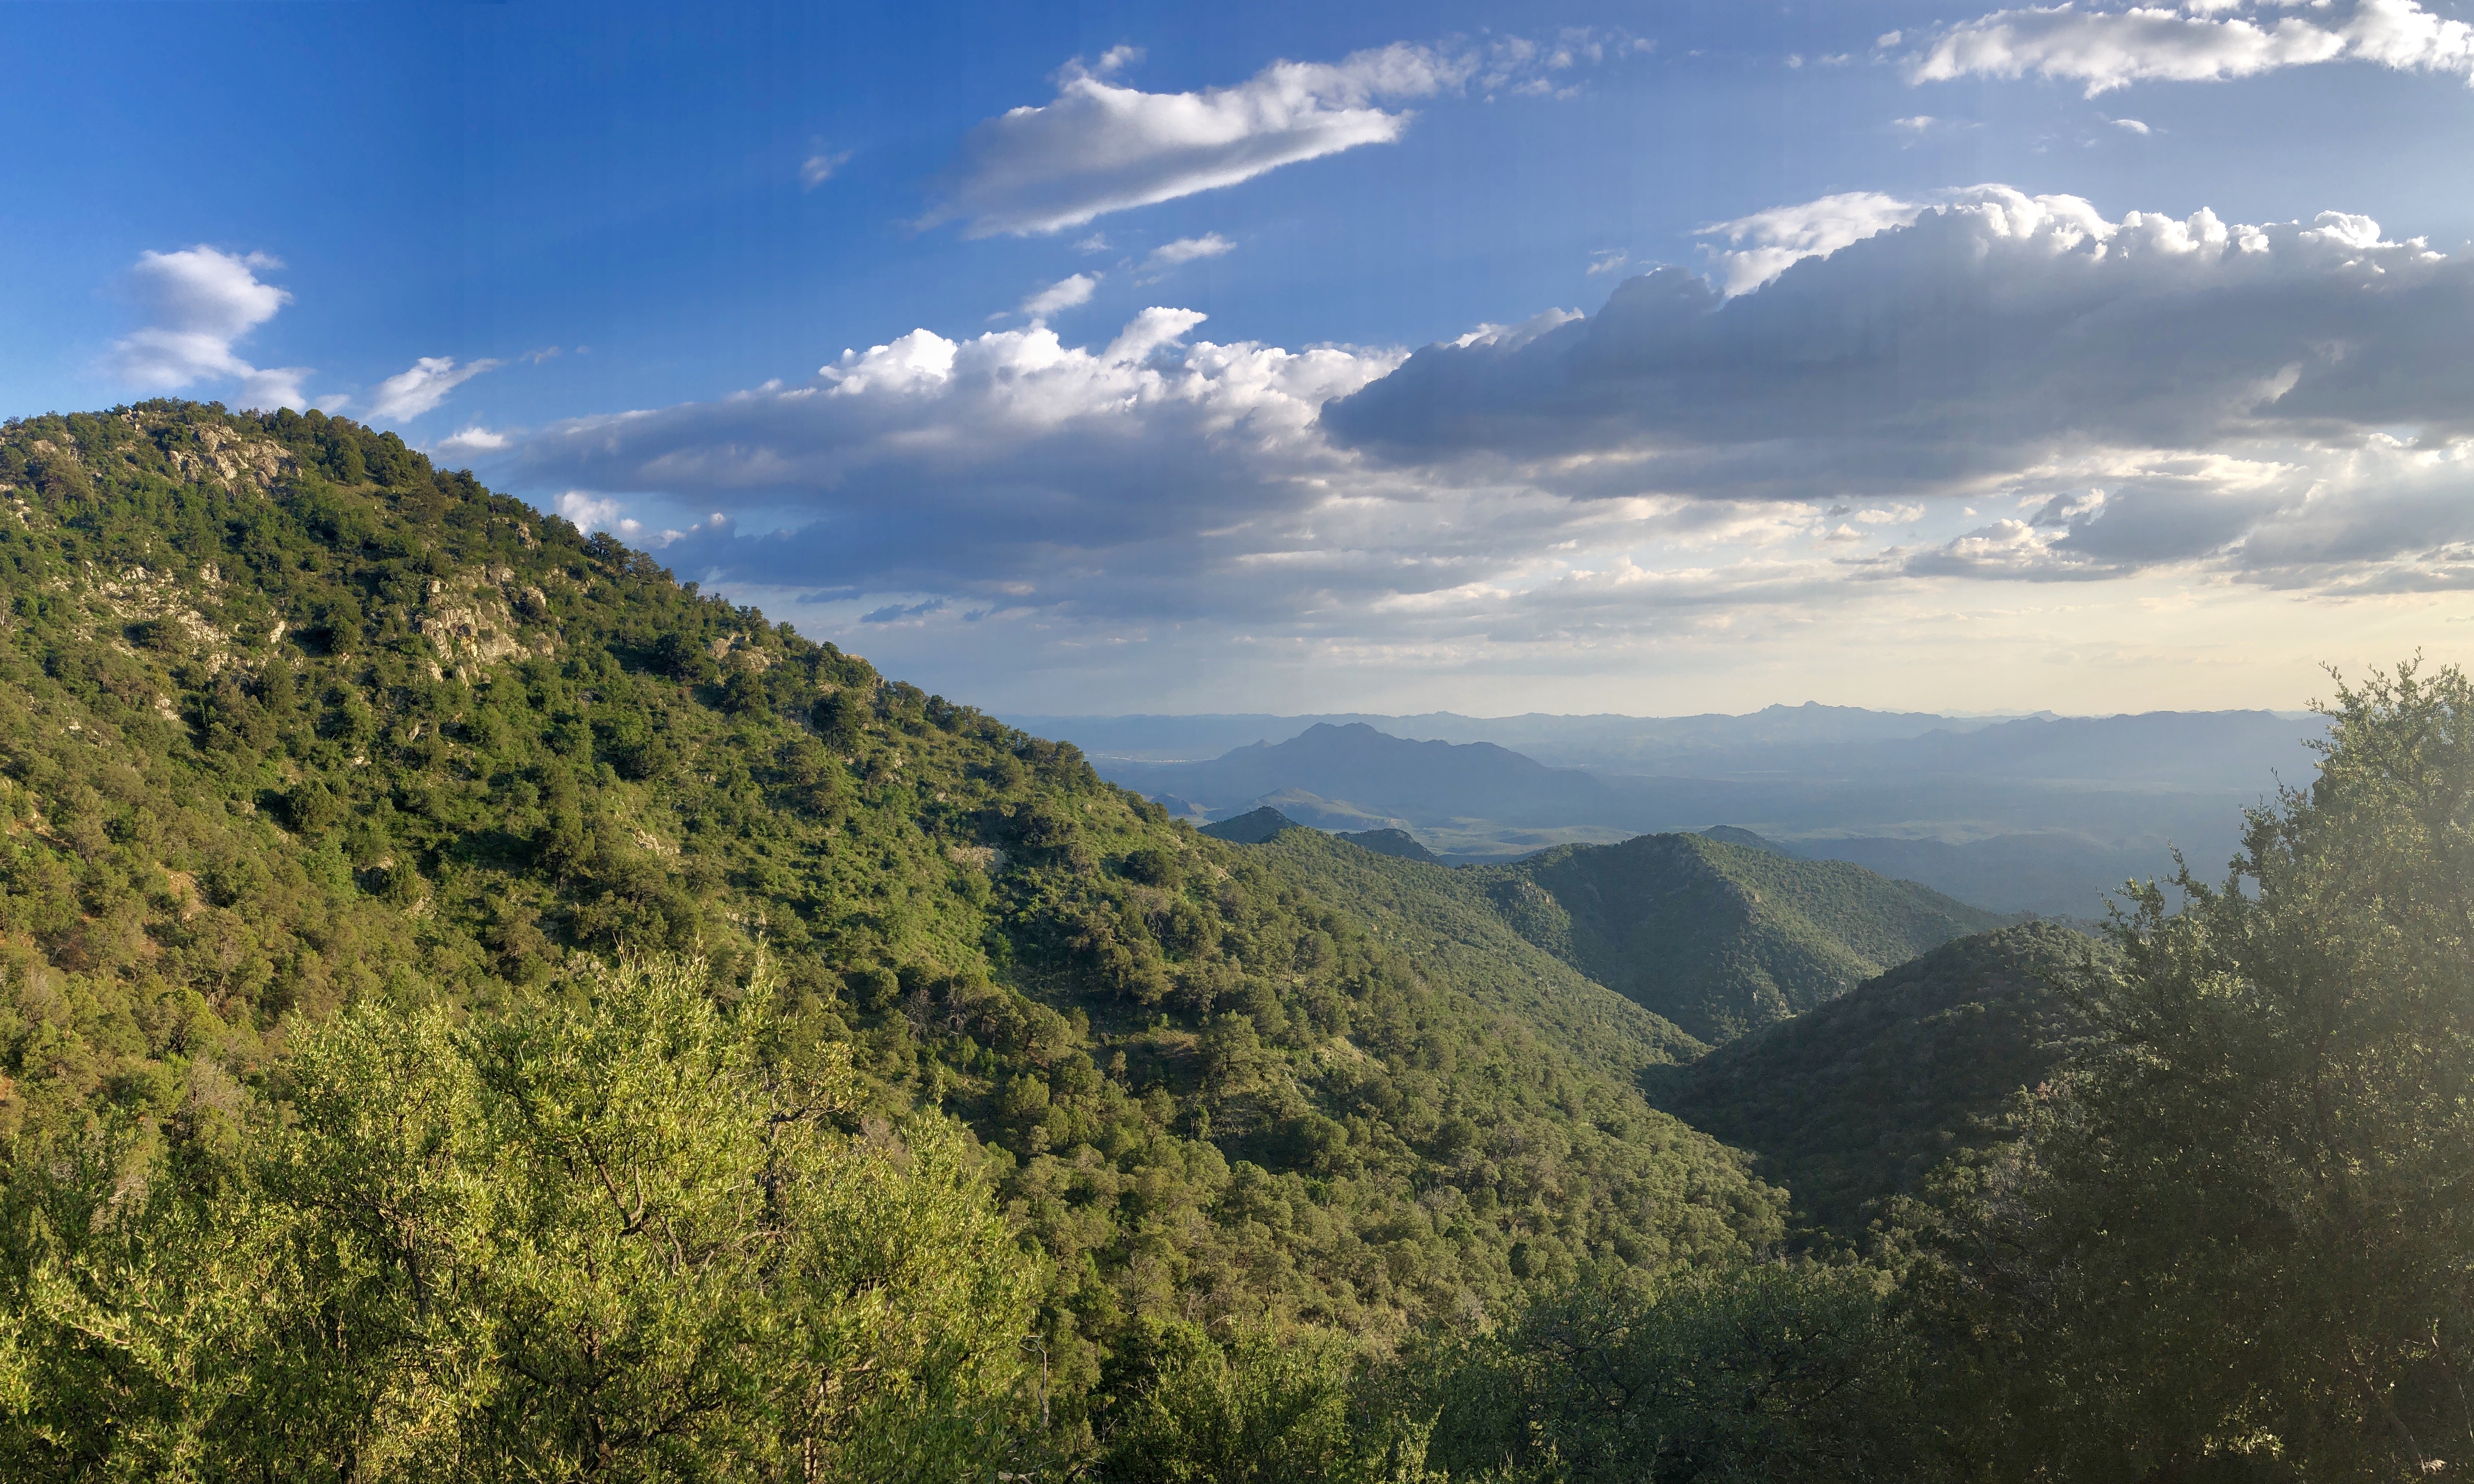
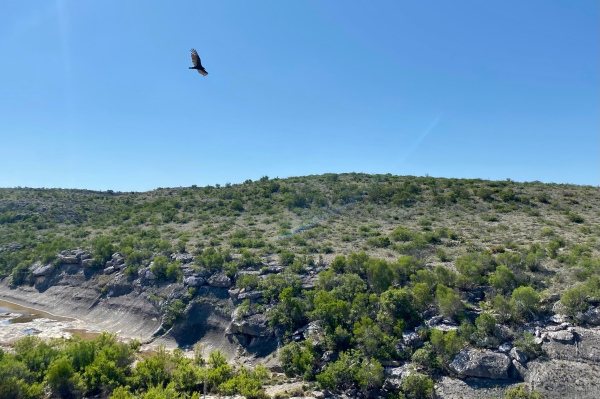
After lunching at Panther Junction, we headed up the into the Chisos Mountains towards Chisos Basin. Heavy clouds shrouded the peaks, so we weren’t sure what we would encounter up there, and once in the cloud zone and then heading down into the basin we could hardly see anything. Suddenly the western side of the basin came into view, still overcast and drizzly but at least free from the heavy fog that shrouded the eastern half of the basin. That made our decision of which trail to hike easy—the Lost Mines Trail under heavy fog versus the Window Trail with semi-clear views. I’ve hiked the Window Trail several times, but the last time was 17 years ago, and Rich in his single attempt a year or two later did not make it to the “Window” due to an impatient 10-year old son in tow. The views on the way down the canyon were spectacular—not despite the rain and clouds but because of it. It is a rare opportunity to see richly moist desert mountains shrouded in mist. At one point on the way down, a Woodhouse’s scrub jay (Aphelocoma woodhouseii) caught our attention—sitting very nearby in a tree before hopping down to the ground and nonchalantly pecking for bugs. Another soon joined him, first landing on a branch just a few feet above me and returning my captivated stare for a few moments before joining his mate on the trail ahead of us… followed shortly by a third individual. Their soft chirpings were a charming contrast to their more familiar raucous calls, and Rich and I soaked in the moment until they moved on. The trail is not an easy hike—nearly 7 miles round trip, dropping over a thousand feet on the way down, and then gaining over a thousand feet on the way back. The “Window,” however, is a sight to behold—a narrow gap in the rocks soaring high overhead with a view out onto the desert floor almost a thousand feet below. There is tempting danger at the window—its smooth, water-carved rocks are deceptively slippery even in dry conditions, and with the rain of the day they were especially so. I would not be surprised to learn that at least one person had made a fatal error in judging how close to the window one can get. They would have had plenty of time to think about that mistake on the way down! The views on the way back up were even more breathtaking, as fog enshrouded the high peaks towering above us. Periodically the sun attempted to push through the clouds, creating surreal lighting in a battle of sun versus rain, but eventually the rain won out and fell steadily on us for the last, switchback-laden mile back to the trailhead. As for insects, we actually did see some despite the rain—a few blister beetles resting torpidly on yellow composite flowers.


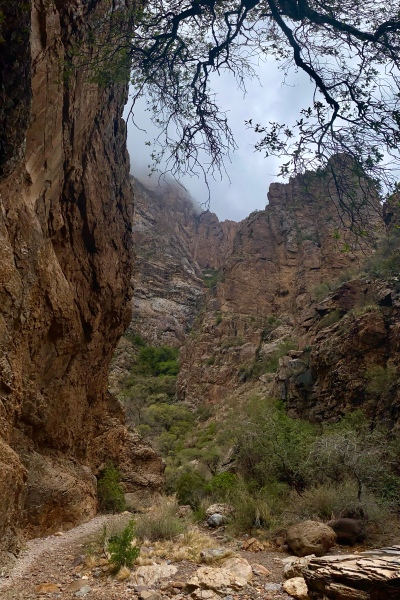

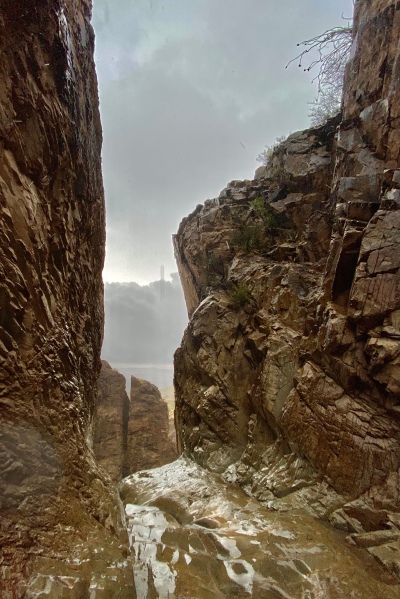


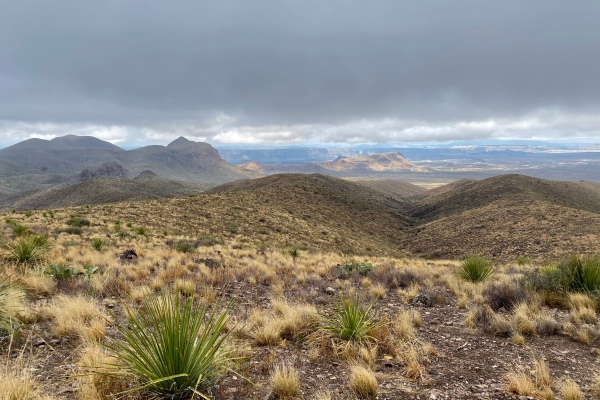
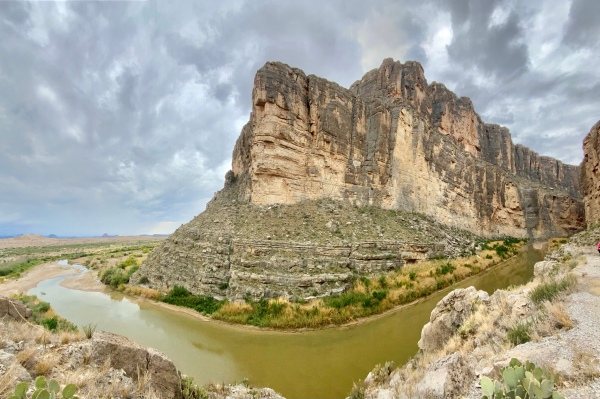
Day 5 – Big Bend National Park, Sotol Overlook
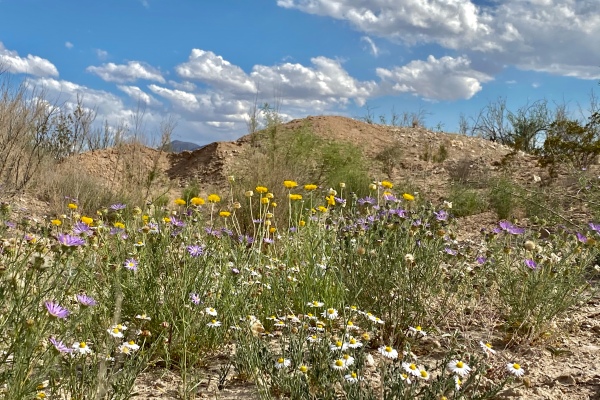
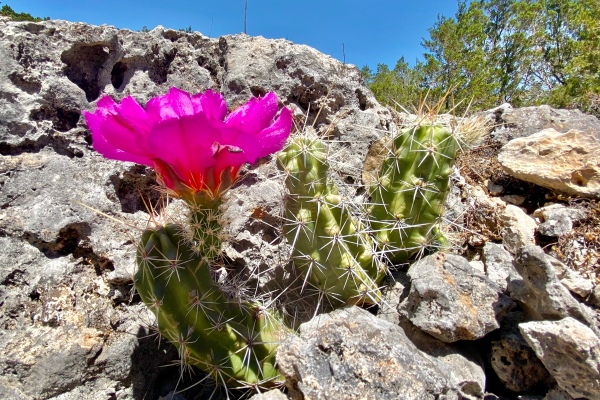
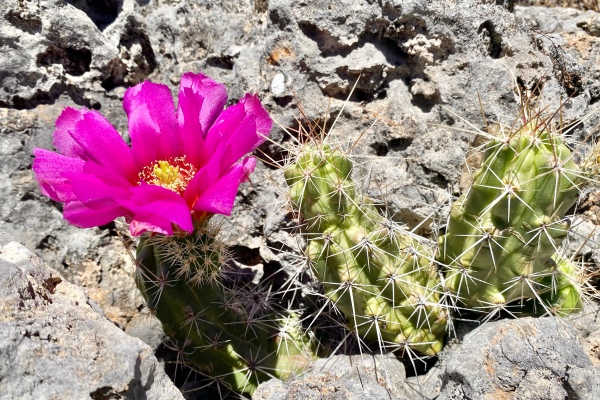
We’re on our way to Santa Elena Canyon and stopped at this overlook. From a distance of 14 air miles, the canyon entrance looks like a tiny split in the rocks, belying the 1000-foot canyon walls that await us. Cacti were nicely in bloom, if a bit rain battered—two species of yellow-flowered Opuntia (pricklypear) and the always extraordinary pink flowers of Cylindropuntia imbricata (tree cholla). No insects were to be found, but we did find a live Orthoporus ornatus (desert millipede)—the first that we’ve seen on this trip—who obliged us by coiling into its classic defensive pose.


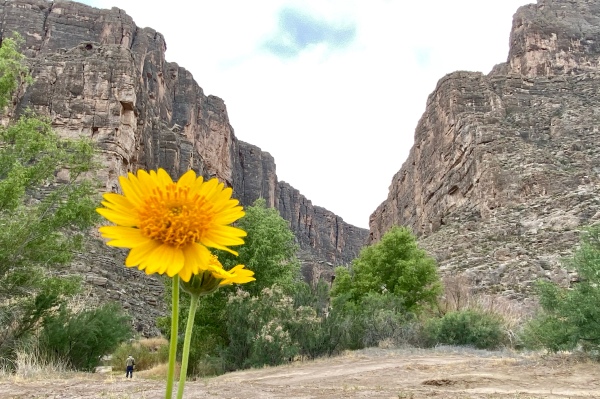
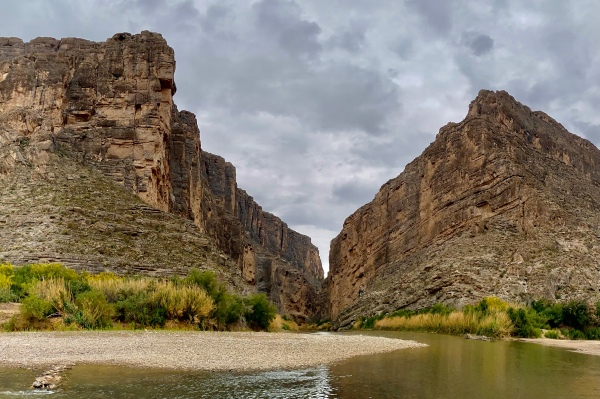
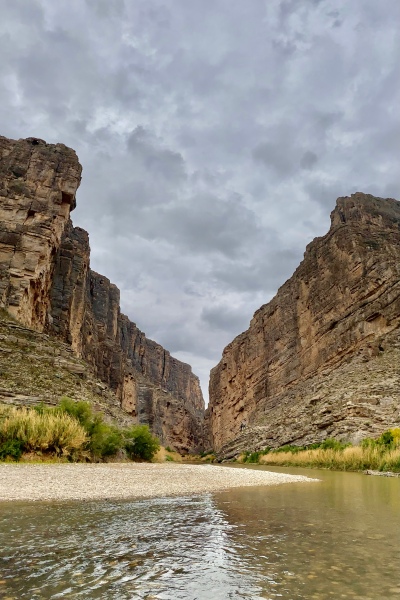
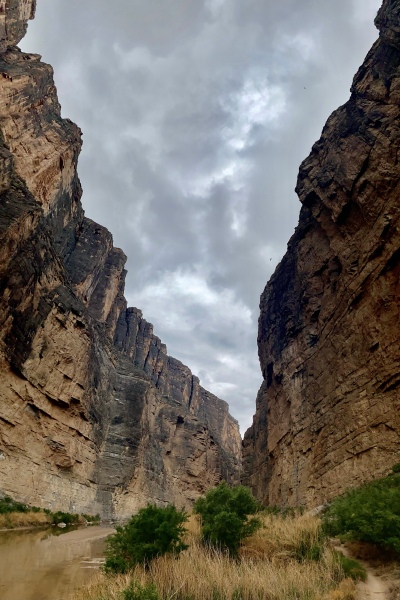
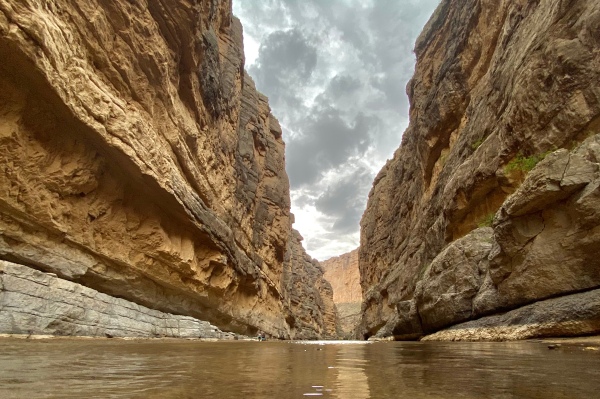
Big Bend National Park, Santa Elena Canyon
From 14 air miles away, Santa Elena Canyon looks like a tiny split in a little cliff (see previous post). Up close, however, it’s soaring walls tower 1000 feet overhead! The hike into the canyon features a tortuous staircase to bypass a narrows, followed by a leisurely stroll along the canyon bottoms along the Rio Grande River. Rain last night has triggered an en masse millipede emergence, and even a few insects were seen: velvet ant; Acmaeodera mixta, Trichodes sp. and Gnathium sp. on yellow composite flowers; and Omorgus sp. crawling in the sand.


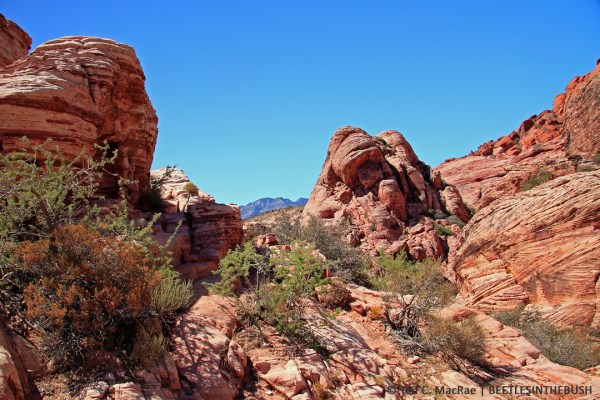
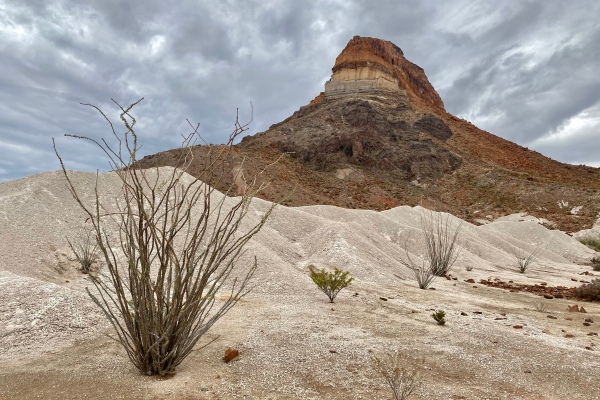
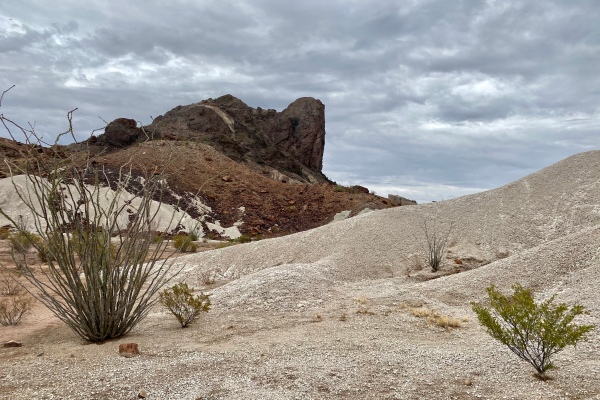
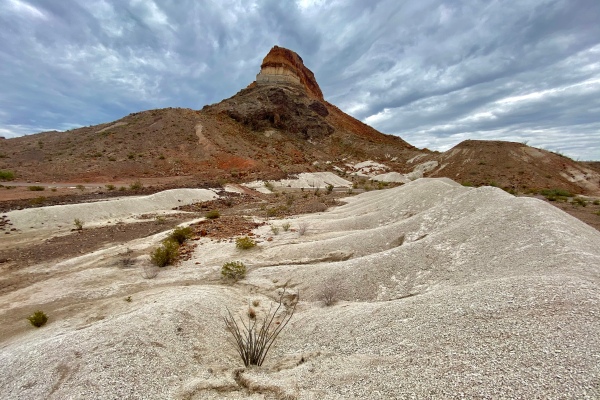
Big Bend National Park, Cerro Castellan (Castolon Peak)
The layers visible in Cerro Castellan reveal millions of years of volcanic events. Stacked in this tower are several lava flows and volcanic tuffs (ash deposits), with layers of gravel and clay from periods of erosion between eruptions. Cerro Castellan’s cap rock is the same lava that formed the Chisos’ South Rim. The lighter orange and gray layers beneath are tuffs.
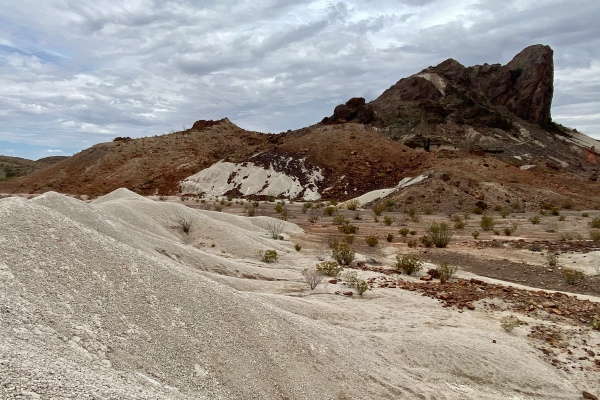

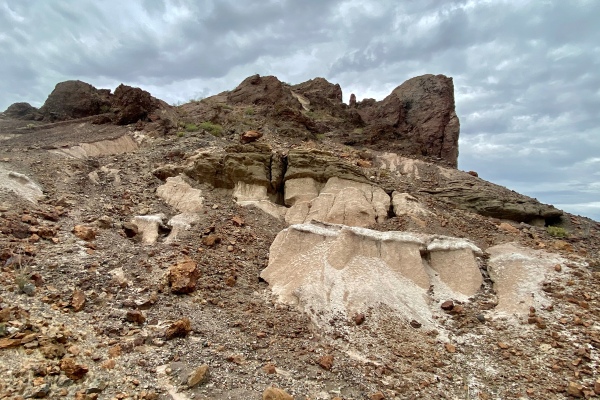

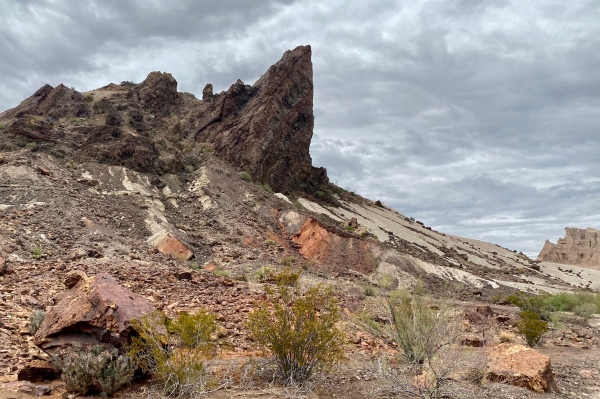
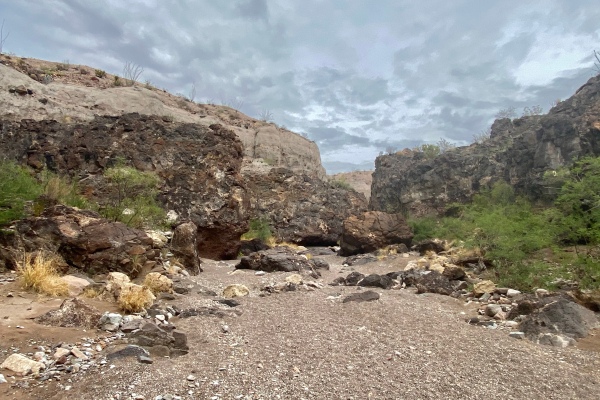
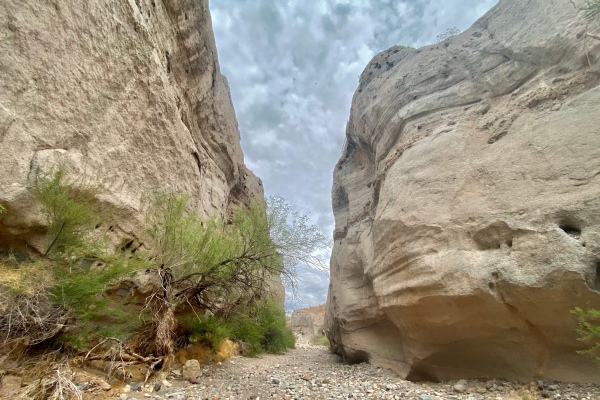
Big Bend National Park, Tuff Canyon Trail
Some of the oldest layers of volcanic rocks lie at the bottom of Tuff Canyon. It is dry most of the time, but summer thunderstorm runoff churns through the canyon, cutting it deeper. This canyon is narrower and deeper than most others in Big Bend, partly because the light gray volcanic tuff is relatively cohesive. Swift, powerful floodwaters will cut down through any kind of bedrock, but the tuff is better able to resist the widening effects of sideward erosion.


4.6 mi W of Langtry
After leaving Big Bend National Park we started making our way towards the Del Rio area in Val Verde Co., where we plan to meet up tomorrow with a few other beetle collectors (Dan Heffern, Brian Raber, and Ed Riley). I noted that our path took us right by the type locality of the recently described tiger beetle, Amblycheila katzi. I didn’t have much hope of actually seeing the species, given that the season seems to have even really started yet and the earliest record of the species is the 23rd of May. Nevertheless, since we happened by the spot right as dusk was falling it seems a good idea to at least try. First we walked the limestone 2-track just to see what was out and about (just a few darkling beetles), then we started checking the limestone ledges where the tiger beetle can be found. We checked about 100 m of ledge without seeing any, and I was about ready to call it a night when we finally spotted one. It was running in a seam about 2 m above the ground and was unmistakable. My attempt tiger an in situ photo failed at first, and it almost escaped deep into a crevice before I pulled out my long forceps and pulled him out by a tarsus. It gave me a healthy pinch when I grabbed it while fumbling in my pack for a bottle, but eventually I prevailed. Later on I placed it back on the ledge and covered it with the Nalgene bottle cap, waited for it to calm down, then carefully lifted the cap and got a couple of shots before it began scurrying again. We checked another 50 m of ledge without seeing any and decided to call it a night.


Day 6 – Comstock (prologue)
The owner of the motel in which we stayed was super friendly and kind enough to leave a key in the door for our very late arrival last night. Settling up this morning, I saw this on the wall (right next to his vaccination card—two doses) and just had to get a pic. He was only too happy to oblige when I told him how awesome it was and could I get a picture. Hey, no reason to reveal true political leanings if it means we can all just get along.


Amistad National Recreation Area, Spur 406 Campground
A quick stop here on the way to meet up with Dan, Brian, and Ed near Devil’s River. There were lots of dead and dying Acacia constricta (whitethorn acacias), off of which I beat a diversity of cerambycids and buprestids from both the dead and dying branches. I found one small sapling of the same with evidence of fresh woodboring beetle larval feeding, so I collected it as well for rearing. Other than that I just collected a few weevils off of living Prosopis glandulosa (mesquite) for weevil-specialist Bob Anderson.

Devils River near Dry Devils River
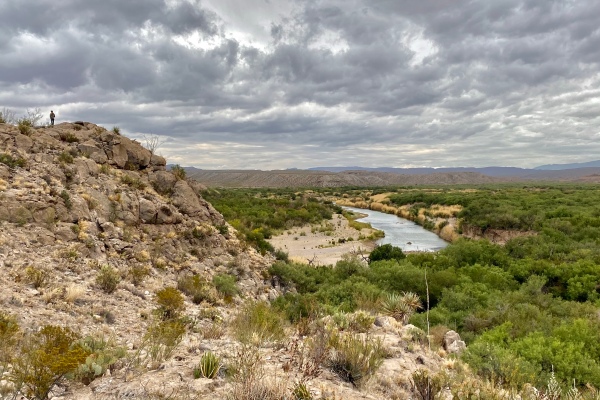
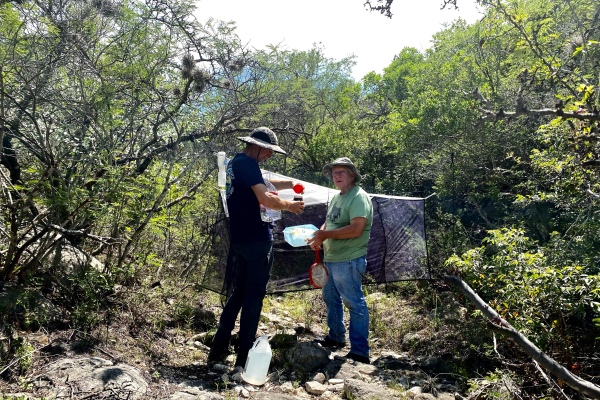
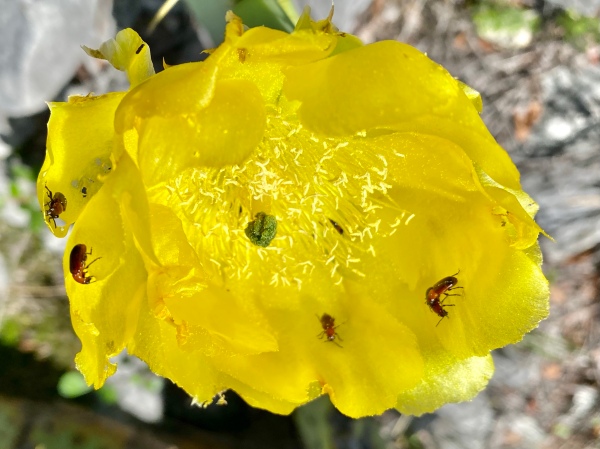
We met up with Dan, Brian, and Ed north of Del Rio and, after exchanging peasantries, followed them into a private resort surrounding a stretch of the Devils River*—considered by some to be the most unspoiled river in Texas. Dan had arranged for access after befriending Dave Barker, a commercial herpetologist who had built a home on property overlooking the Devils River and also a guest cabin on property overlooking nearby Gold Mine Canyon. We met up at the cabin and then carpooled to a spot along the Devils River where Dan and Brian had placed a variety of traps that needed servicing. While they took care of that, Rich, Ed, and I collected in the area around where the traps had been placed. I started off beating dead branches of Vachellia farnesiana (huisache), sweeping blooming Salvia sp. (sage), and beating dead branches of Acacia rigidula (blackbrush acacia) down by the river but collected only a smattering of beetles. I then clambered up the rocks and found good numbers of Acmaeodera spp. visiting flowers of Echinocereus enneacanthus (strawberry cactus) and Opuntia engelmannii (Engelmann’s pricklypear). After collecting my fill of those beetles, I returned to the riverbanks and noticed some large Carya illinoensis (pecan), from which I beat a few Anthaxia (Haplanthaxia) sp. (hoping they are one of the recently described taxa). By then, Dan and Brian had finished servicing their traps and gave me a few specimens that had been collected in their ethanol-baited Lingren funnel trap.
* The accepted usage of the name is without an apostrophe, although the reason for this is a matter of debate.

After finishing along the Devils River, Dave invited us to his home for a few post-collecting beers. Spectacular views overlooking the river.

Gold Mine Canyon
We setup a variety of light stations at Dave’s cabin a little east of the river. It was warm and dry, so conditions were good, if a bit windy. My two ultraviolet light stations a bit north of the cabin ended up catching the lion’s share of cerambycids, although it was mostly elaphidiines and a Lepturges sp. We also picked up a few tenebrionids and a Carabidae crawling on the ground near the lights. Ed’s mercury vapor/ ultraviolet station on the road west of the cabin attracted a few more cerambycids, including a Lagocheirus sp. Dan, however, got the catch of the night—a Goes that came to Dan’s $6 battery-powered lantern on the road south of Ed’s station. We at first thought it might be G. novus, but that Dan later decided it was just a very lightly marked G. tesselatus. Zephyranthes chlorosolen (Brazos rain lily) blossoms were beautiful at night, their stark whiteness catching the beam of the headlamp.

Day 7 – Gold Mine Canyon
Rich and I spent the morning walking the grounds around Dave’s cabin while the others packed up and got ready to leave. I found some oak (Quercus vasseyana) saplings infested with cerambycid larvae, which I cut and bundled to bring back for rearing. Acmaeodera were already coming to the flowers—a couple of small ones on an undetermined white composite, three different species on Opuntia engelmannii (Engelmann’s pricklypear) and Echinocereus enneacanthus (strawberry cactus) flowers, and a couple on Coreopsis? flowers. I beat some of the Diospyros texana (Texas persimmon) looking for Spectralia robusta but did not find any. It got hotter than blazes real quick!
After Dan, Brian, and Ed left, Rich and I went down to the canyon entrance to beat on the oaks and Texas persimmons that dot the sides of the canyon. Nothing was on either plant, however, and I ended up again concentrating on the diversity of Acmaeodera that were coming to flowers of Coreopsis sp., Opuntia engelmannii, and an unidentified yellow composite. I did beat a single Cleridae off a dead branch of mesquite.

Devils River near Dry Devils River
After finishing at Gold Mine Canyon, we came back to the Devils River crossing near the first stop we made here for our final stop of the day. Temperatures had maxed out at 99°F! and I wasn’t too motivated to collect much more today, but when we arrived at the spot I noticed some declining Platanus occidentalis (American sycamore) with large emergence holes suggestive of Mallodon dasystomus and old fallen branches with the same suggestive of Polycesta elata. The tree with the Mallodon holes was much too large to cut (and embedded within a thicket of poison ivy), so I occupied myself by collecting a few more Acmaeodera off of Opuntia engelmannii flowers. As I walked the roadway I noticed more sycamore with some smaller trees in the grove that looked recently dead. One was dead from about three feet up and had buprestid workings under loose, peeling bark. I cut just above the live portion (3–4” diameter) and took three 4-ft sections of the trunk above that point, each cut showing internal galleries. If P. elata emerges from these pieces of wood I will be “elated” [Later edit: I did rear the species!].
Gold Mine Canyon
For blacklighting tonight we decided to bring the lights down to the mouth of the canyon where we collected this afternoon so we could have acces to anything associated with the oaks. Unfortunately it was a much slower night than last night and cooled off quickly despite the high heat earlier in the day. I only got three cerambycids (one Ecyrus and two Aneflomorpha) and a few clerids at the lights. I also walked the jeep track leading to the mouth of the canyon and the main road outside and didn’t see anything until I almost got back, when I noticed a beetle sitting on the trail that looked a bit odd. When I picked it up I realized it was a buprestid in the genus Melanophila—what the heck?! Totally unexpected to see this beetle at night and especially on the ground instead of on a tree. I suppose it is one of the juniper-feeding species (since pine doesn’t occur here).


Day 8 – Gold Mine Canyon
Our plan today was to head over to some spots further west in Val Verde Co., but before leaving the cabin we did a bit of walking around and took a last few photographs.


22 mi N Del Rio
I had noted a few scattered plants of Senna roemeriana (two-leaved senna) at this spot a couple of days ago when meeting up with Dan but didn’t have the chance to sample them for Agrilus obtusus—one of my target species for the trip. I found one on the second plant I checked, so I went back to the truck to get my big camera hoping to photograph one in situ. I didn’t see anything on the next plant, but when I tapped it over my net there was another one! I did that for the next hour or so—inspecting and tapping—and never saw another one. Rich did get one sweeping the S. roemeriana (in an area I’d already worked) and was gracious enough to give it to me. There were also tiny bruchids and clerids on the plant. Other than that I got a couple of Acmaeodera mixta sweeping, a couple of Canthon sp. in flight, and a Euphoria kerni on the flower of Zephyranthes chlorosolen.
Hwy 90 at Del Rio River
I first visited this spot nearby 30 years ago based on a tip by Dan Heffern, who had reared a Polycesta elata from Fraxinus greggii (Gregg ash). I found the ash on that visit, though I didn’t find any wood infested with that species here, but what I did find was Diospyros texana (Texas persimmon) infested with Spectralia robusta and managed to rear out a few individuals. That was my quarry today, but when I arrived the abandoned road on the northwest side of the bridge was fenced and posted. I took a look on the southwest side and found open access up top and decided to hike down towards the ravine from that point. Things seems to be about as far along here as they were at Devils River, with not much activity except for Acmaeodera coming to the Opuntia engelmannii flowers, albeit not quite the diversity. I found a few more also on flowers of an undetermined yellow composite, Coreposis sp., and an undetermined white composite. Closer towards the ravine I found just a single large F. microphylla (with no signs of infestation) and several D. texana—two of which had the half-live/half-dead branches in which S. robusta larvae live and showing the emergence holes of adults. I collected both branches and will bring them back for rearing.


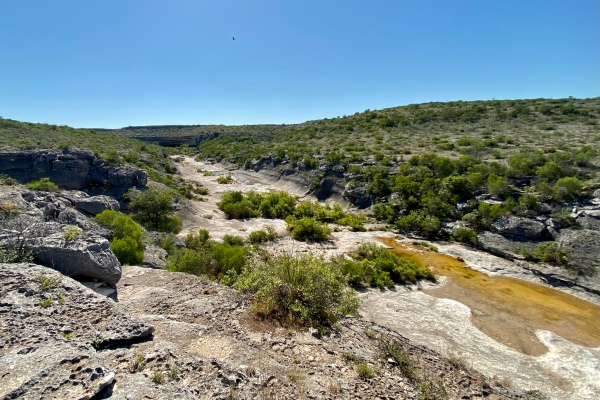
Amistad National Recreation Area, Pecos River Access Nature Trail
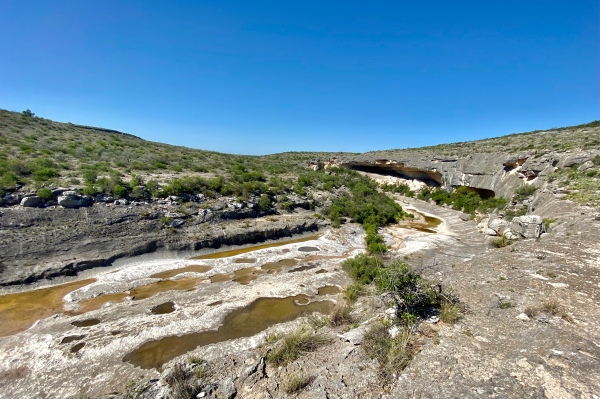
Just a quick stop at the Pecos River Access on the east side to walk the short nature trail and gaze at the 300-ft high, 100 million-year-old (Cretaceous Period) limestone bluffs that the Pecos River has cut near the junction with the Rio Grande River (the latter can be seen on the left side of photo 2). The first photo also shows the old road that was originally used to cross the river snaking down the west bluff—traffic today uses the tall bridge in the right side of the photo.


Seminole Canyon State Park, Canyon Rim Trail
We came here looking for oak potentially infested with Spectralia roburella. We didn’t find any oak on this trail, but I did find a Acacia rigidula (blackbrush acacia) showing signs of infestation by buprestid larvae (difficult to find such this year because the freeze in February apparently killed or severely knocked back most of this species). I cut up and bundled the wood to bring back for rearing.
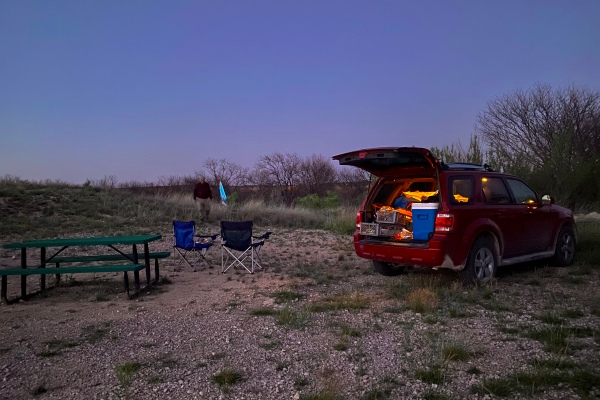
Amistad National Recreation Area, Spur 406 Campground
We got to Seminole Canyon State Park too late to check with the supervisor about setting up our blacklights at the park, so we came back to Spur 406 Campground where we’d collected a few things two days earlier. Temps were okay and there was no moon or wind, but it was still a very slow night—for me just a couple of elaphidiines, two trogids, two Digitinthophagus gazella (why do I continue to pick these things up?), and a bostrichid.
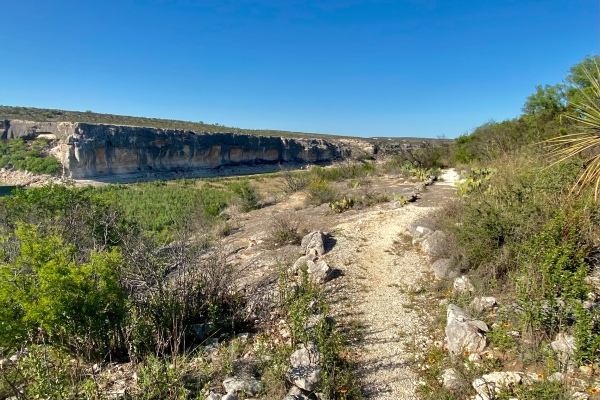
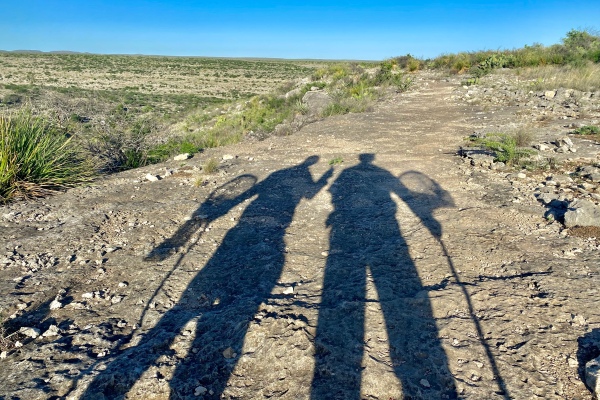
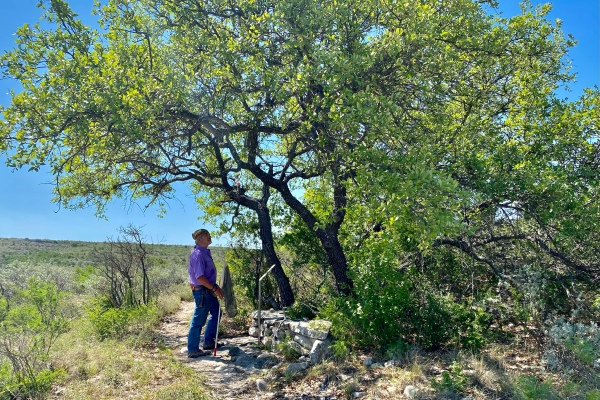
Day 9 – Seminole Canyon State Park, Windmill Trail
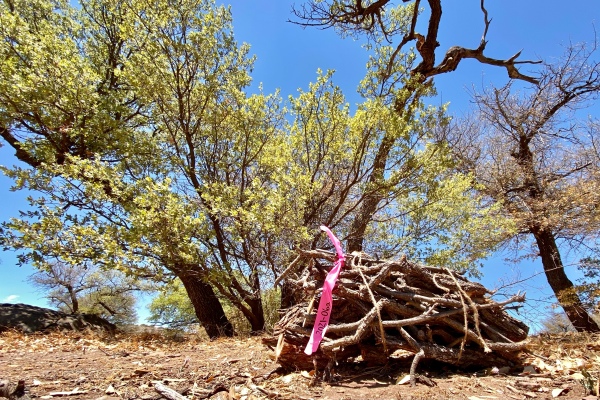
We came back to the state park since we ran out of time to look for oak yesterday. The park staff were extraordinarily helpful—both in getting me checked in with my permit and in directing me to the spots where I might be able to find oak. Their first tip—along the Window Trail—paid off, where we found a nice cluster of Quercus fusiformis (plateau live oak) clinging to the upper canyon walls. Most of them had dead branches on them, and I did some beating to see if by some chance the beetles would be out already. They were not, but on the second tree that I examined I found a main branch from near the base with the outer 4–6 ft dead but the bark not peeling and small living sprouts about 2 ft from the base. Pulling apart the dead portion revealed buprestid larval workings, likely my quarry—Spectralia roburella, but these could be old. I cut the branch at the base, however, and found fresh larval galleries in the sapwood of the still-living portion even extending into the trunk—success! I’ll bring this back for rearing and will hopefully get S. roburella out of it. Further along the trail I found a single Senna roemeriana (two-leaved senna), inspected it carefully and didn’t see anything, then tapped the plant over my beating sheet and a single Agrilus obtusus fell onto it to add to the three that I got yesterday. I really wish I could see these things before I beat them off the plants so I could take an in situ photo!


Seminole Canyon State Park, Canyon Rim Trail
Another place the park staff recommended to find oaks was along the Canyon Rim Trail. We hiked that trail yesterday for a bit and didn’t see any oaks, but it turns out they were farther down the trail then we went. We headed back out on the trail to find them, along the way checking Opuntia engelmannii flowers for Acmaeodera and seeing only one for the time being. Just past the first of two east-facing ravines where we expected to find oaks, we found one on the canyon edge that looked rather bedraggled. There were some completely dead branches with bark already sloughed but also one large fresher-looking dead branch that had one live branchlet coming out of it about a third of the way up (meaning there was at least a strip of live wood within the branch). I broke of one of the dead branches near the live/dead junction, and there in its gallery was a smallish buprestid larva that almost certainly is Spectralia roburella! I took the entire branch and cut it up to bring back for rearing. We continued hiking along the canyon rim and saw the most amazing views—sheer Cretaceous limestone walls towering 300 feet above the narrow canyon bottoms! Farther down the trail we finally started seeing Acmaeodera on O. engelmannii flowers. By then we’d hiked more than a mile and a half down the trail and temps were beginning to soar, so we turned back, picked up the wood we’d cut as we came back by, and finished the long, hot slog back to the truck.


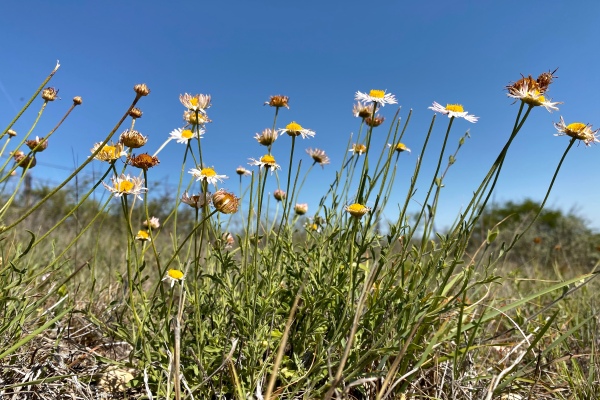
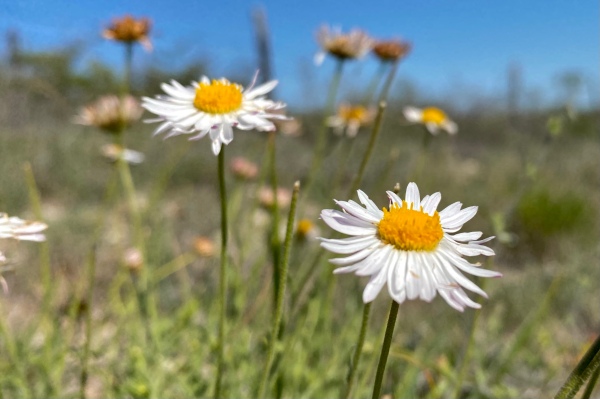
Comstock
As Rich and I were lunching after our last stop, I got a text from Ed Riley about a spot near Comstock where he’d collected what he believed to be Acmaeodera starrae—a species I’ve never encountered. It just so happened that we would be passing by Comstock on our way back east this afternoon, so we stopped to see if we could find it. Bingo—right where and in the flowers he said it would be (an undetermined white composite that I later determined to be Aphanostephus ramosissimus [lazy daisy]). Together we found about 15 specimens, and interestingly about 25% have red rather than yellow elytra markings. [EDIT: I’m not convinced these are A. starrae, but I do not yet know what they are.]
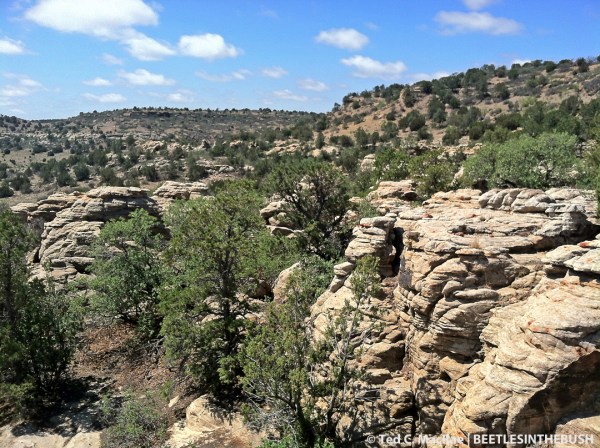
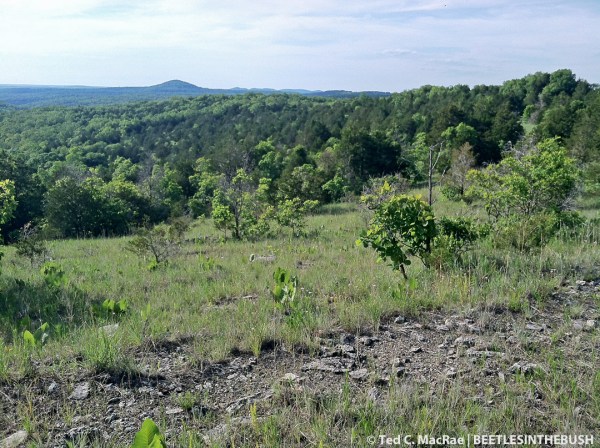
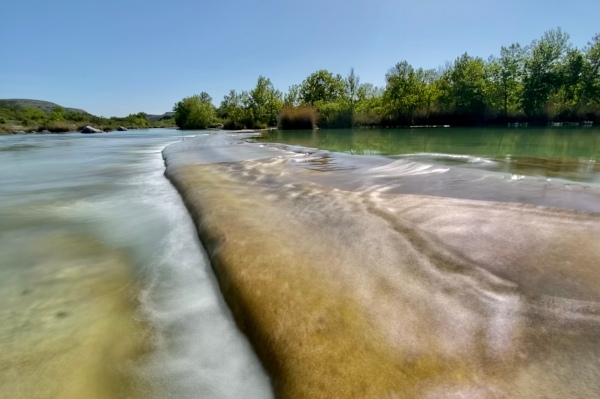
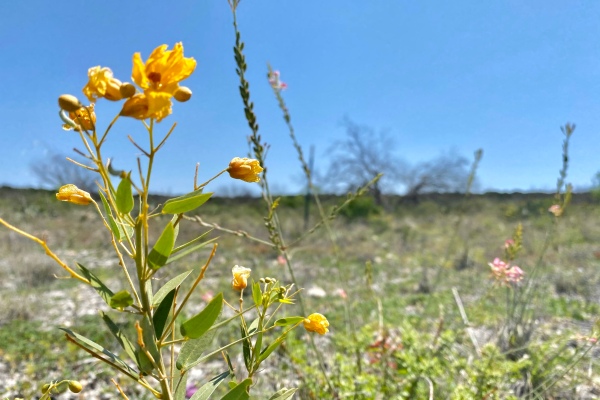
Day 10 – Garner State Park, Wild Horse Creek/Highway/Campos Trails
It’s the final day of collecting for the trip, and for our last stop we picked Garner State Park along the Frío River. I was last here back in the mid 90s—nearly 30 years ago, Acmaeodera ornatoides and Polycesta elata being the two species of note that I remember finding. I remember during that first visit that the area reminded me of my beloved Ozark Mountains, especially the White River Hills region in southwestern Missouri—scraggly forests of oak and juniper on steep, rocky slopes over craggy hill and lazy dale. It still does, although the species are a bit different—Juniperus ashei (Ashe juniper) dominates instead of J. virginiana (eastern red-cedar), and a variety of other oaks replace the familiar Ozarkian Quercus stellata and Q. marilandica (post and blackjack oaks, respectively). We hiked a series of trails on the western side of the park, thinking the west-facing slopes would tend to be drier and result in more open, glade-like habitats, and for the most part this was true. Almost immediately after reaching the first glade along Wild Horse Creek Trail, we found A. ornatoides and at least two smaller congeners on flowers of Coreopsis sp. Flowers of Viguiera dentata have been uncharacteristically depauperate of buprestids on this trip, but I picked up a couple of Acmaeodera neglecta/neoneglecta nearby as well. On the Highway Trail a good series of Acmaeodera was found on flowers of an undetermined small white composite, and a few were also found on flowers of Senna roemeriana (two-leaved senna)—though no Agrilus obtusus. The Campos Trail ascended steeply and ruggedly to a nice overlook, where I found one Acmaeodera sp. on the flower of Zephyranthes chlorosolen and then the mother-load—the biggest diversity and abundance of Acmaeodera I’ve ever seen on cactus flowers occurred nearby in a single flowering Opuntia engelmannii. The final specimen of the day’s “Acmaeodera-a-thon” was taken a bit further up the trail on the flower of Echinocereus enneacanthus (strawberry cactus). Fortunately, the trail was all downhill from there (albeit a bit too steep and rocky at times for these no-longer-nimble legs!). We finished off the hike back along the Wild Horse Creek Trail by collecting a branch off a fallen oak that I hope proves fruitful in the rearing box back home and had some lunch. As we were getting ready to leave, I noticed most of the trees in the camping area were Carya illinoensis (pecans)—a great host for buprestids (especially Xenorhipis brendeli), so I picked up several fallen branches from under the trees to complete the wood collecting portion of the trip.


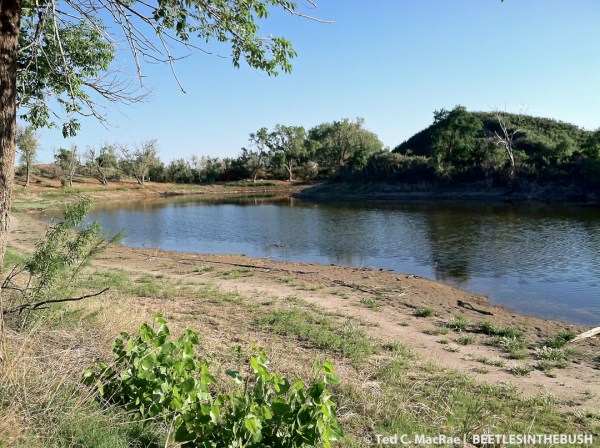
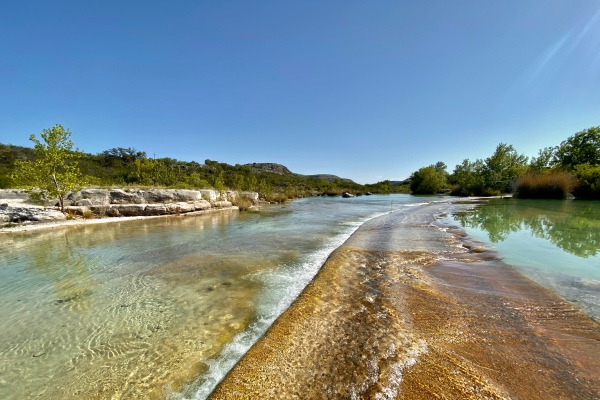
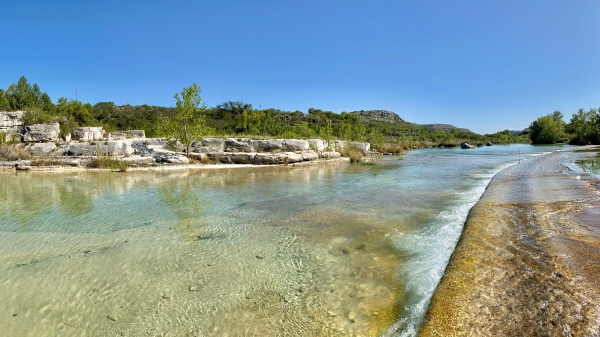
Garner State Park, Brazos River (epilogue)
We visited the nearby Frio River for one last look at the park, took a shower, and settled in for the 15-hour trek back to St. Louis.

Postscript!
©️ Ted C. MacRae 2021